Authenticating with Venly
Authenticating with Venly and types of authentication
Intro
Authenticating with Venly is done using OpenID Connect, which combines the OAuth 2.0 protocol together with a simple identity layer. We use OpenID Connect's Authorization Code Flow for our authentication and authorization.
An application requires a specific Client ID to connect to our environments. This not only improves security but also allows custom branding.
You will receive a
clientIdthat is linked to your specific domain (URI).Only calls initiated from this whitelisted domain (in combination with the
clientId) will be accepted.
Authentication code
If you provide your own implementation of bearerTokenProvider, the web3 provider will not attempt to obtain an authentication code but rather use the one provided by you.
Authenticating the Widget
To communicate with Venly, a Client ID is required in pair with whitelisted URLs.
- You need a Venly business account, if you don't have one, register in our Developer Portal, or follow our step-by-step guide, Getting Started with Venly.
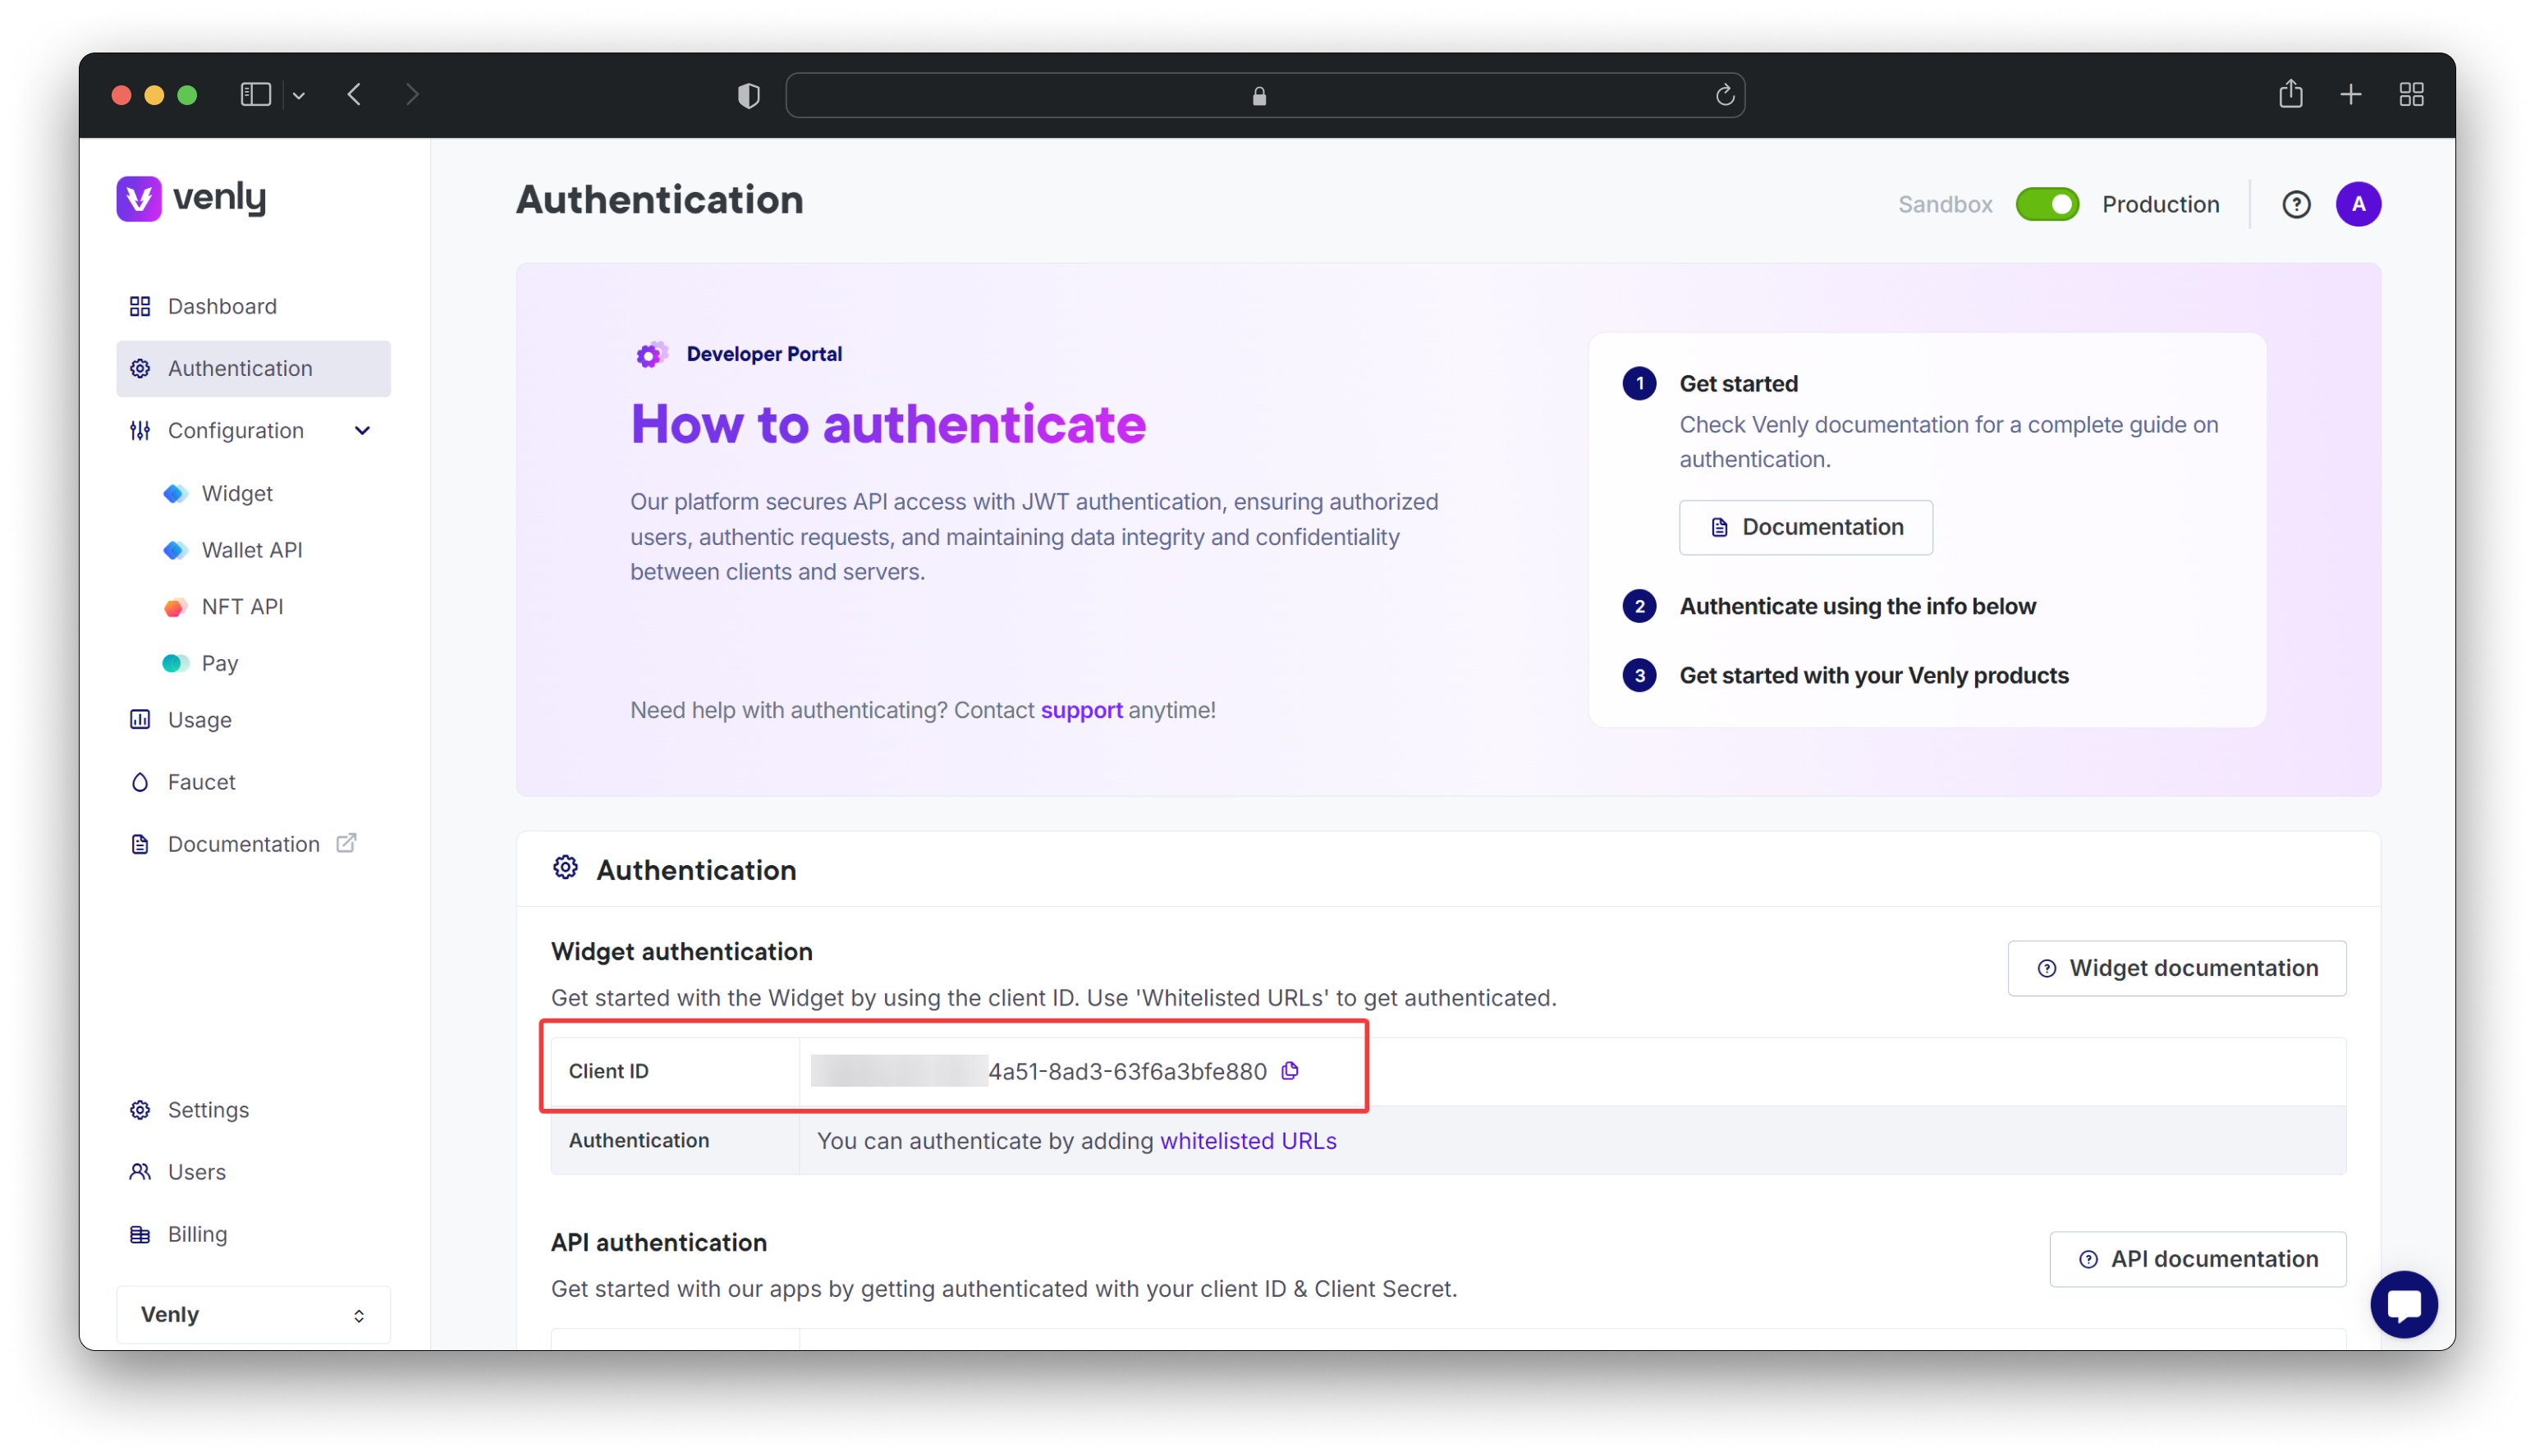
- You need your Client ID which can be obtained from the Authentication page in the Portal as shown below.

Obtaining Client ID for Widget
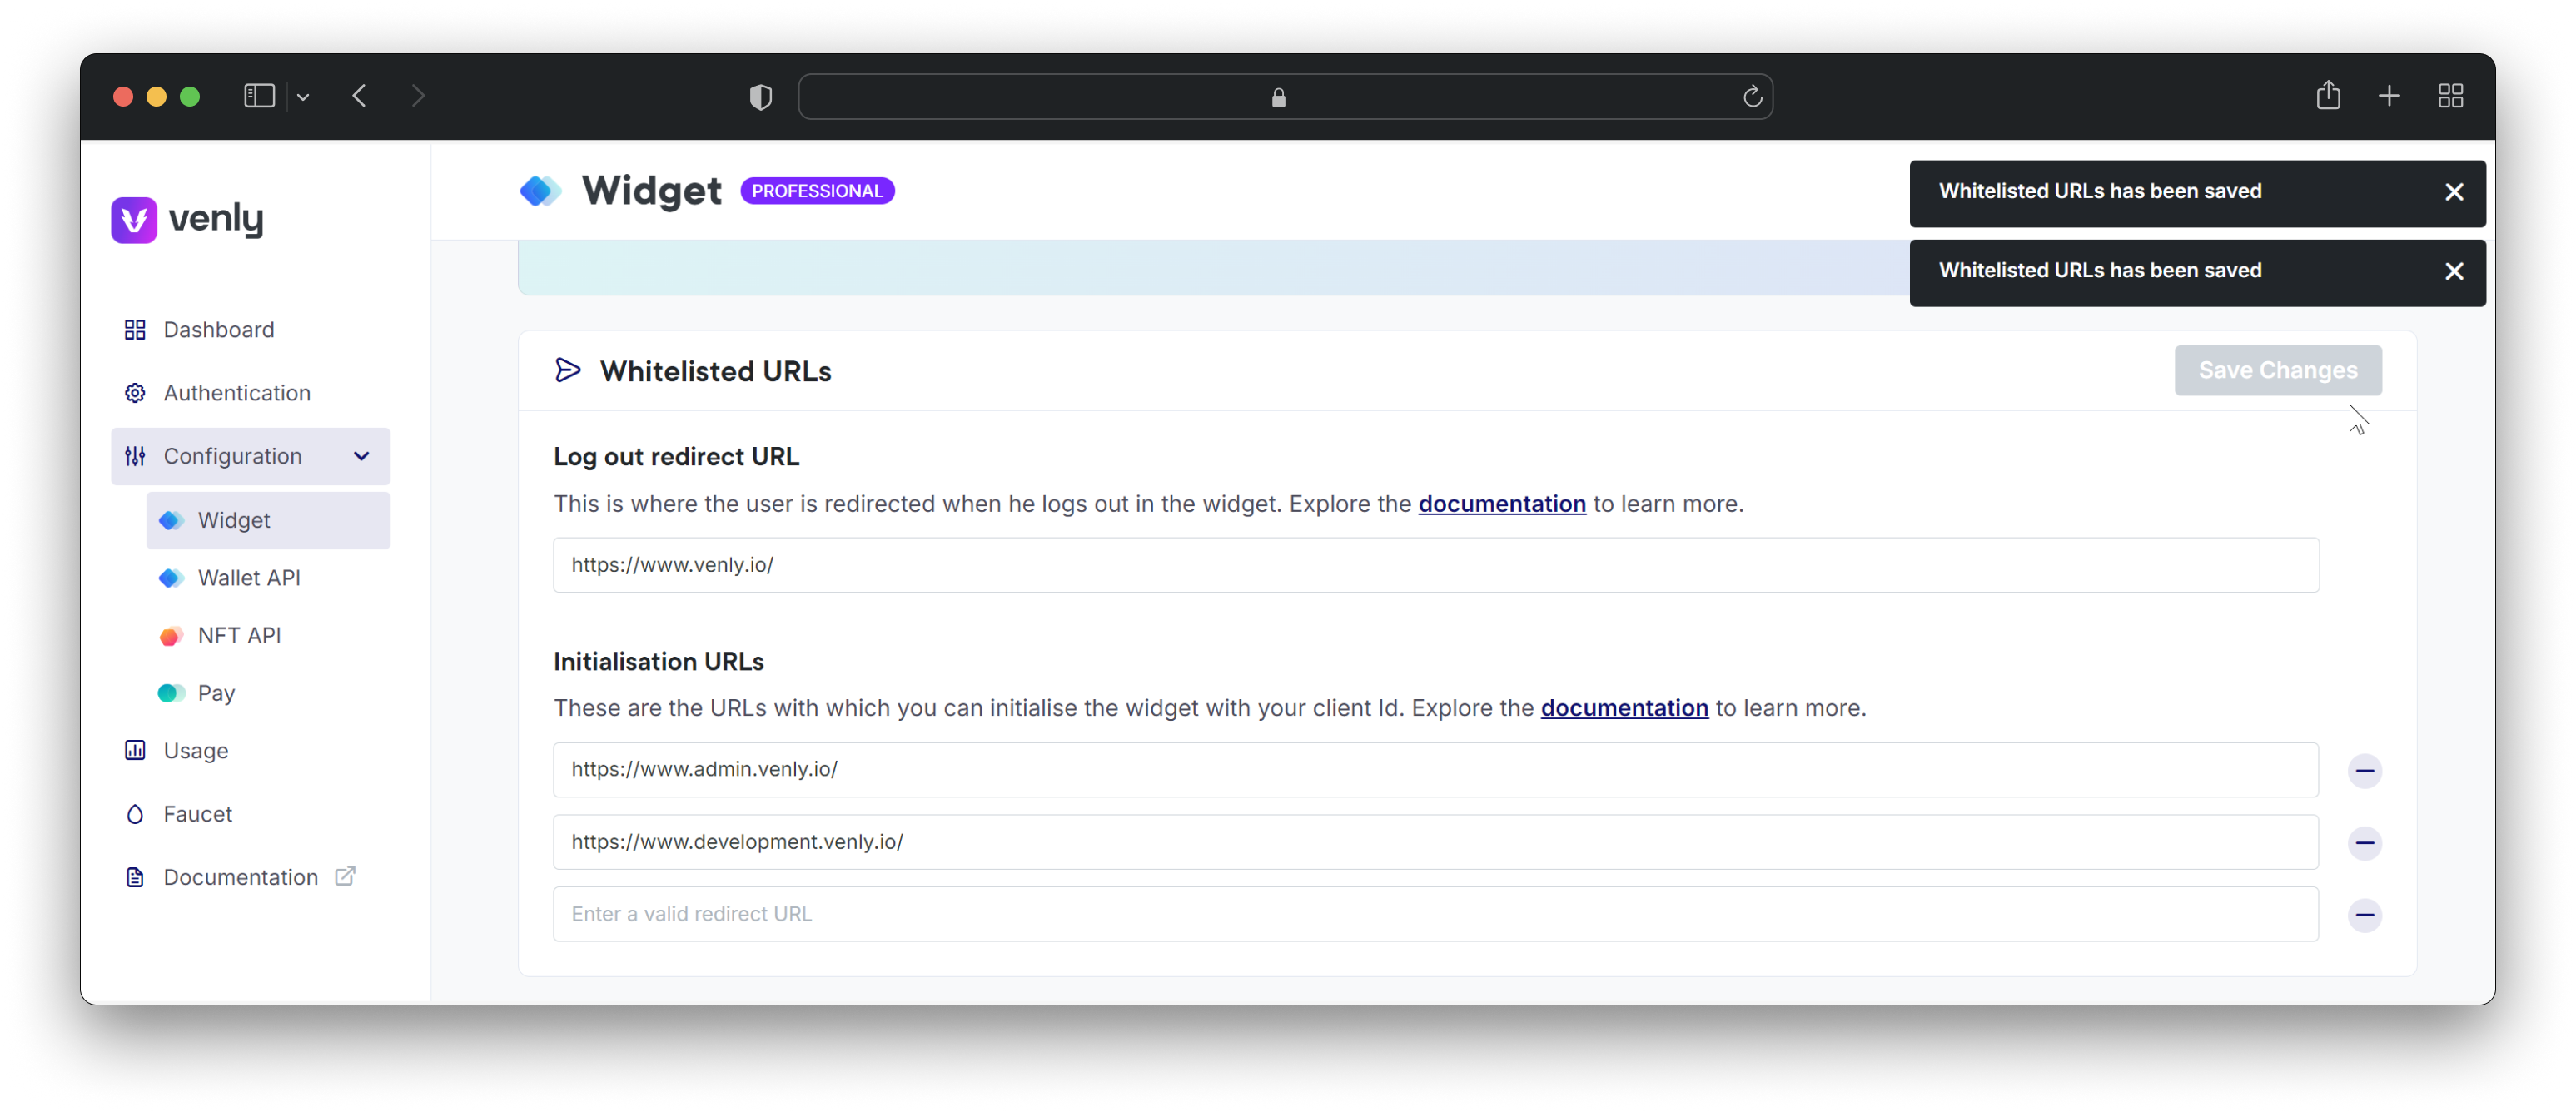
- You will also need to define valid whitelisted URLs from the Widget section of the Portal.
To prevent the Client ID from being used outside of the project, it is required to define the URLs with which to initialize the widget in combination with a project's Client ID.
Any URL that tries to access the Widget with your Client ID will be blocked unless it is defined in the Allow list.
Log out redirect URL: The URL where your user will be directed to when they log out from the widget.
Initialisation URLs: These are the URLs from which the widget will be accessed by you.
NOTE: Make sure to always defined a log out redirect URL as well as minimum one initialisation URL.

Whitelisting Domains
Connecting to the production environment and the different mainnets allows for custom branding of the Widget.
Updated 3 months ago