
Getting started
Learn how to get up and running with the native integration of the Venly Widget.
Getting up and running with Venly Widget
In this guide, we will walk through the steps required to start with the native integration of the Widget.
NOTE:
- In this guide, we will be integrating the widget natively.
- All of the steps will be performed on JS Fiddles.
- We will work with sandbox credentials.
- All functions will be performed on sandbox environment.
Prerequisites
- Your Widget Client ID (Can be obtained from theDeveloper Portal)
- Finished configuring the Widget
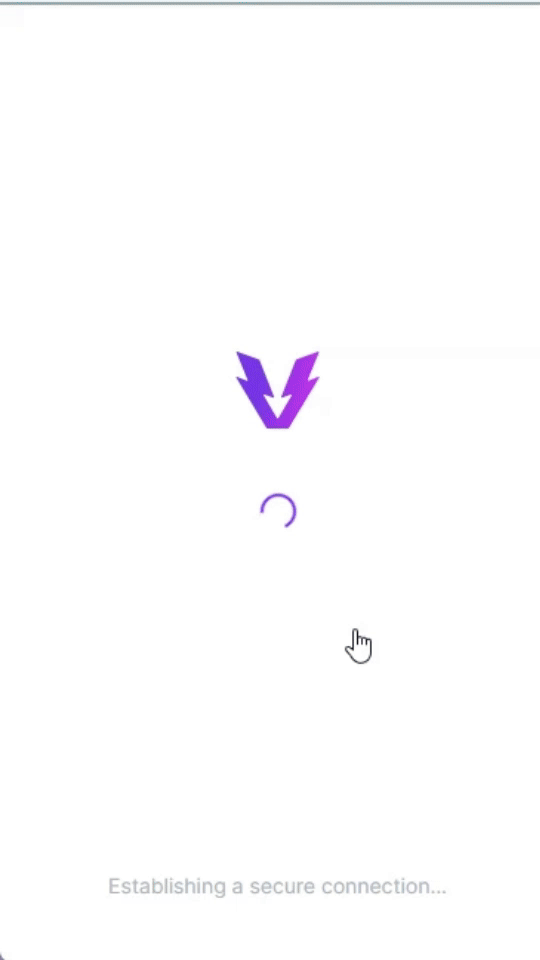
Authenticating the Widget
To communicate with Venly, a Client ID is required along with whitelisted domains, from which you can perform the widget calls.
Initializing/Including the Widget
Step 1: Including the widget
When running on the JS Fiddle, you can add the following code in your HTML to include the Widget:
<head>
    <title>Venly Widget</title>
    <script type="text/javascript" src="https://unpkg.com/@venly/connect"></script>
    <!--Including the widget-->
</head>Step 2: Initializing the Widget, with Venly Connect
Create a VenlyConnect instance with your Client ID with the following script. Your Venly Client ID is required when calling this function, as it identifies your app to Venly. We have also specified the sandbox environment here.
const venlyConnect = new VenlyConnect('your_client_id', {
  environment: 'sandbox'
});
The VenlyConnect object is your entry point to the rest of the widget functionalities.
Step 3: Getting the basics ready
Following is a JS Fiddle whose code you can easily copy and try yourself. We have added HTML, CSS, and JavaScript code. Following is a brief explanation of the code:
HTML:
- Included the widget in a
<script> - Added image URL of the Venly logo (You can replace this with your own)
- Created a button called Connect with Widget (
getAccount()function will be added later) - Created a
<textarea>to display the response - Added basic
h1,h2, andbodytags
CSS:
- Copy the CSS code as it is (You can make changes according to your company color scheme)
JavaScript
- Initialized the Widget with a
TestaccountClient Id (add your own Client Id here) and set the environment as sandbox - Created a function that will output the response of the function calls in a human-readable manner
Connecting with Widget
Now let's learn how your end-user will connect with the widget.
- Defined a constant called
chainand set the value as MATIC. You can pick from the list of other chains we support. All the functions and wallet creations will happen on our selected MATIC chain. - Added a
getAccount()function which will allow your end-user to quickly sign in or sign up if they don't have an account. - Added the
getProfile()function which will fetch your end-user profile details. - Added the
logOut()function to log out the currently logged-in user. - In the HTML section, we created and assigned the relevant buttons.
- Replace the
Testaccountwith your Client Id.* Try the JS Fiddle yourself.
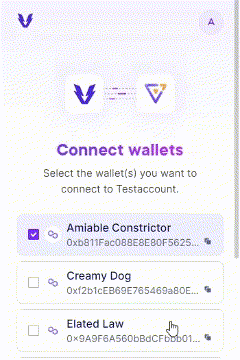
Creating Wallets
Next, let's see how to create wallets. Since you are currently using the sandbox environment, the wallets will be created on a testnet chain.
In this next fiddle, we have:
- Added the
manageWallets()function that accepts thechainvariable (we previously defined thechainconstant and assigned itMATICvalue). - The
manageWallets()function allows your users to connect existing wallets with your app, or create new wallets. - Added the
getWallets()function which will fetch all of your user's wallets. ( this function will fetch details for all your user's wallets including the walletaddress) - In the HTML section, we created and assigned the relevant buttons.
- Try the fiddle yourself and create 2 wallets.* Next try the Get All Wallets to view your wallets.
Example as a new user
- Using the Fiddle, first, connect your account.
- Next, click on Manage Wallets, and a pop-up will appear.
- You can either sign in or sign up using the provided options.
- Click on Create new wallet.
- Enter your 6-digit PIN for the wallet and click Submit. Confirm the PIN again.
- Next, it is mandatory to enable an emergency code that can be used for PIN resets.
- Copy the emergency code and save it somewhere safe. Click continue.
- Your new wallet will be created!
- Do this again to create a second wallet.
Create new wallet as a new user
Example as an existing user
- Using the Fiddle, first, connect your account.
- Next, click on Manage Wallets, and a pop-up will appear.
- You can also view and connect your existing wallets.
- Scroll to the bottom and click on Create new wallet.
- Enter your 6-digit PIN for the wallet and click Submit.
- Your new wallet will be created!
- Do this again to create a second wallet.
Create a new wallet as an existing user
You now have two wallets on the Polygon (MATIC) testnet blockchain. Let's explore how to add testnet tokens to your wallet using the Polygon Amoy Faucet.
Learn more about testnet tokens and Faucets.
Topping Up Wallet
To request tokens from the Venly Faucet, you need to follow these steps:
- Go to Venly's Developer Portal and navigate to Faucet.
- Choose the token you want to request, in this case, choose MATIC.
- Enter your wallet address or wallet UUID associated with Venly. This ensures that the tokens are sent to the correct wallet
- Click on the "Request tokens" button to submit your request. Tokens will be sent to your wallet shortly after.
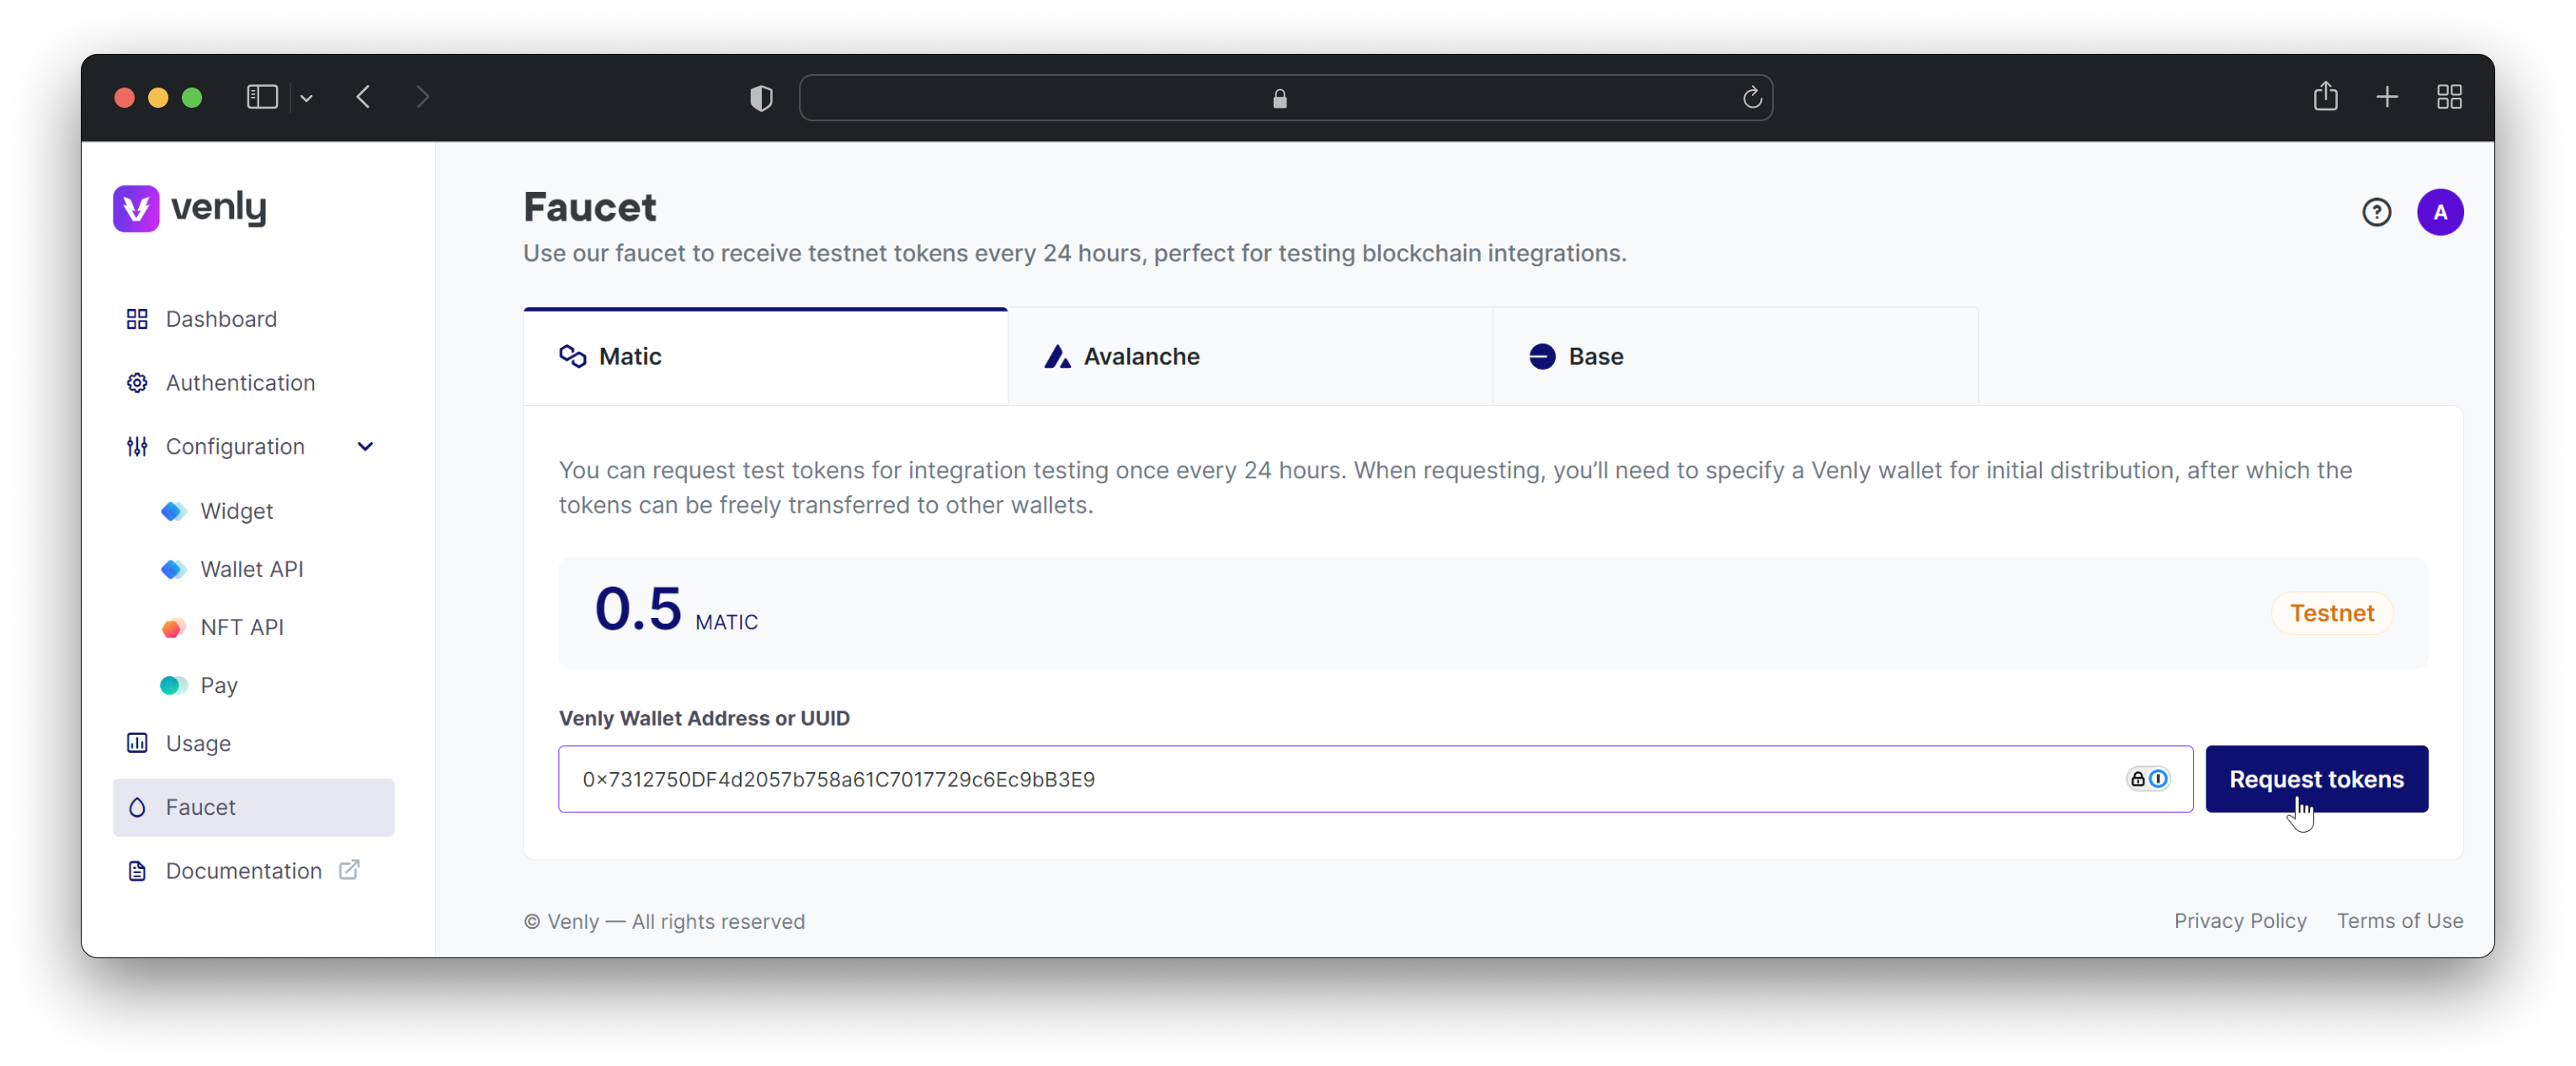
Request MATIC testnet tokens
Now you should have some MATIC tokens in your first wallet while your second wallet is empty.
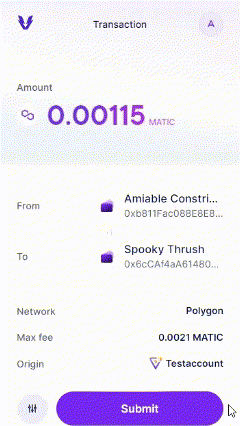
Execute Crypto Transfer
Next, we will see how to execute a crypto transaction where we will send tokens from your first wallet to the second wallet.
In the next fiddle, we have:
- Added an
executeTransfer()function that will carry out the transfer of tokens from your first wallet to the second. It accepts the following fields:walletId: ThewalletIdof the wallet executing the transaction (first wallet)to: The recipients wallet address (second wallet)value: Amount of tokens to transfersecretType: The blockchain of the transaction (in this case, MATIC)
- Added the
getBalance()function which fetches the balance of a wallet bywalletId. - In the HTML section, we created and assigned the relevant buttons.
Example
- Click on the Get All Wallets button and copy the respective data required for the
executeTransfer()function. - Modify the data for the
executeTransfer()function. - Modify the
walletIdfor thegetBalance()function by adding thewalletIdof the second wallet. - Save and run the fiddle again. Connect with the widget and click on Get Balance, in the result the
balancefield will be 0. - Now click on Execute Transfer:
- A pop-up will appear.
- Confirm the details of the transaction and click Submit.
- Enter your 6-digit PIN and click Submit.
- You will see Sign successful message and the pop-up will close.
Executing Crypto Transaction
- Copy and save the
transactionHashthat you get in the response body. - Next, click on the Get Balance again and the
balanceof your second wallet will be >0. - Alternatively, you can also check the status of the transaction by pasting the
transactionHashon the Polygon Testnet Explorer (in case of MATIC).
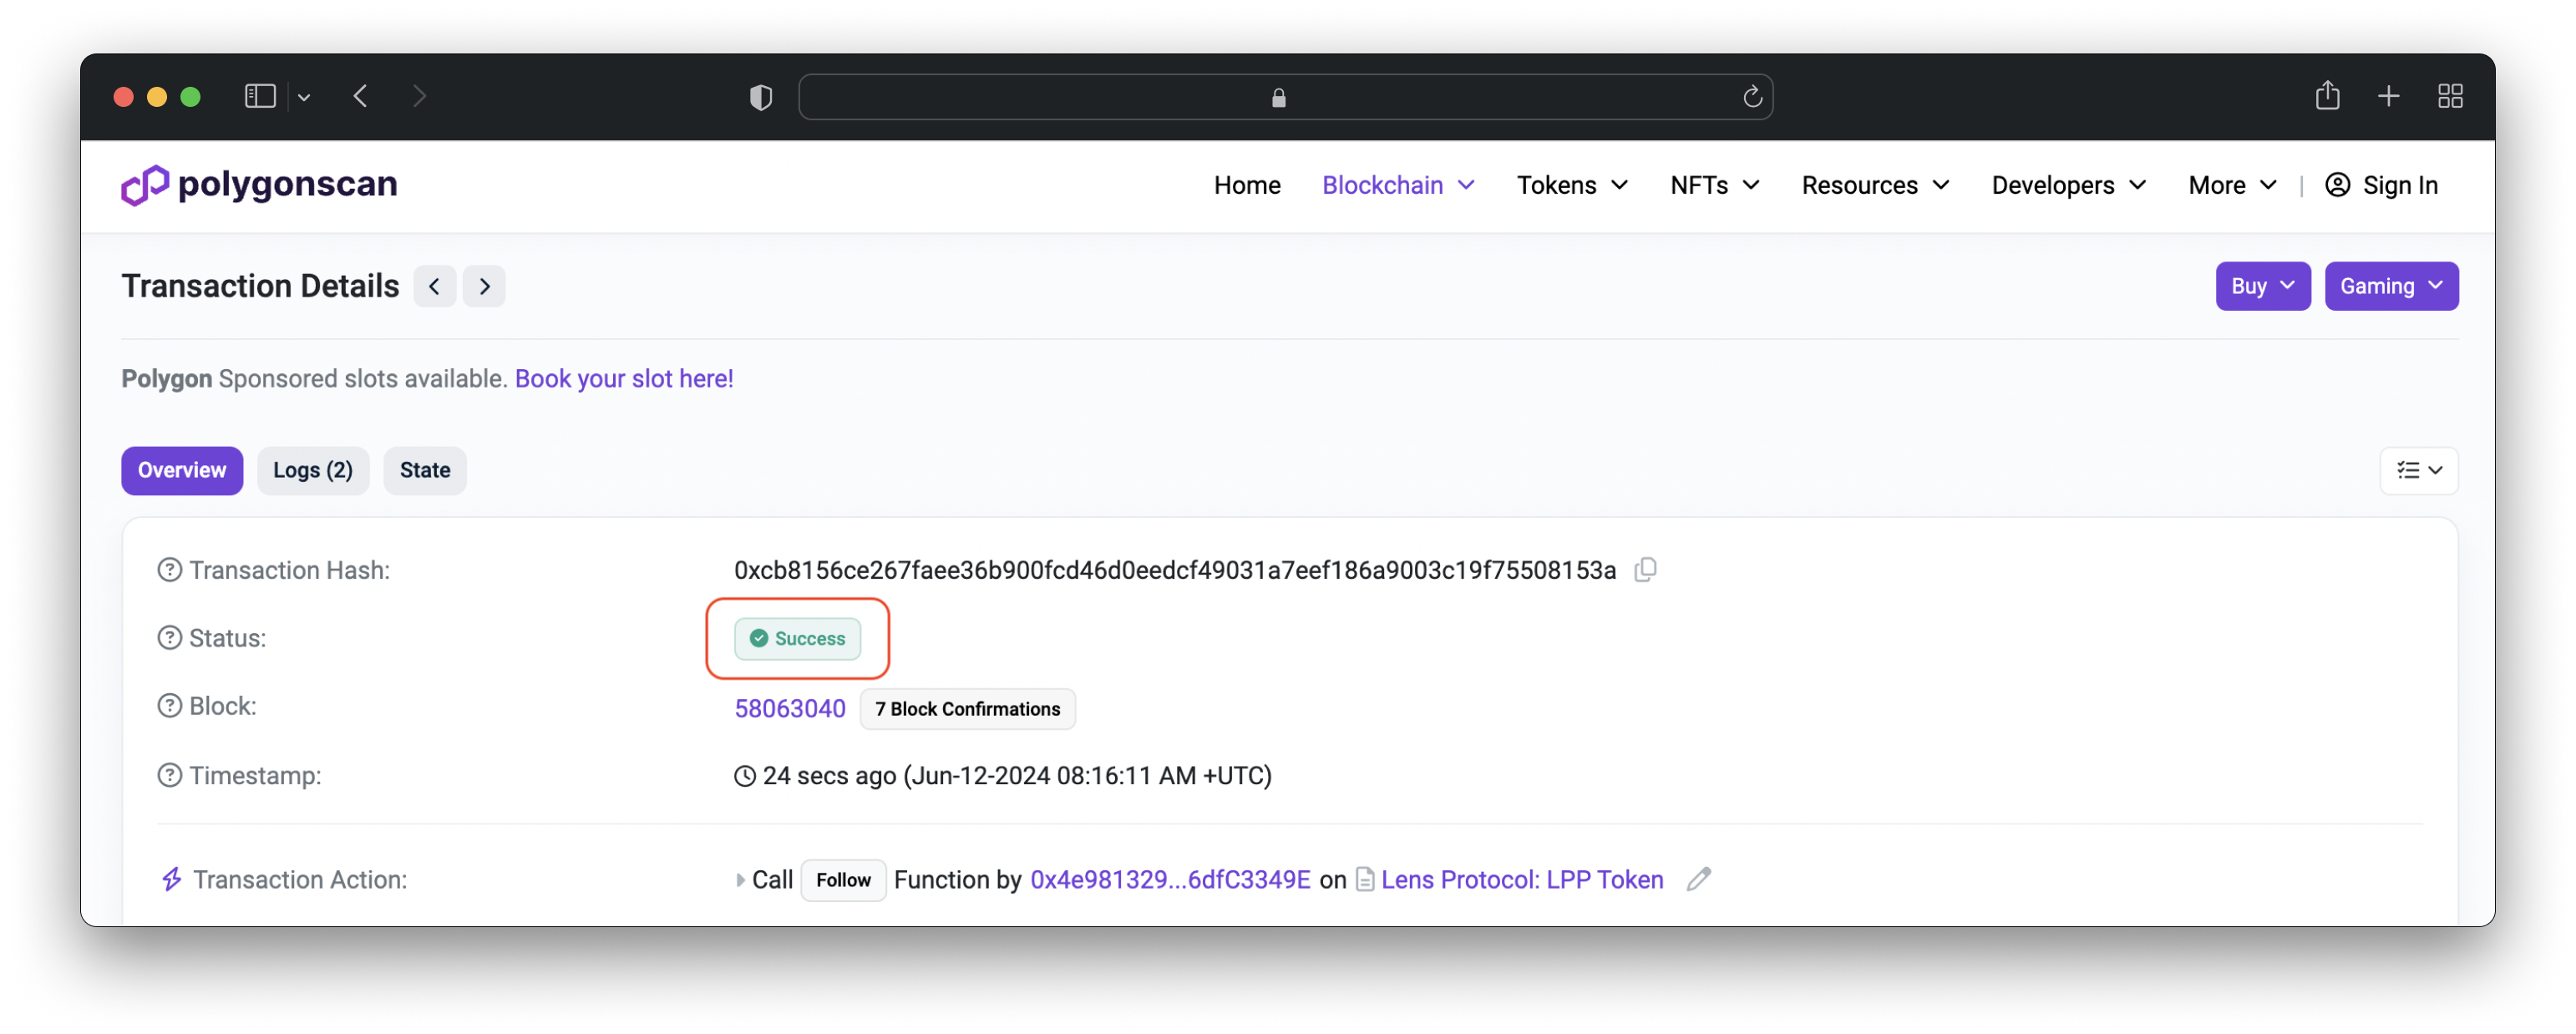
Checking the status of a Matic transaction on polygonscan.com
From the Get Balance you can confirm that your very first transaction was successful.

Schedule a demo with our team to explore tailored solutions or dive in and start building right away on our portal.
Updated 9 months ago