
Mailchimp x Venly
This step-by-step guide explains how you can mint and distribute welcome NFTs whenever someone subscribes to your mails, using Mailchimp.

Scenario Explained
In this guide we will be working with the Venly and Mailchimp integration on Zapier.
We will create an automated workflow such that whenever a new subscriber joins your mailing list, they will be sent a personalized NFT. The automated workflow will take care of minting and sending the NFT to your subscriber's wallet.
The only input that is required from the subscriber is their:
- Email address
- Name
- Wallet Address (Must be of the same chain as your contract/collection)
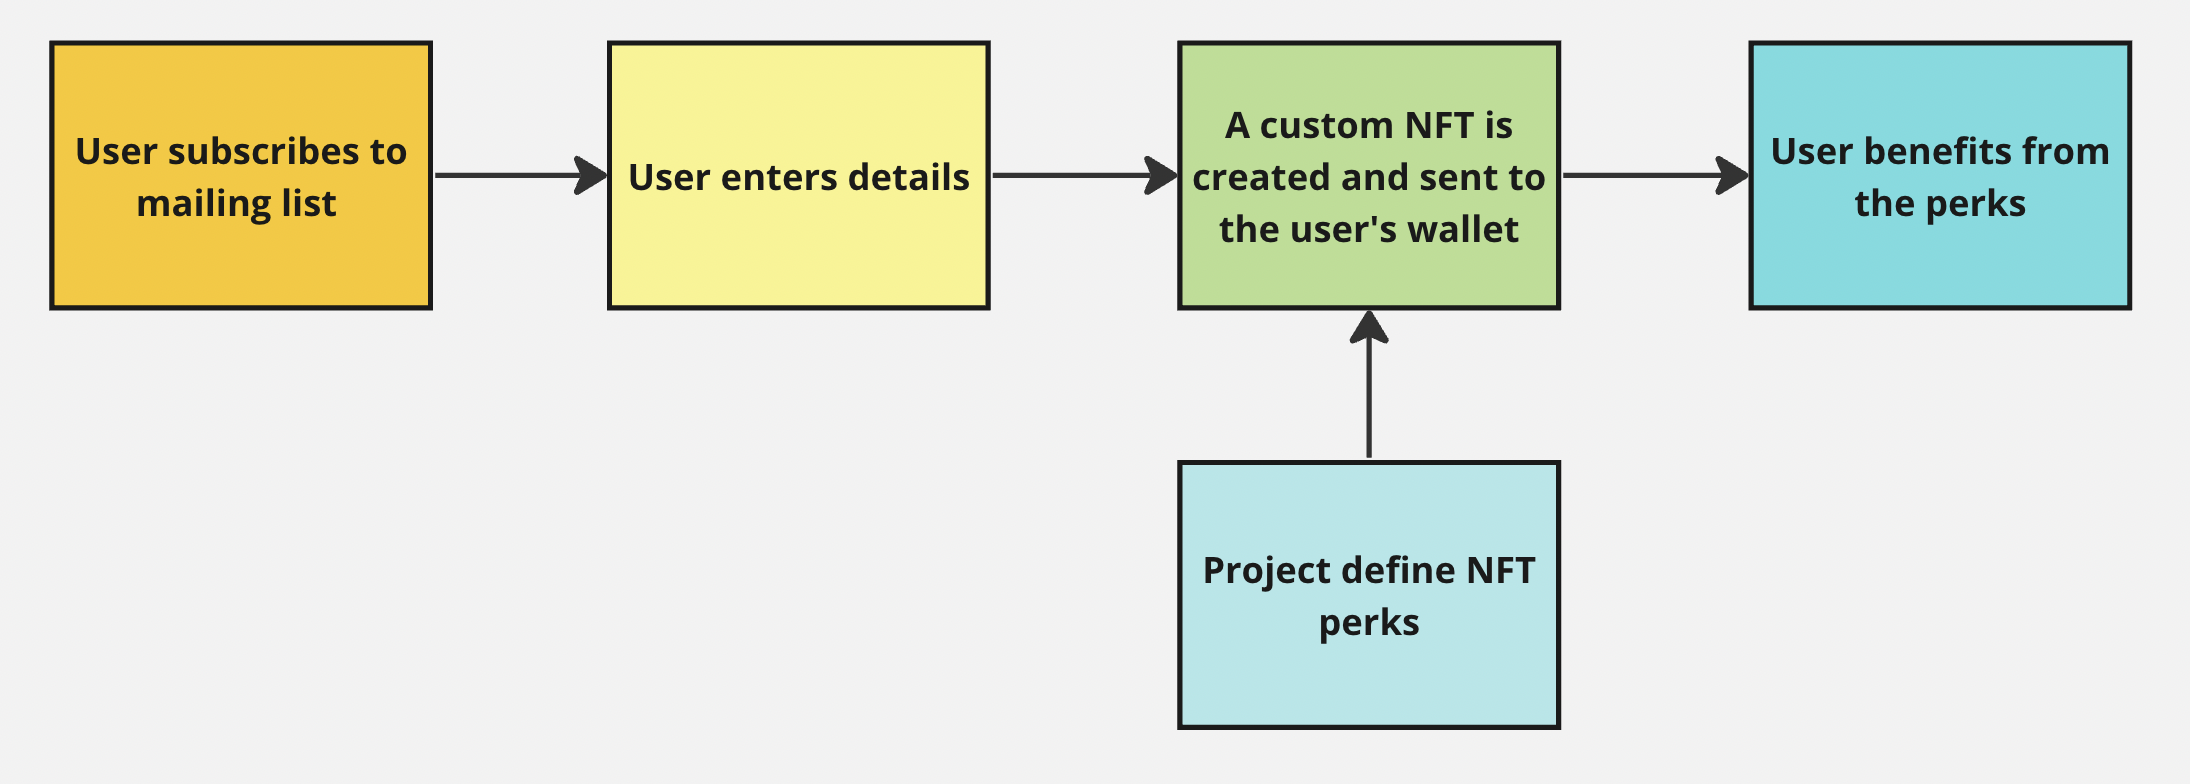
User flow
End Result
A potential subscriber subscribes to your mail list using Mailchimp form:

Mailchimp subscription form
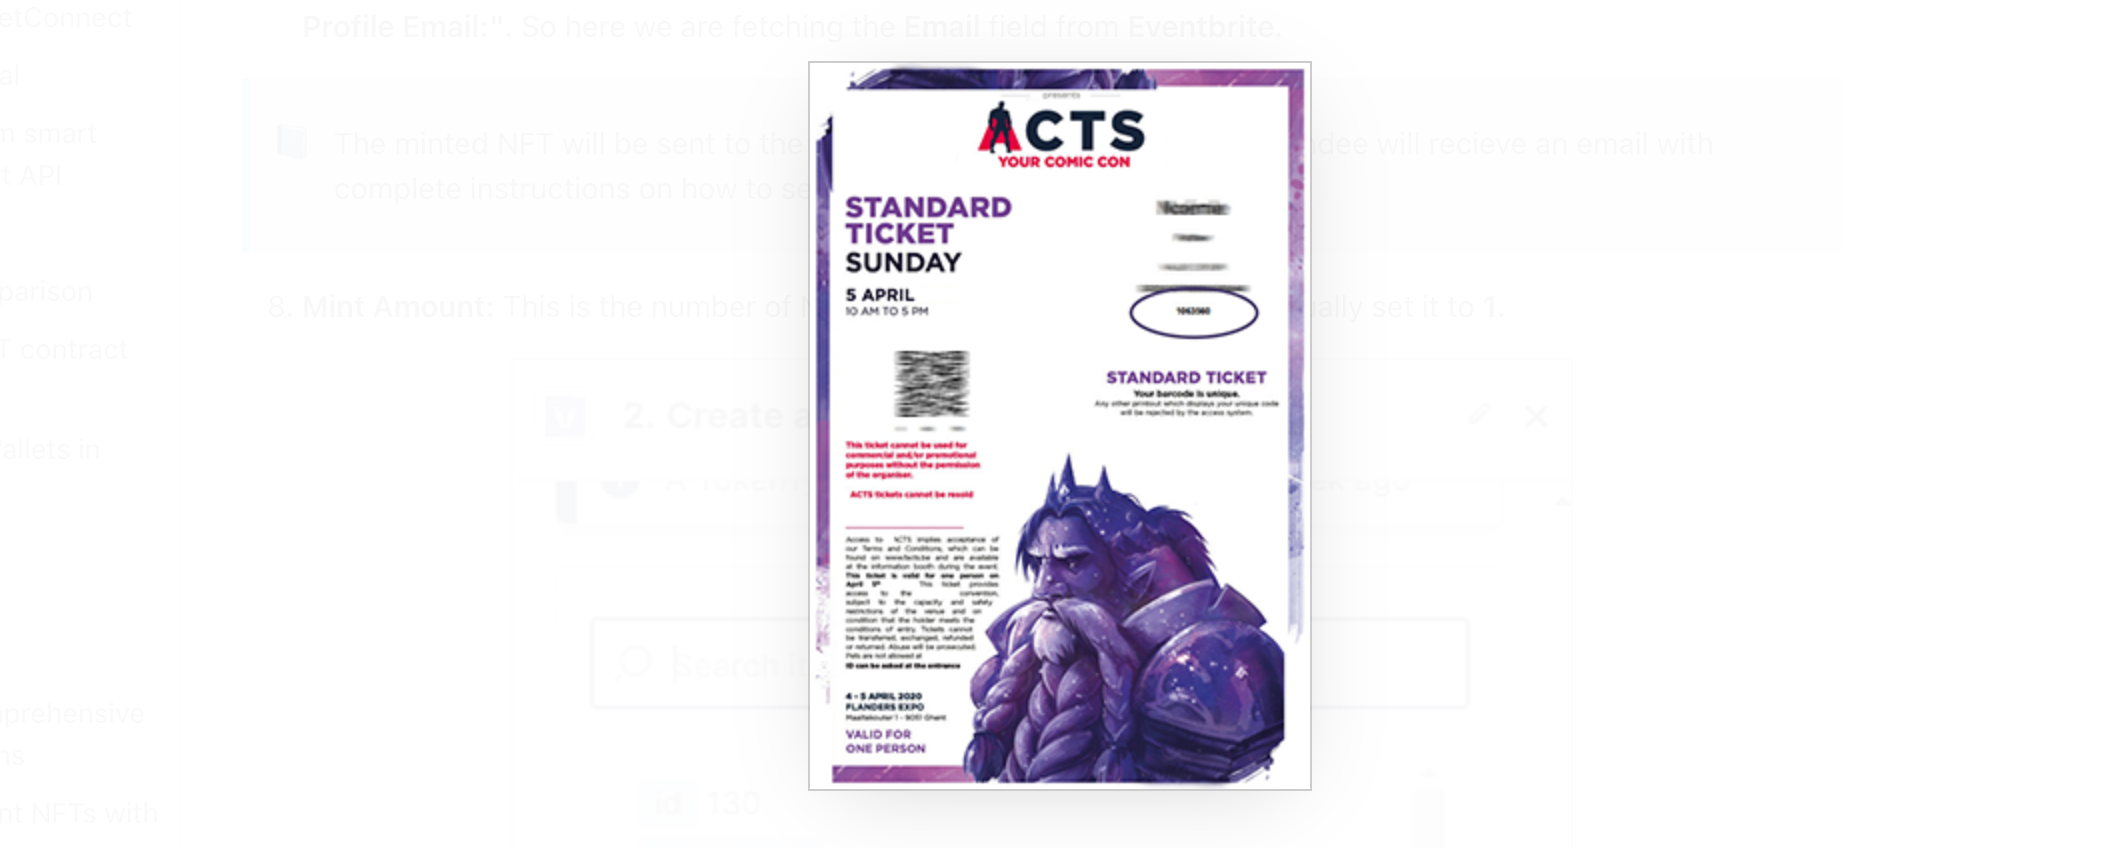
As a result, a customized welcome NFT will be minted and sent to the subscriber's wallet:
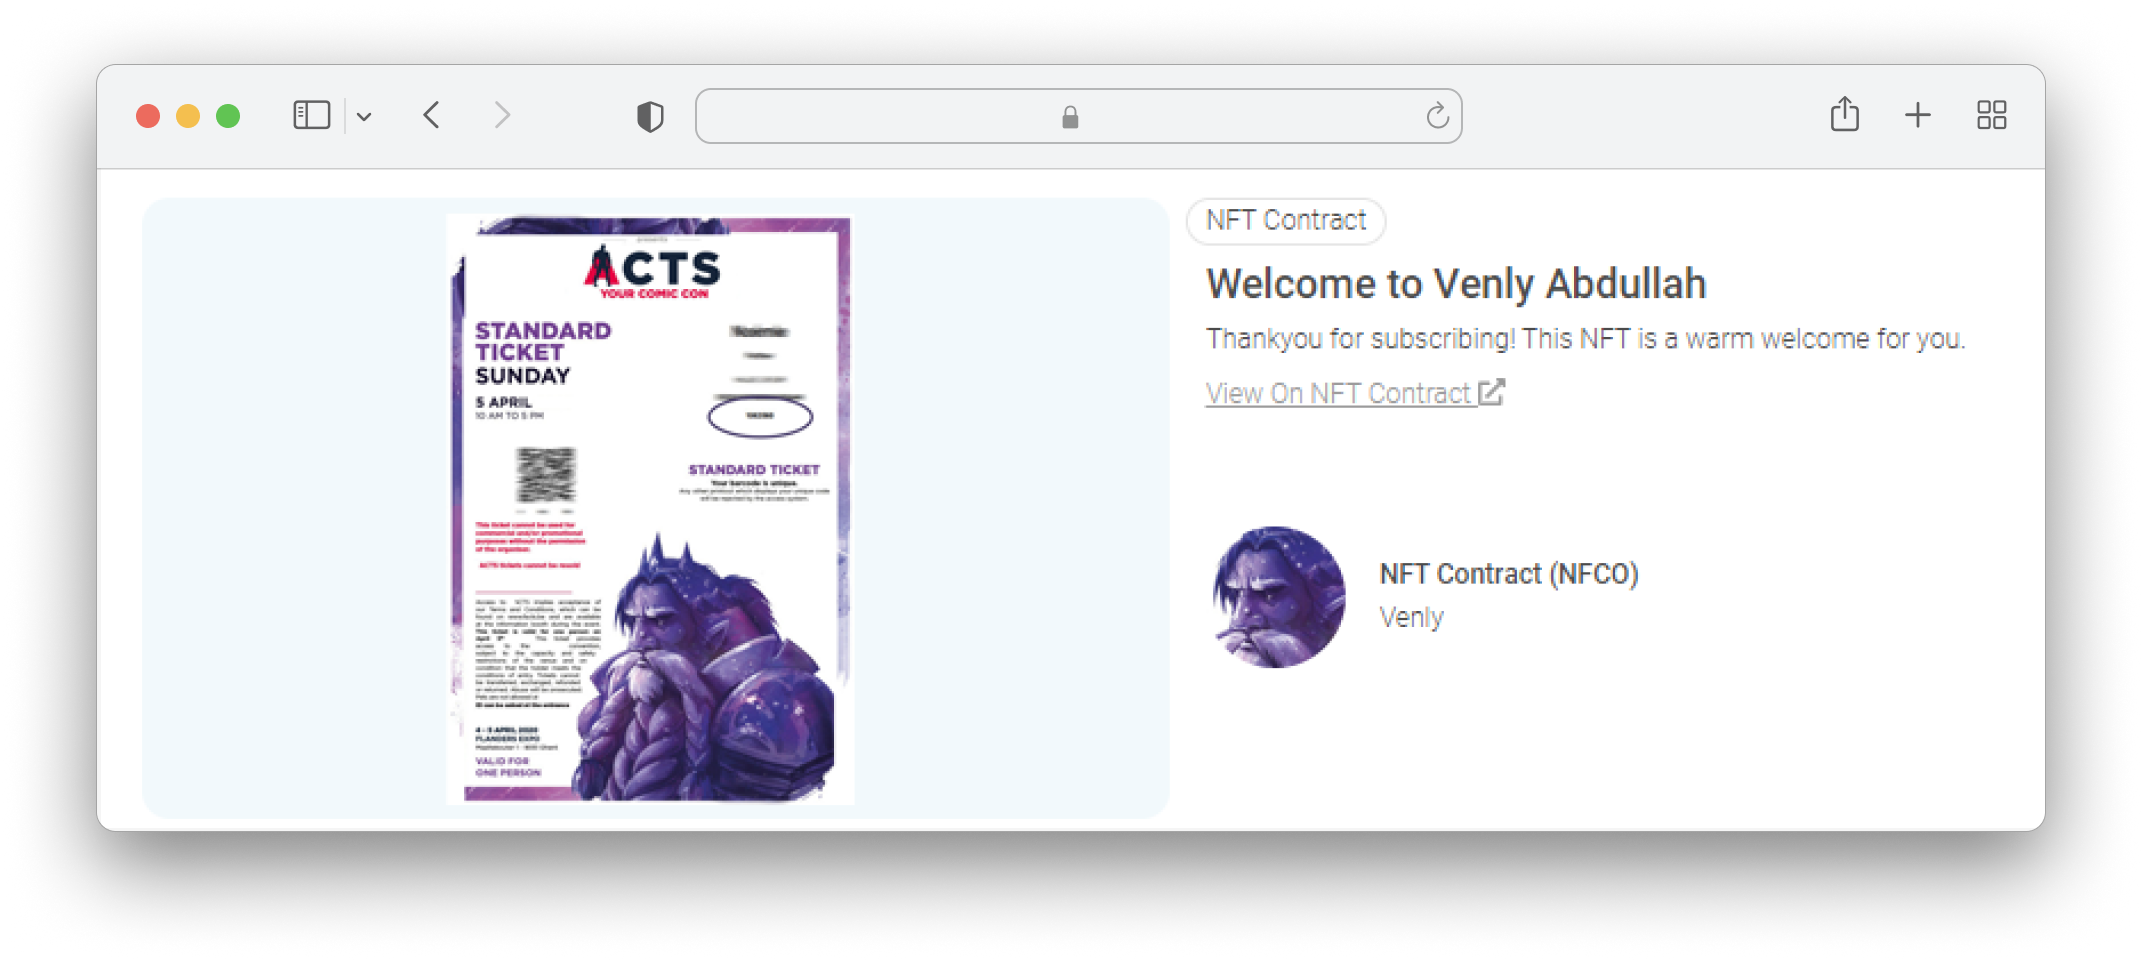
Minted NFT
Prerequisites
- You should have completed the onboarding with Zapier.
- You should have an NFT contract/collection already created.
- You should have an account on Mailchimp. If not, click here to sign up.
Configuring Zapier with Venly & Mailchimp
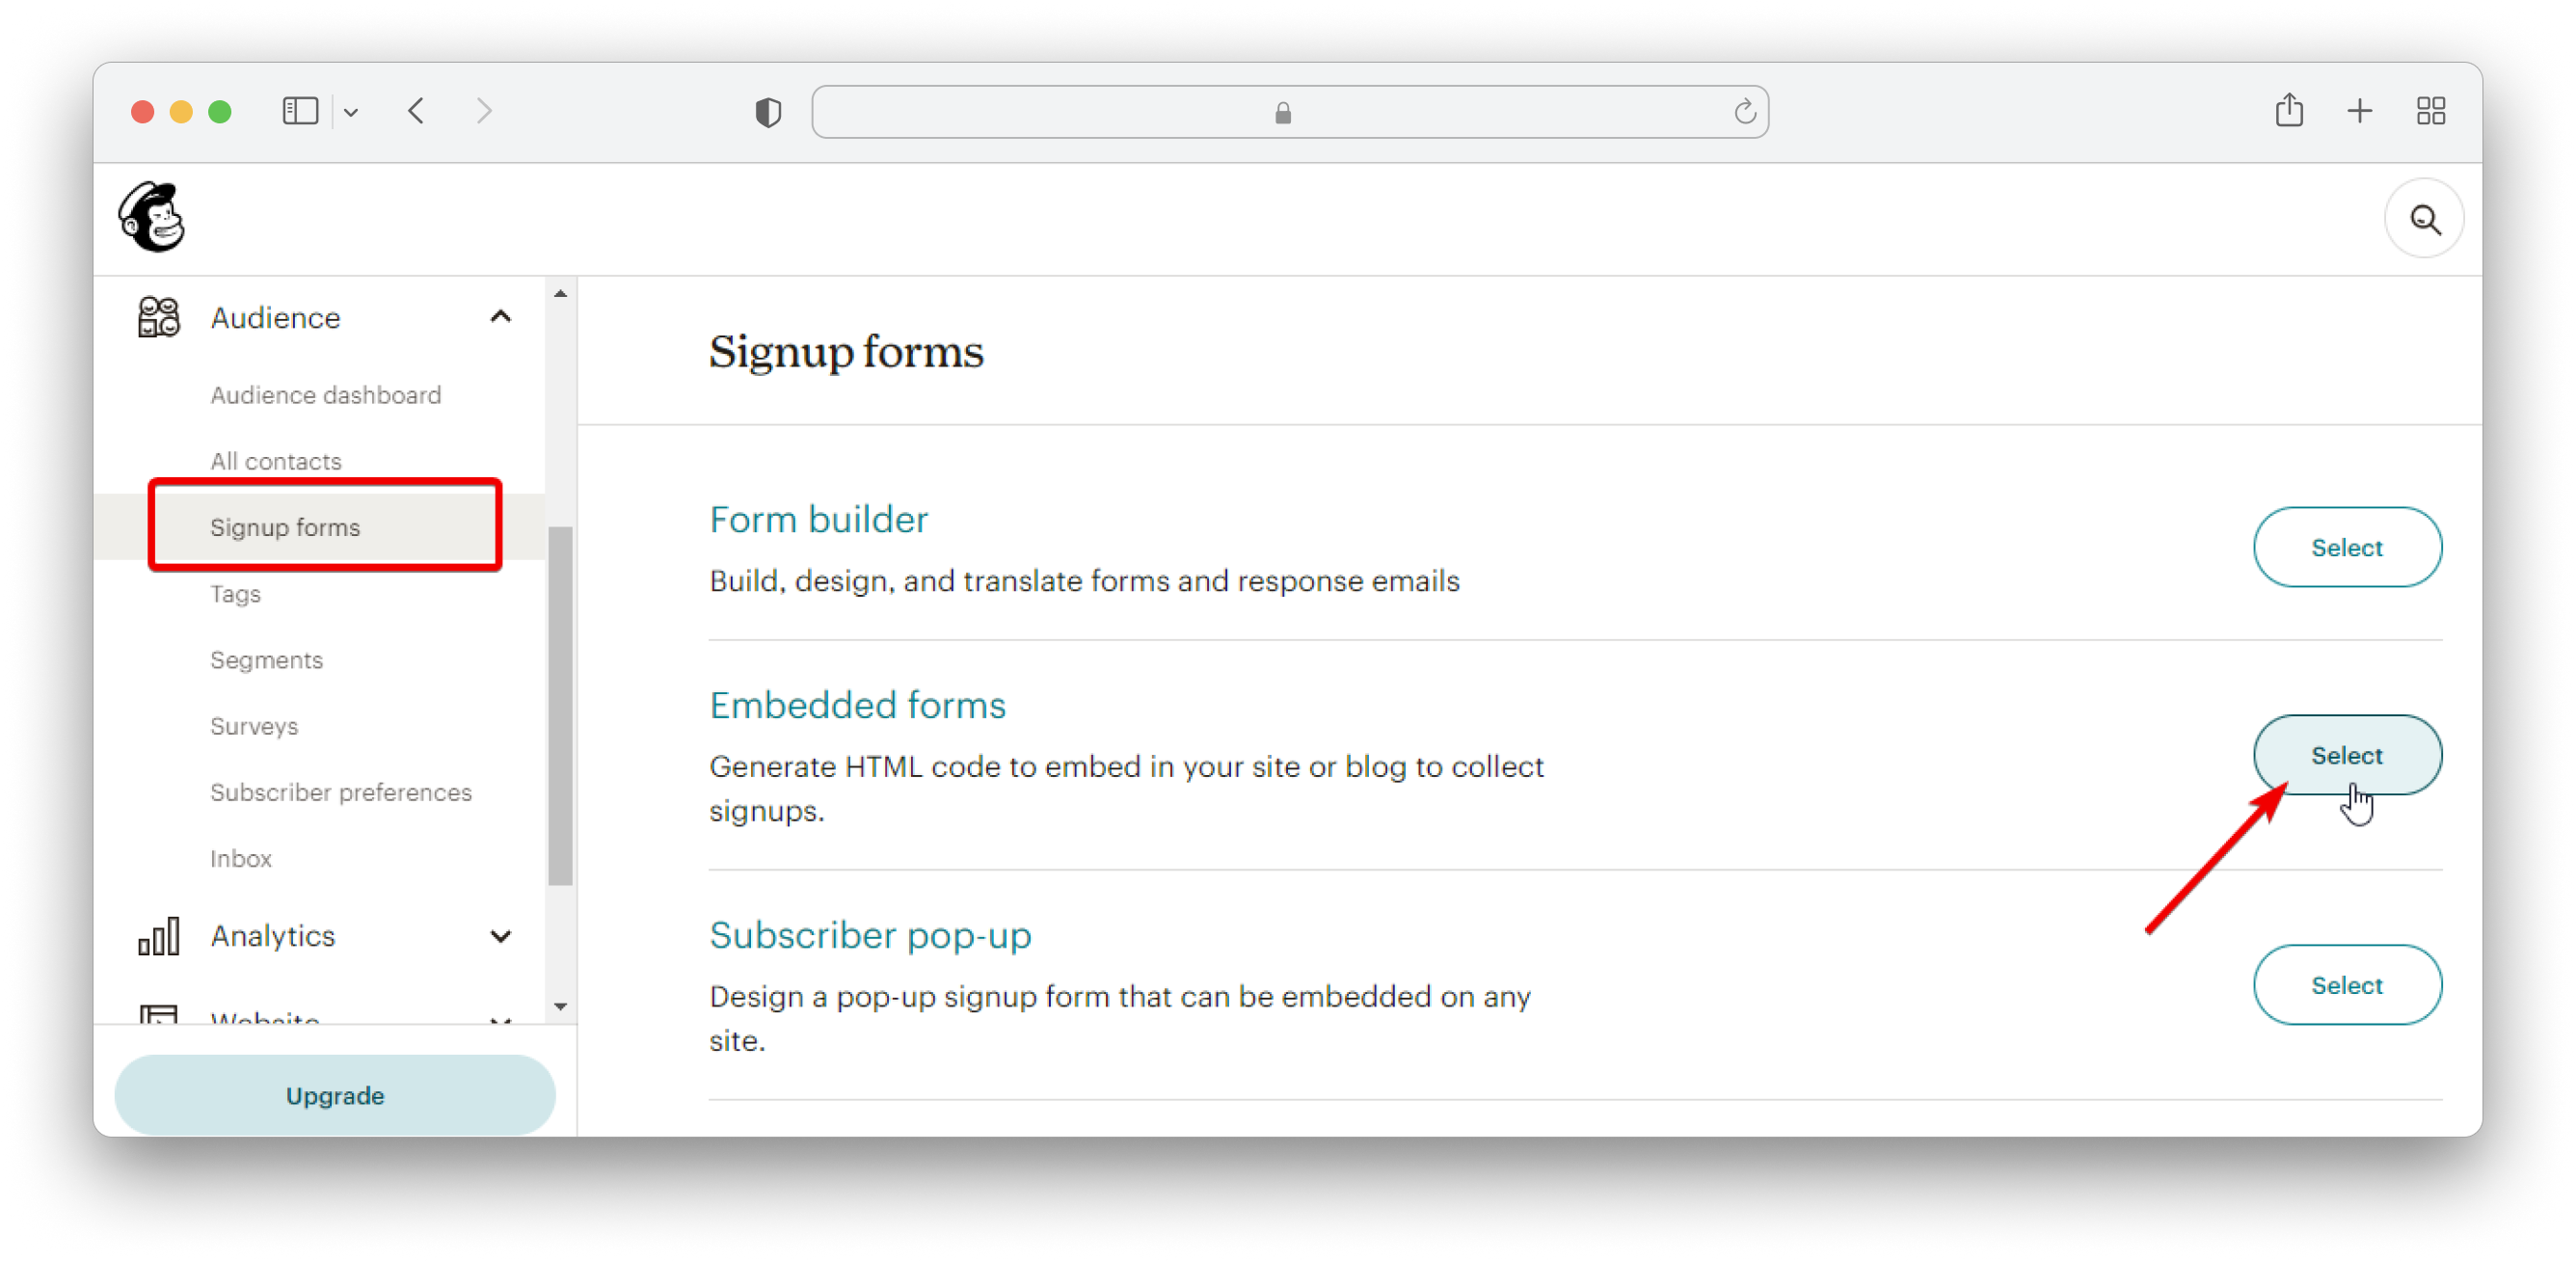
1. Configure Mailchimp
1.1 Create a signup form
- Head over to your Mailchimp dashboard
- Under Audience, click on Signup forms
- Next click on the Select button next to Embedded forms (You can create forms any way you like)
For this example, we are going to create the signup form using the Embedded forms option.
Create signup form
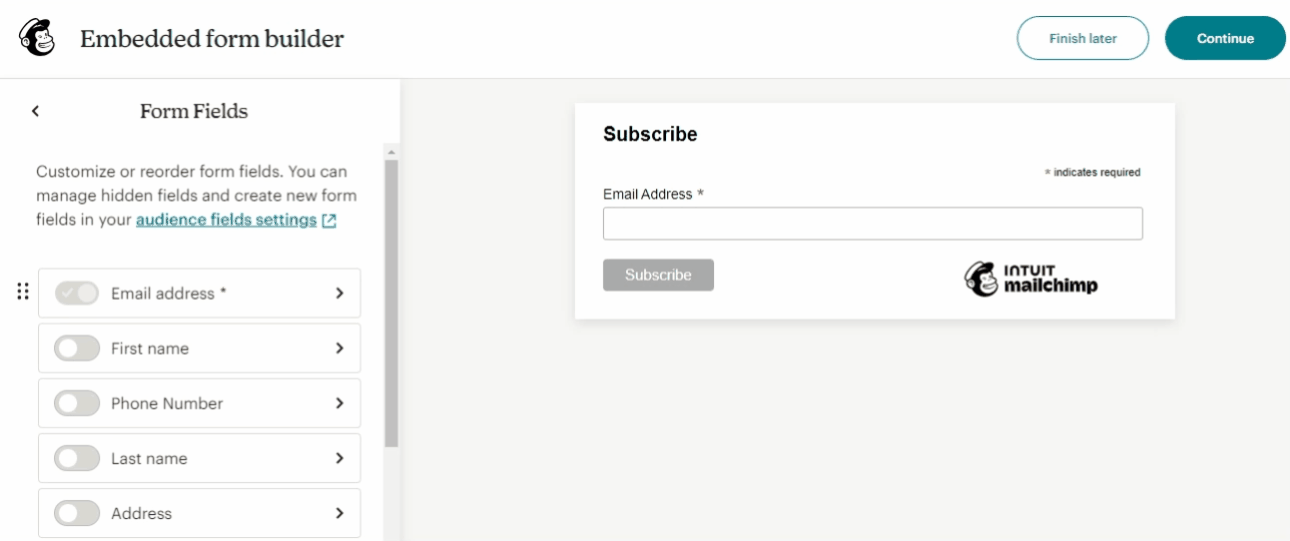
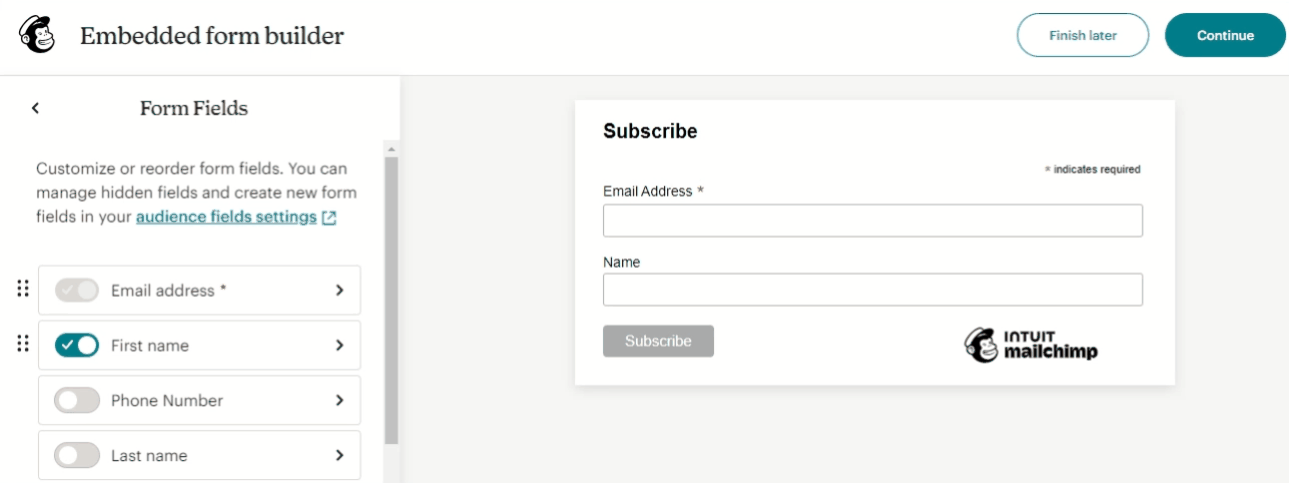
- You'll be taken to a new page
- As you can see the Email Address form is already present
- Click on First name and enable it
Configure name field
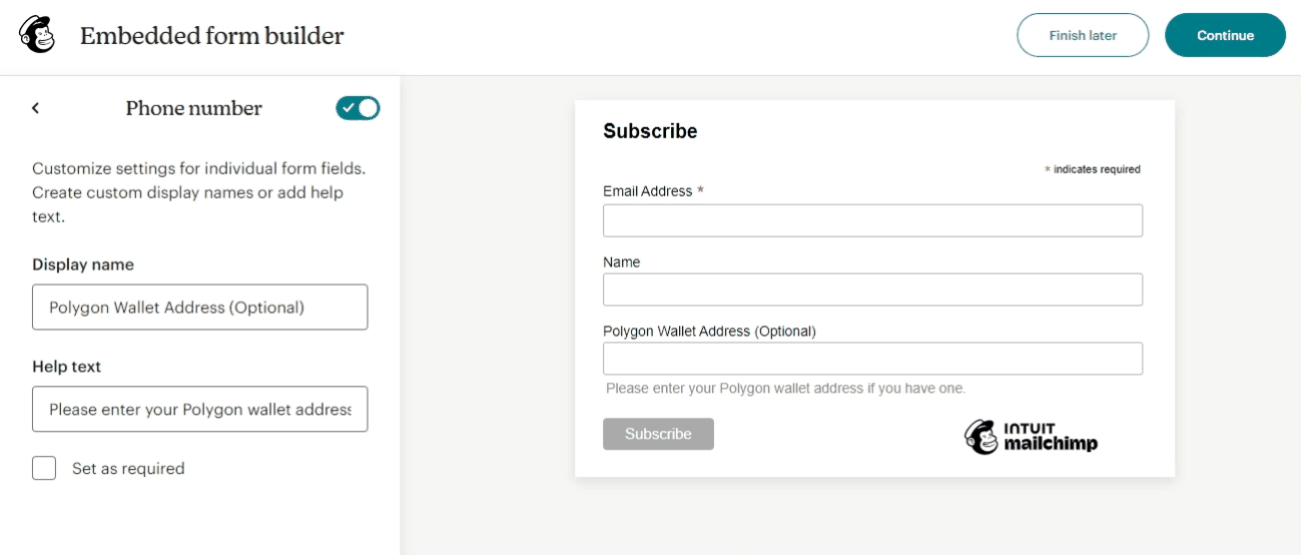
- Next, click on Phone number and enable it
- Change the Display name field
- Change the Help text field
For this example we are configuring the Phone number field and changing its display text to "Polygon Wallet Address". You can change the text according to your contract's chain, in this case, it's Polygon.
Configure wallet address field
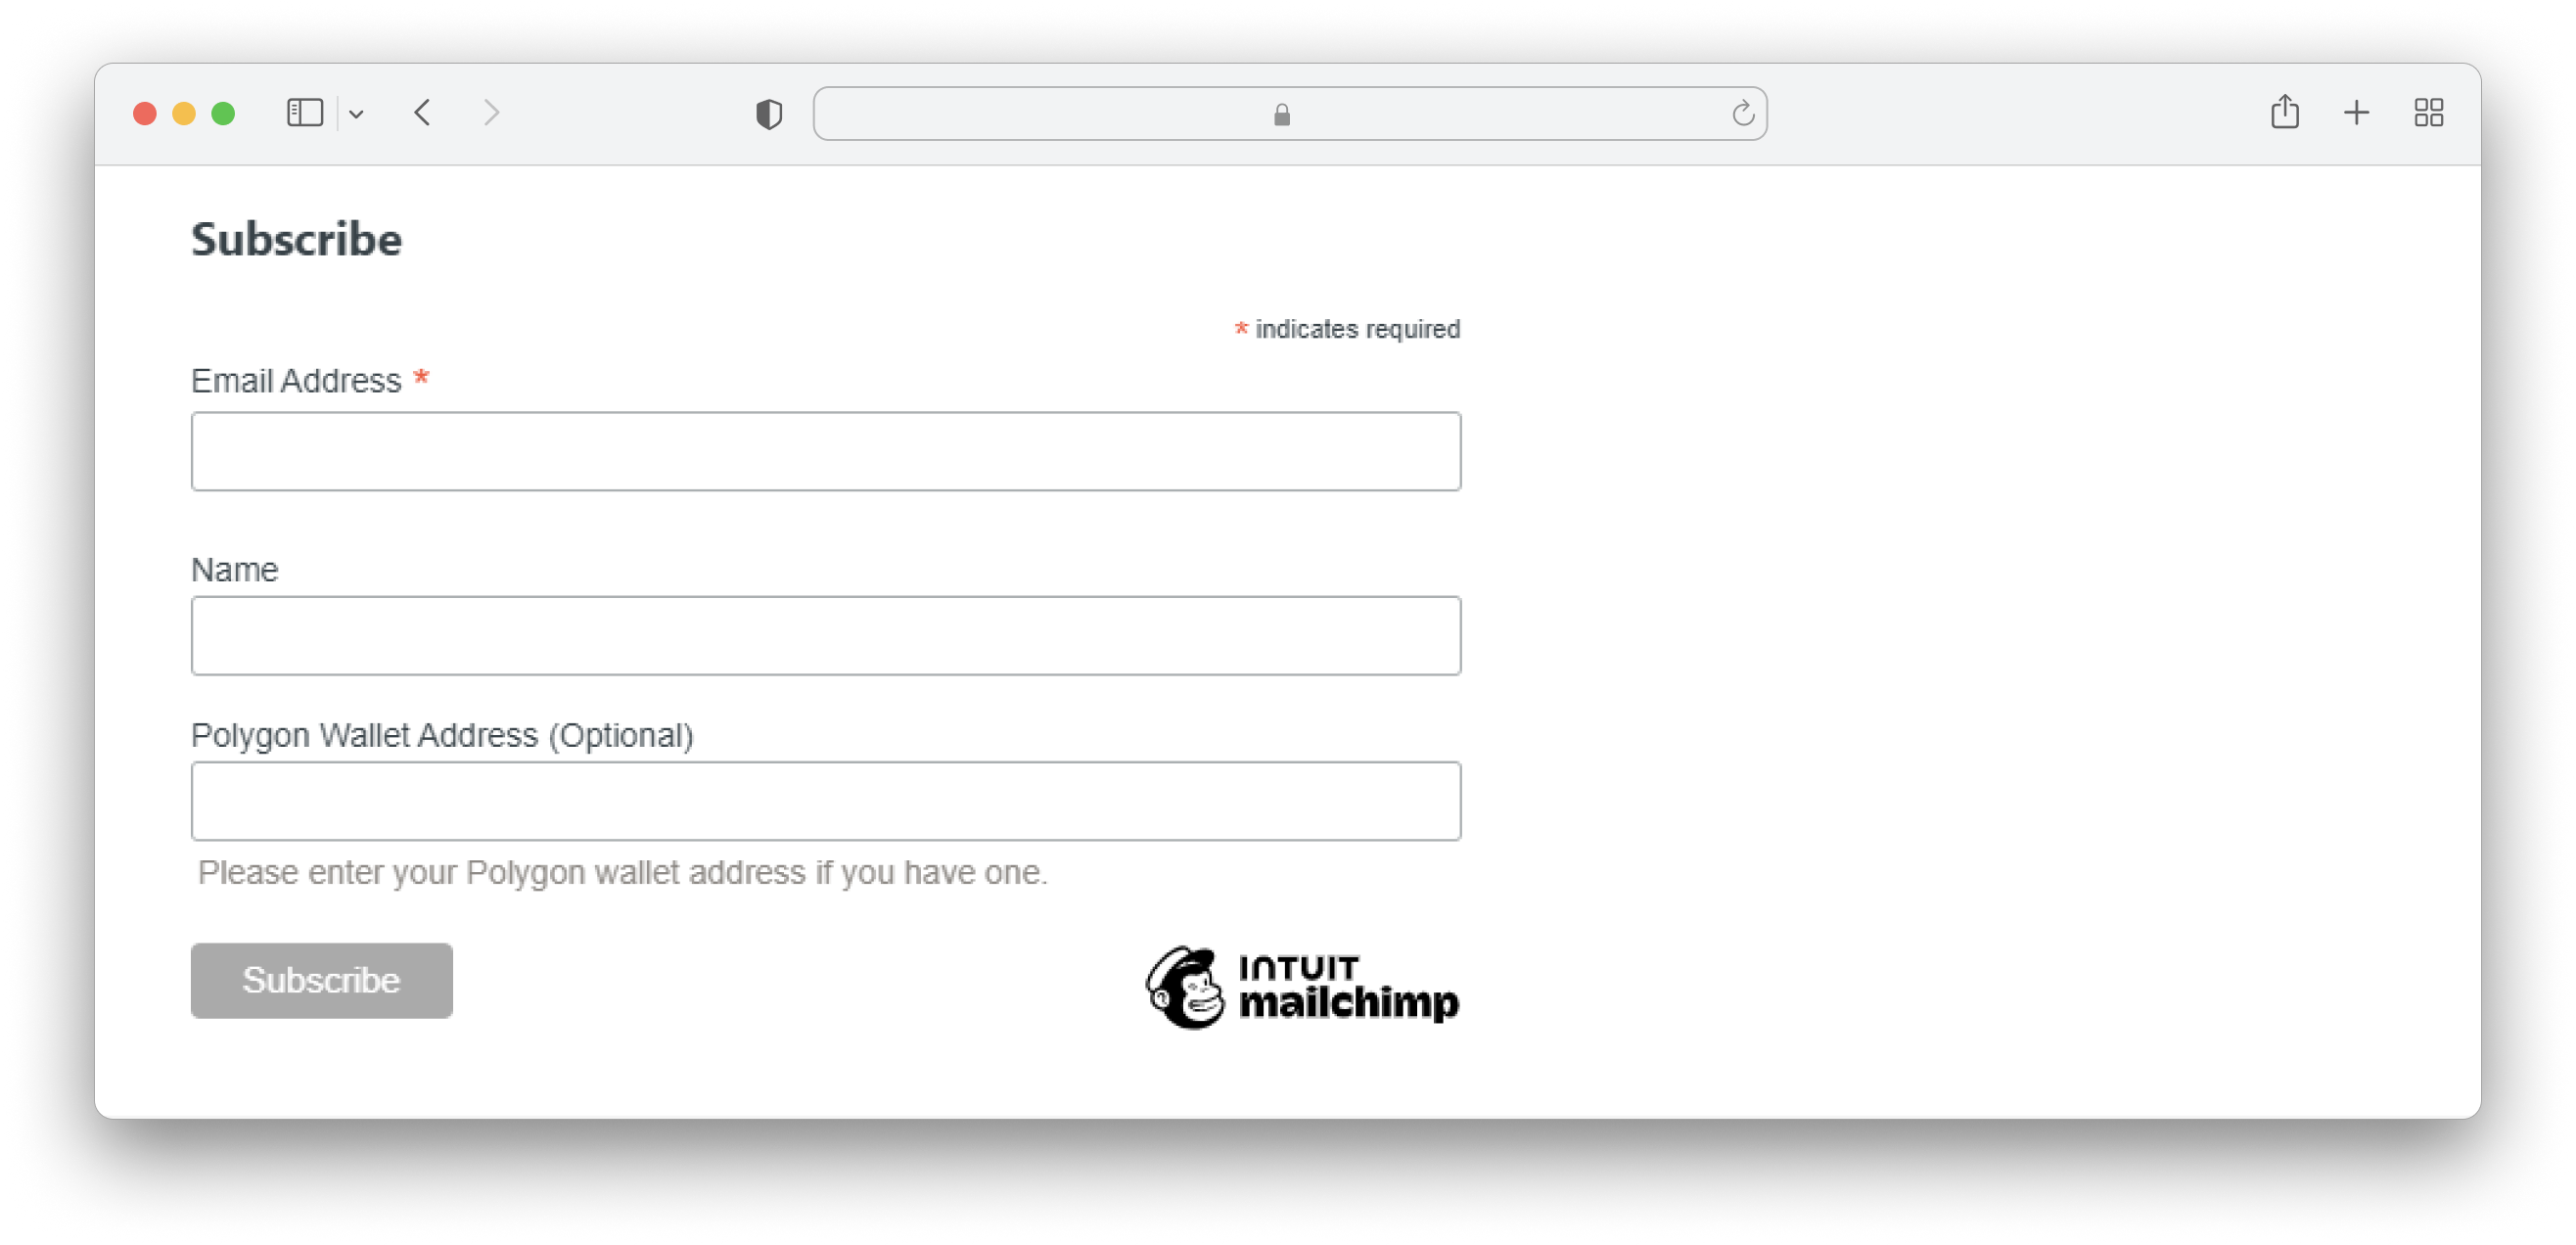
- You can add additional fields if you like, but for this example, we will continue with only three
- When done, click on Continue on the top right corner
- Finally, copy the HTML code and embed it into your website
Copy HTML code
- Now your potential subscribers should see a form like this:
Signup form
1.2 Configure Mailchimp trigger on Zapier
- Head over to your Zapier dashboard and click on + Create and then Zaps.
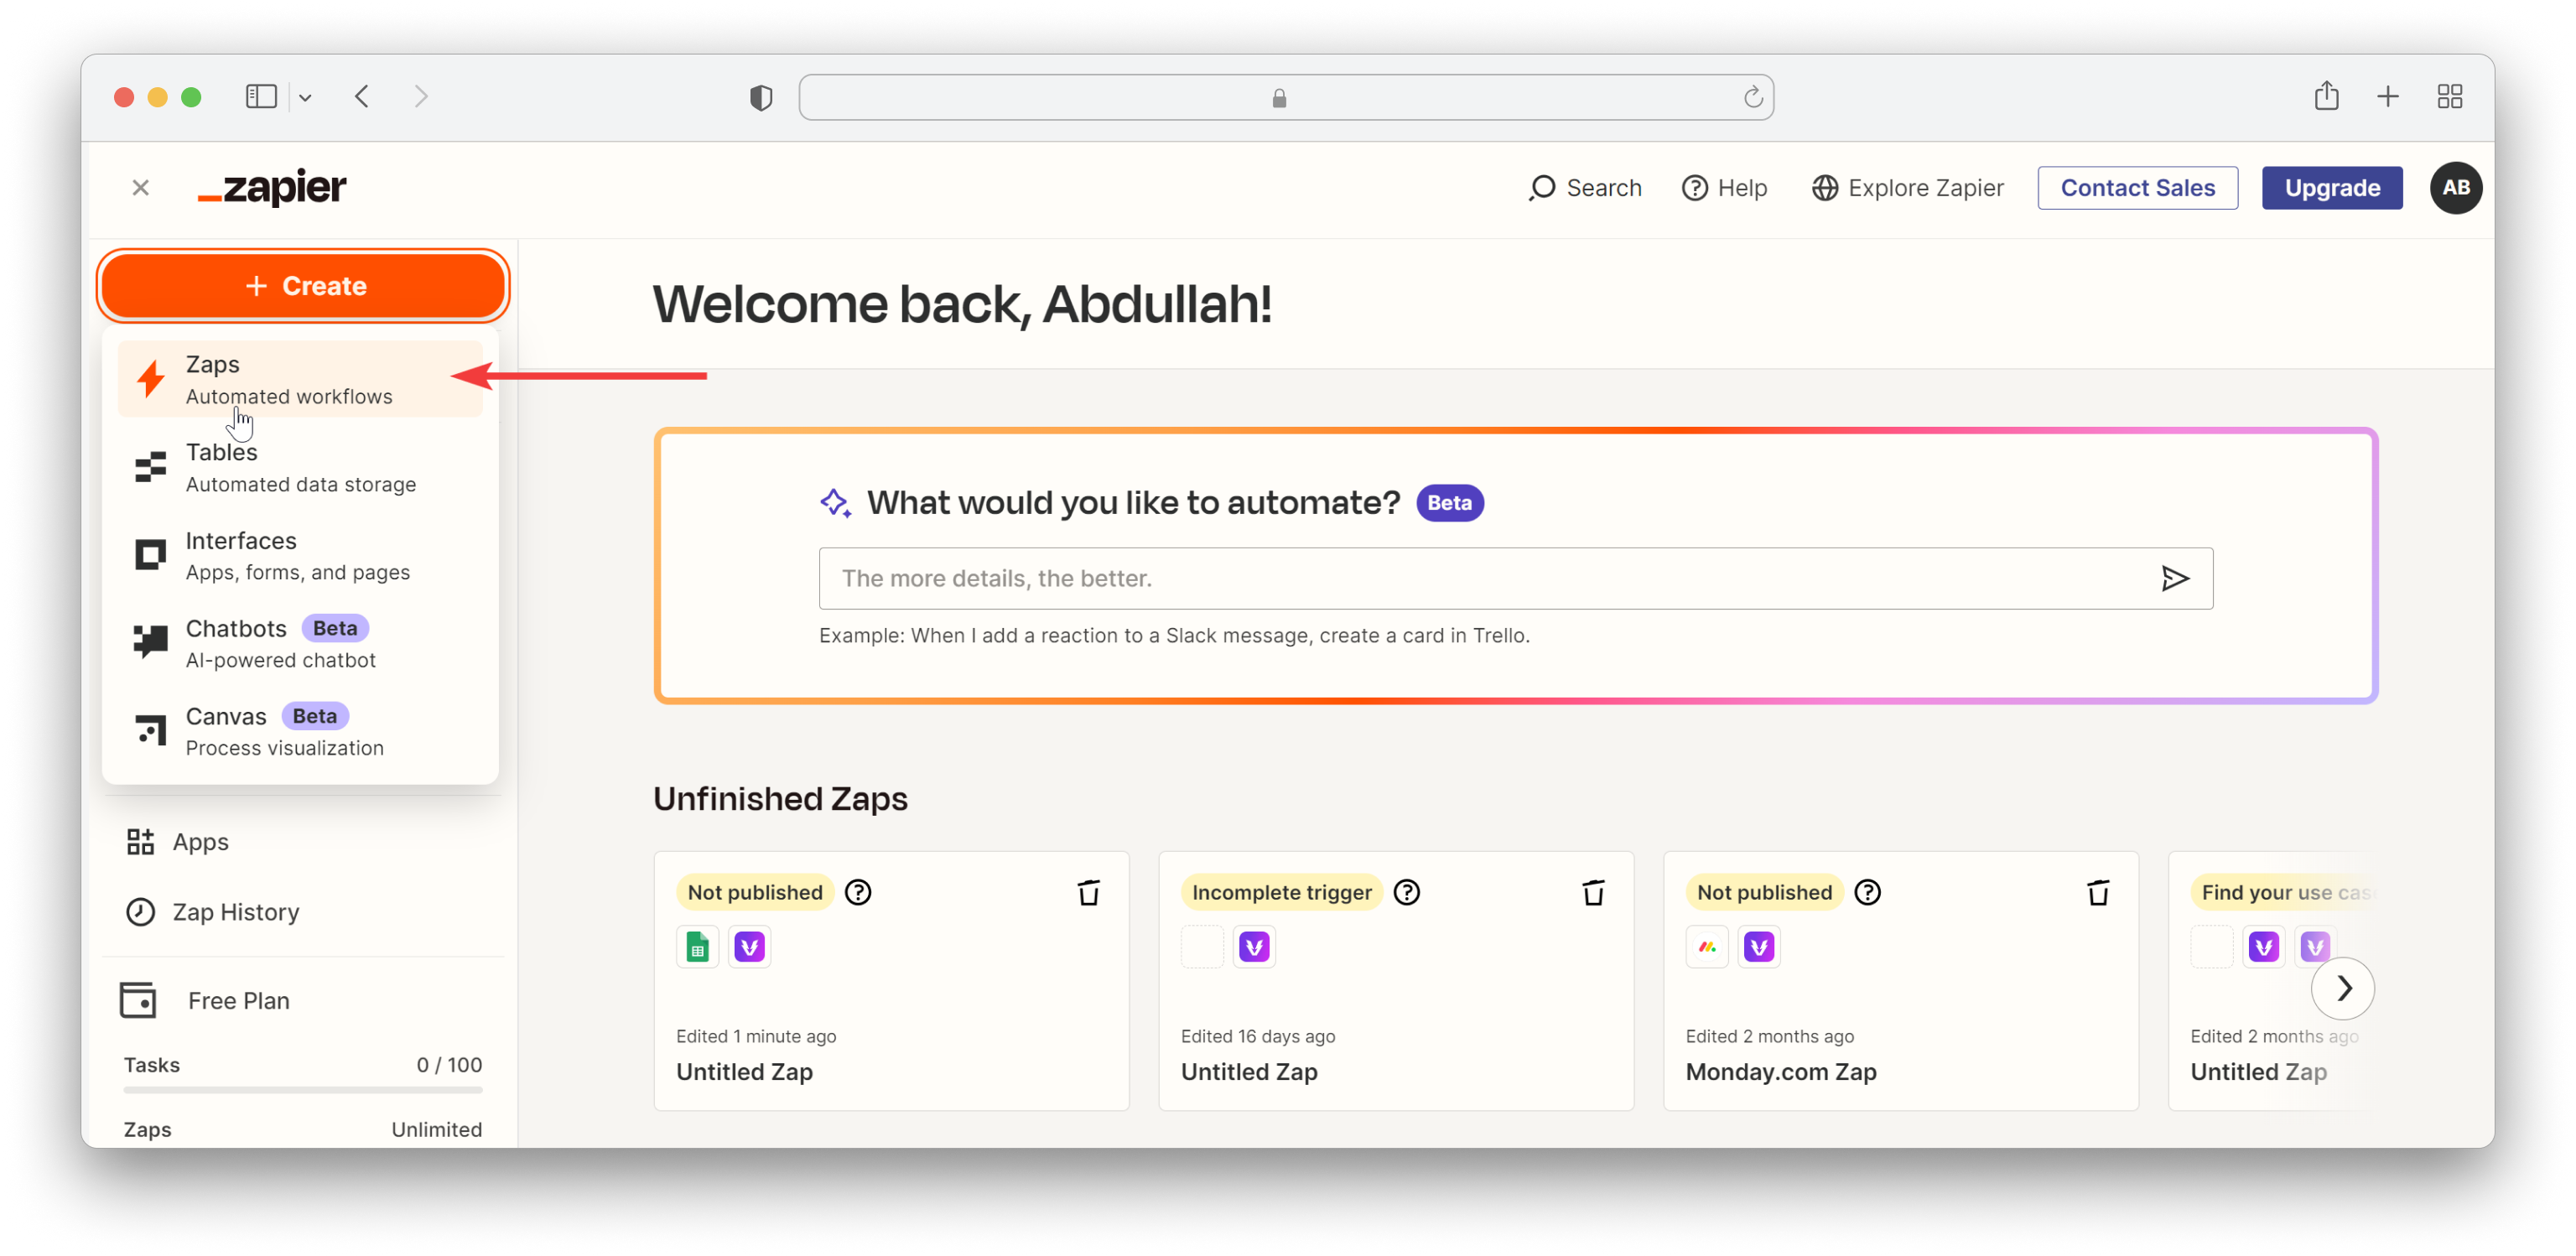
Zapier Dashboard
- Click on the Trigger , search and click on Mailchimp
- Select the event as New Subscriber and continue
- Connect your Mailchimp account with Zapier (A pop-up window will appear where you need to enter your Mailchimp login credentials)
- Next, in the Trigger section, select your audience and continue
- Finally, click on Continue with selected record
This is the last step for configuring Mailchimp. The next step will be configuring Venly action.
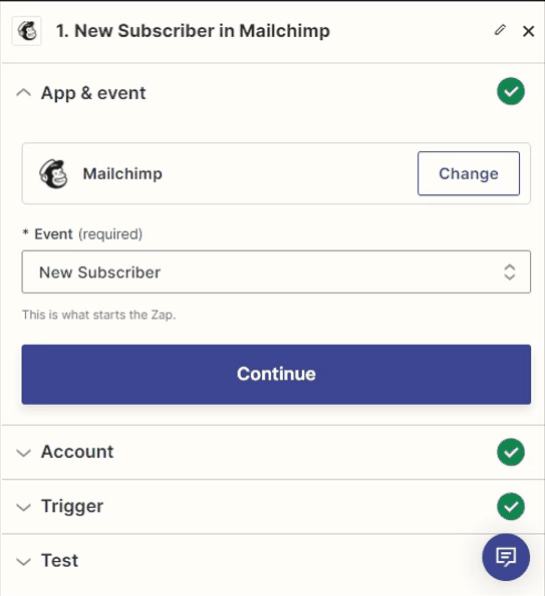
Configure Mailchimp Trigger
2. Configure Venly Action on Zapier
- Next, we need to add the Venly action
- Search and click on Venly
- Choose the event as Create and Mint NFT and continue
- Next, add your Venly account to Zapier. Your account should already be visible if you previously created your contract. Read how to add Venly account on Zapier.
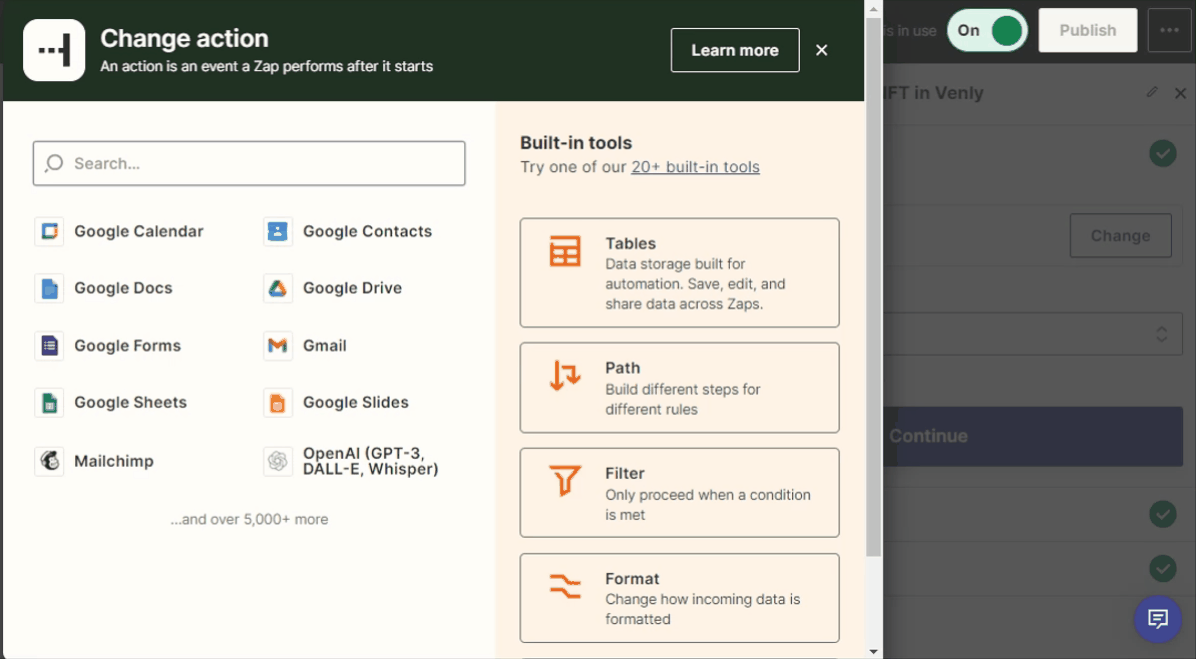
Configure Venly Action
3. Configure the action fields
Basic fields (need to be set up manually)
- Blockchain: First, select the blockchain of your NFT contract from the drop-down list.
- Contract: The NFT contracts will be displayed here based on the blockchain selected. Choose the NFT contract from the drop-down list.
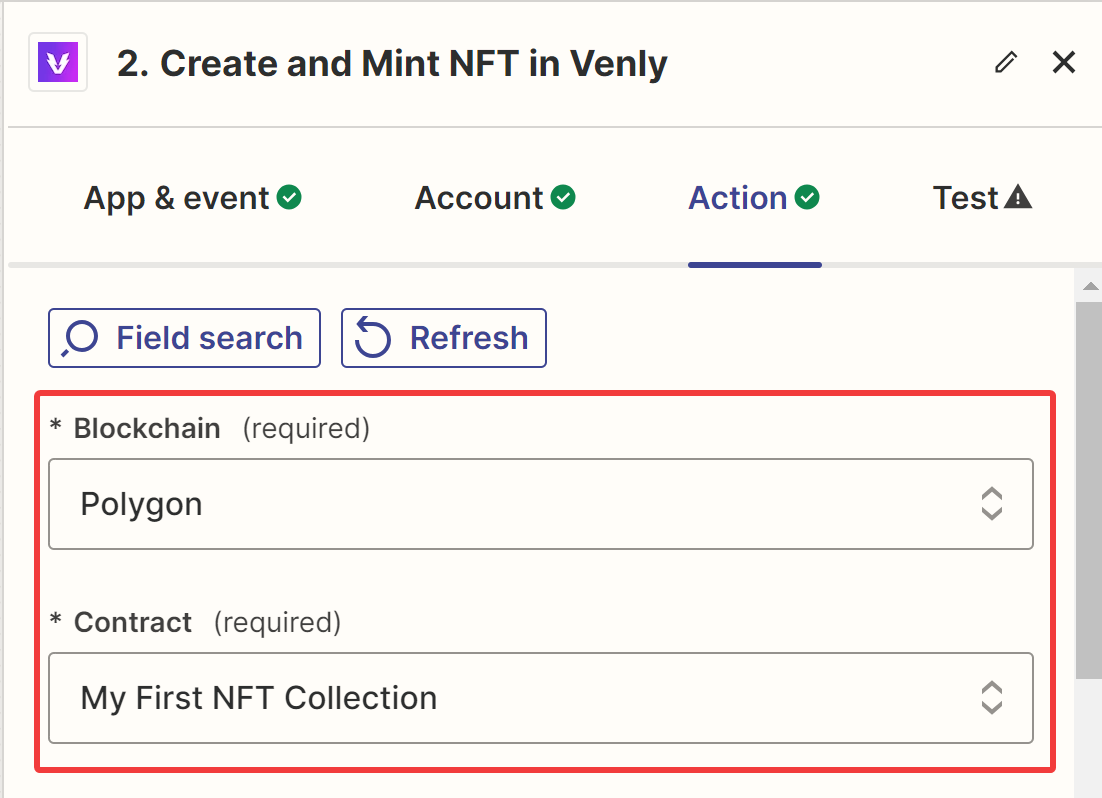
Select blockchain and NFT contract address
Configure required fields
- Fungible: Next, manually set the Fungible property to False. (This means you will be minting NFTs)
- Name: This is the name of the NFT. You can mint customized NFTs by adding a message and then merging it with the subscriber's name. In this example, we have manually added the message: "Welcome to Venly" and then added the Merges FNAME. This will combine your message and the name of your subscriber that it fetches from Mailchimp.
Suppose your subscriber enters their name: "John". the name of the minted NFT will be: "Welcome to Venly John"
- Description: Add a customized message in the description for the NFT.
- Image URL: Enter the image URL for the NFTs.
In this example, we have created a customized image, that will be minted as an NFT and sent to all the subscribers. Our image looks like this:
Our Custom NFT image
- External URL: This can be a link to your website or anything.
- Mint Address: This is the wallet address where the NFT will be sent. We have configured it to Merge Fields PHONE. If you remember, when we created the signup form we changed the display text for Phone number. So here we are fetching the Phone number field from Mailchimp, which is actually where the user will enter their wallet address. (Because we renamed it toPolygon Wallet Address)
- Mint Amount: This is the number of NFTs you want to mint. Here we manually set it to 1.
Optional fields
- Max Supply: This is the maximum number of NFTs that can be minted. You can configure the NFT supply to 1,2 10, 100, etc.
- Attributes: Pass an array of JSON objects to add attributes. Learn about attributes.
Finally click on Publish, and your Zap will be live.

Schedule a demo with our team to explore tailored solutions or dive in and start building right away on our portal.
Updated 9 months ago