
Getting started
Learn how to get your business onboarded and configure PAY.
💸 Onboarding & Configuring PAY
Prerequisites
- Your business/company must be registered in the USA, UK, or any EU country.
- You must already be a user of Venly's NFT-API or Wallet-API.
If you wish to use PAY as a stand-alone product, please reach out.
Onboarding Flow
- Fill out the onboarding form.
- Next, you will receive a KYB form, which is required to conduct due diligence.
- Fill out the KYB form with the required information about your business.
- You will receive a Stripe link to add your business and payment details. Fill out the form with the required information.
- Once approved, you will receive your Client ID and Client Secret.
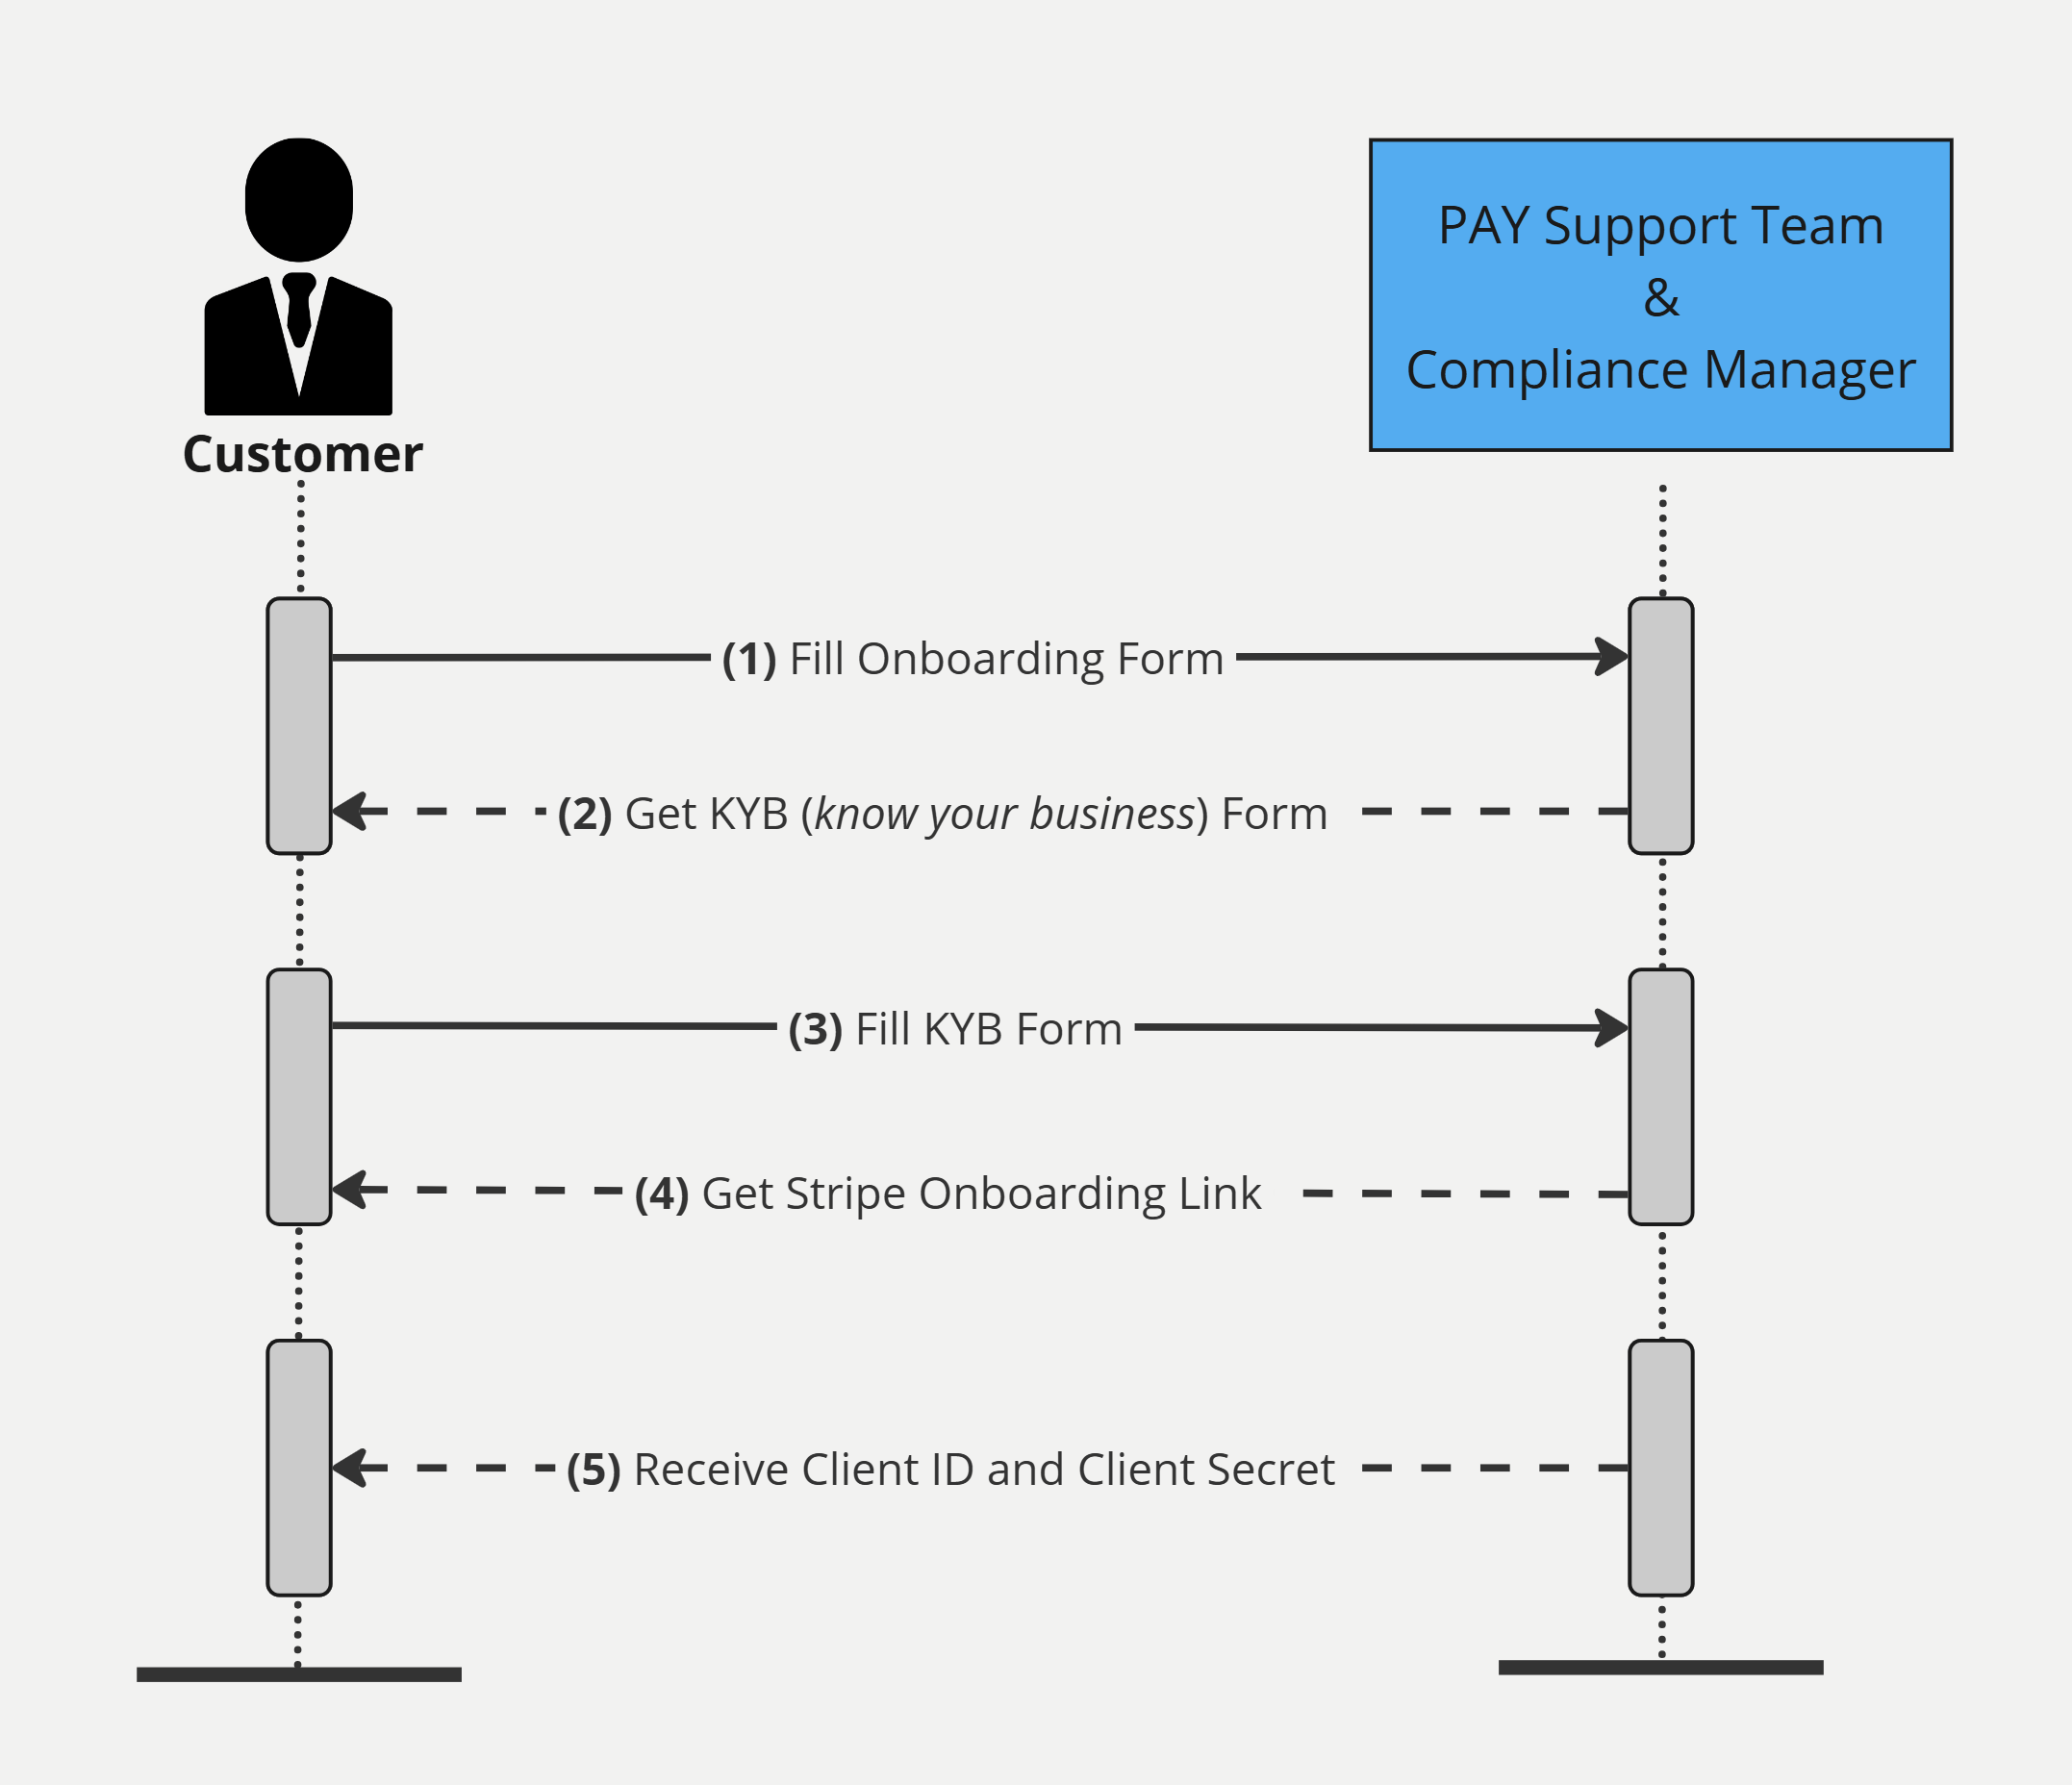
PAY Onboarding Flow
Authenticating PAY
To obtain a bearer token and authorize all API calls, you will need your Client ID and Client Secret. These credentials are necessary for authentication purposes.
Learn how to authenticate and retrieve the bearer token.
Configuring PAY
Next, we recommend you configure the branding and webhooks before you start using PAY.
1. Customize Checkout URL
You can customize the checkout links by adding your business logo and preferred color scheme. We recommend customizing the checkout URL to deliver a tailored customer experience.
Learn how to customize checkout URL.
2. Configuring Webhooks/Notifications
The final part is configuring Webhooks/Notifications by adding your endpoint to listen for triggers. These triggers will inform you whenever a successful payment is made by one of your end-users.
Learn how to configure webhooks/notifications.

Schedule a demo with our team to explore tailored solutions or dive in and start building right away on our portal.
Updated 9 months ago