
Authentication
Learn how to authenticate with different Venly products.
Authentication is a crucial process that ensures only authorized users or applications can access resources. It involves verifying the identity of the entity attempting to access the system. Proper authentication is essential for maintaining the security and integrity of your system and its data.
This page explains the different types of authentication required for different Venly components.
Authenticating with Venly
Venly services are categorized into two parts. The first is the API , which contains the Wallet-API, NFT-API, and PAY-API. These API components are authenticated via OAuth.
The second category contains only the Widget, which is a JavaScript SDK and uses a different authentication method. The Widget is authenticated using a Client ID and valid redirect URLs.
The following guides will go into the details of how to authenticate depending on the component.
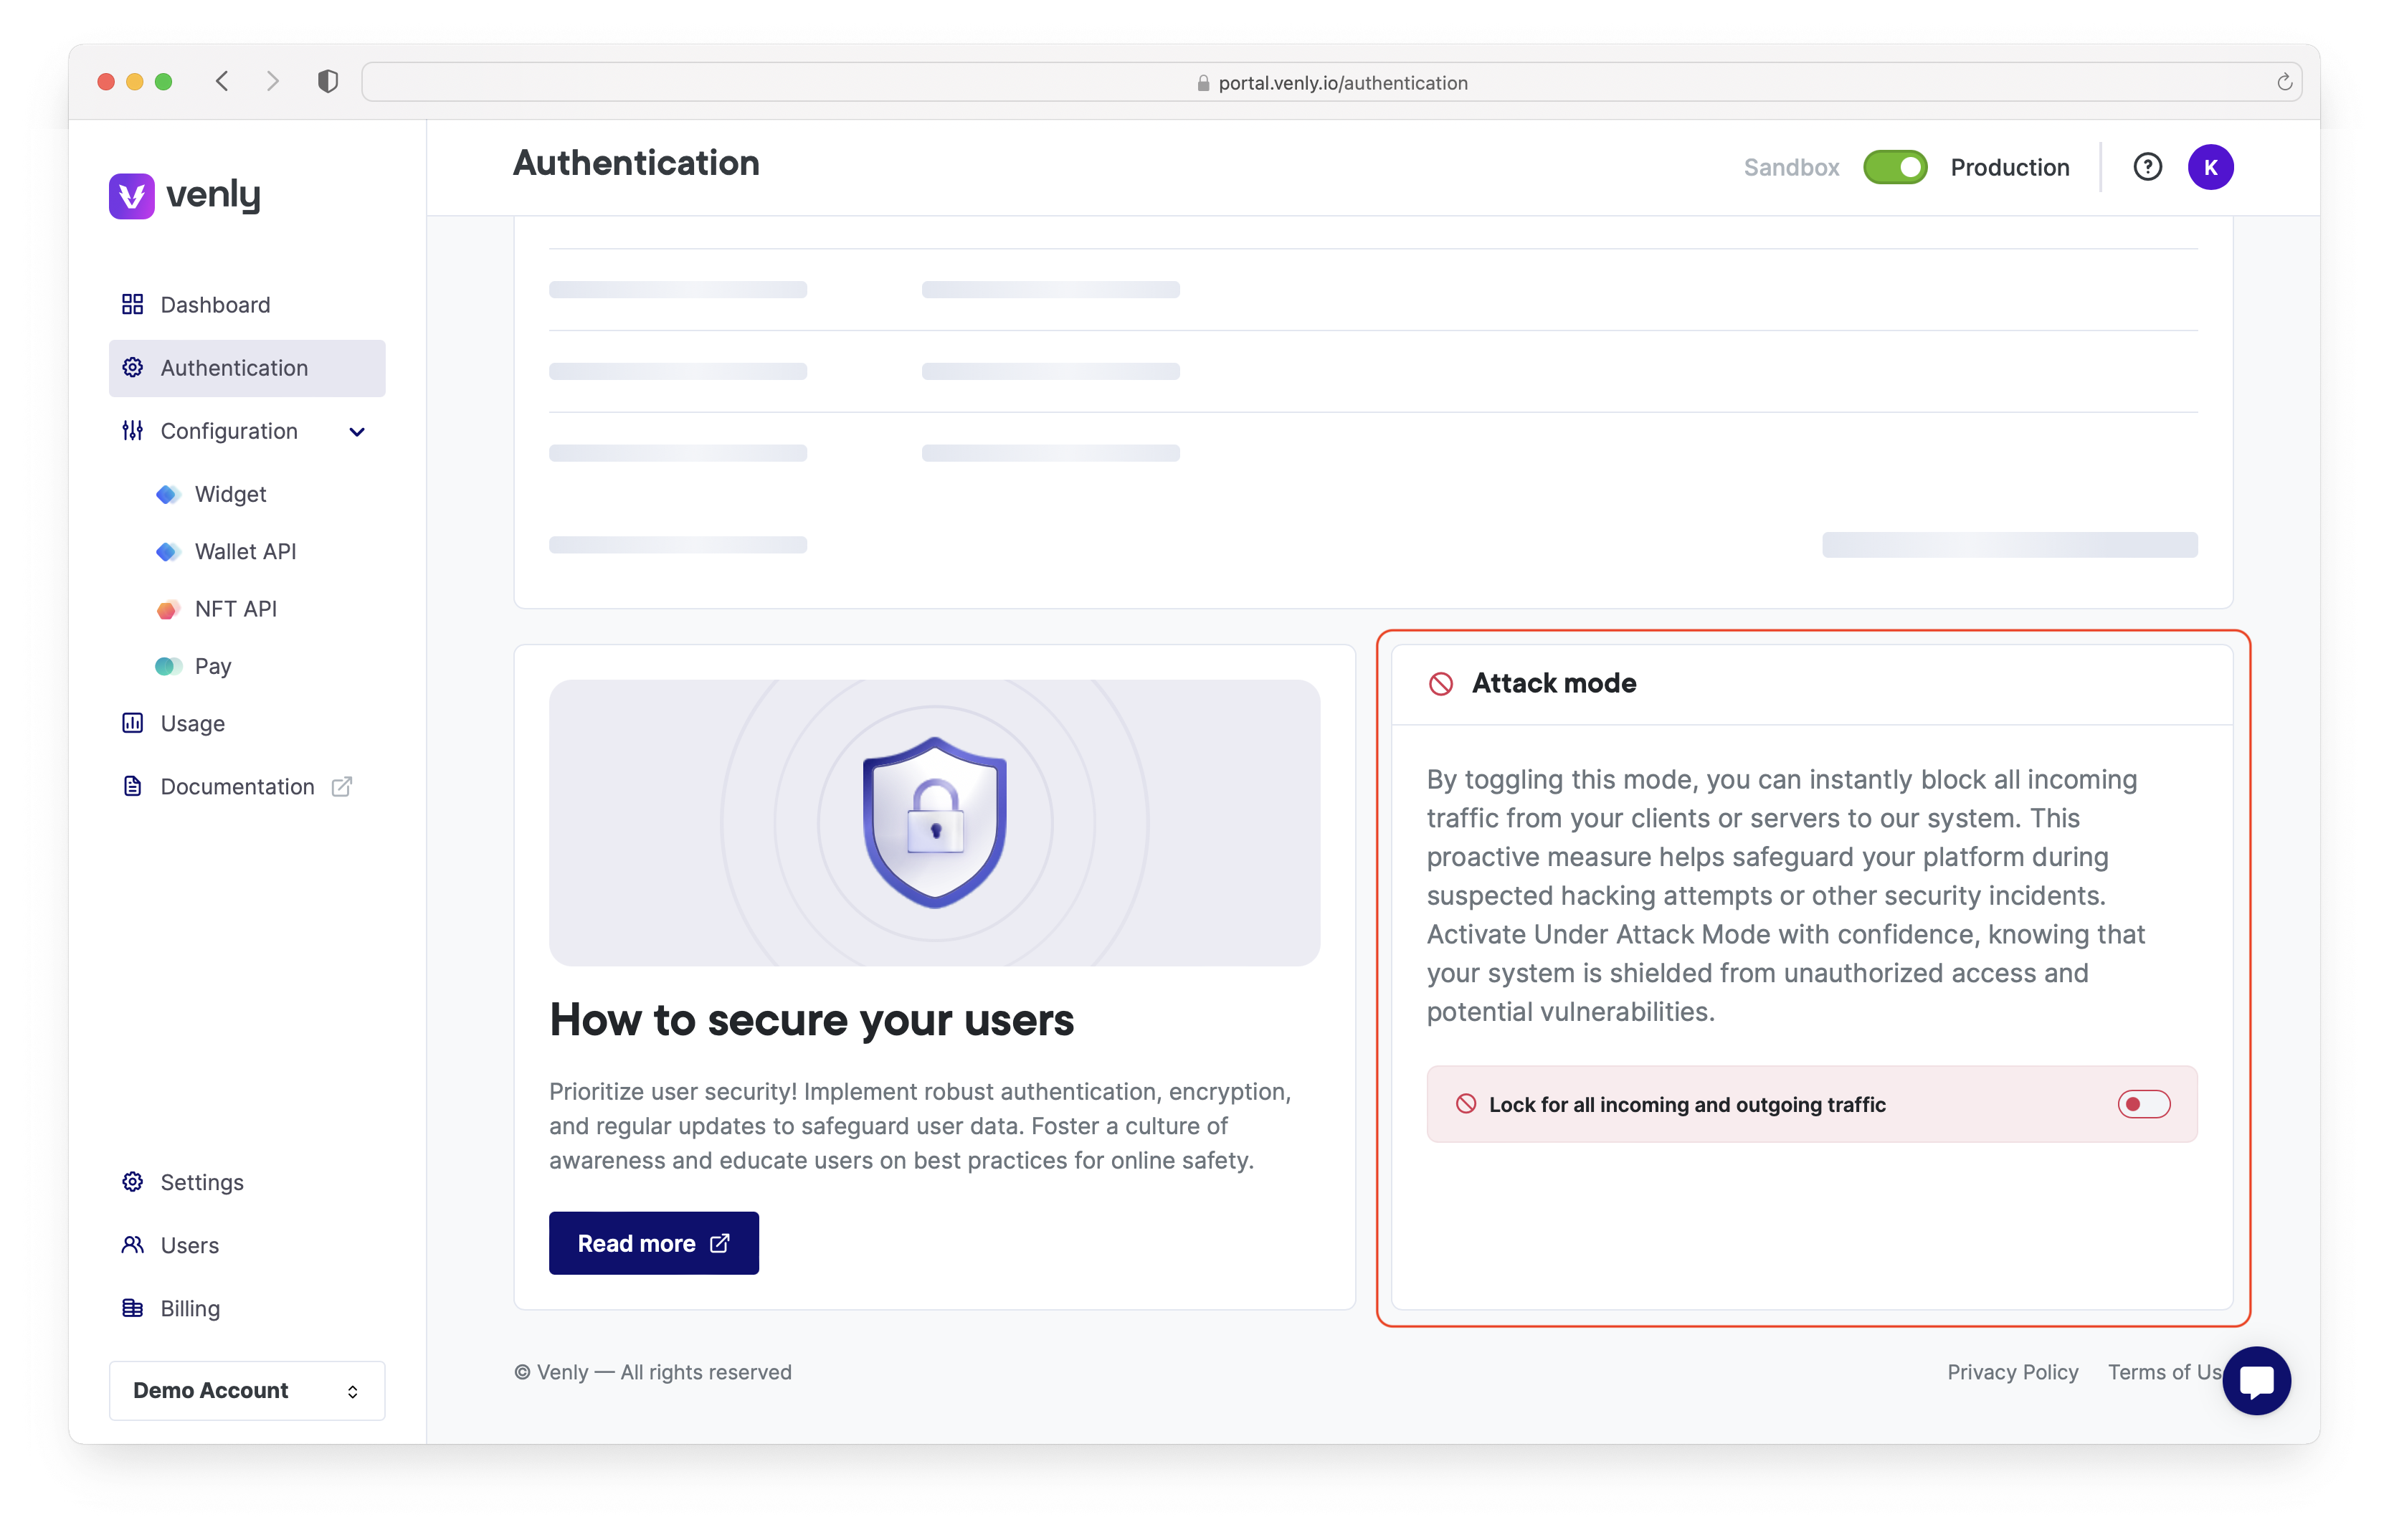
Attack Mode
Attack mode can be activated/deactivated from the authentication section of the portal.
Attack Mode is a critical security feature designed to safeguard your platform against potential security threats and unauthorized access. By activating Attack Mode, you can instantly halt all incoming traffic from your clients or servers to our system, ensuring your data and operations remain secure during a security incident.
Knowing that you have a reliable mechanism to stop potential threats allows you to respond confidently to security incidents. With a simple toggle, you can activate Attack Mode and ensure your system is protected.
Hacking Attempts: If you suspect that your platform is under a hacking attempt, enabling Attack Mode can provide immediate protection by blocking all incoming connections.
Security Breaches: In the event of a security breach, quickly activating Attack Mode helps contain the threat and prevent further unauthorized access.
Activating Attack Mode will temporarily stop all incoming traffic, which may cause a disruption in service. Use this feature diligently and inform your users if necessary.
Updated 9 months ago