
Configuration
Configuring and customising the widget
The Widget is a front-end JavaScript component allowing projects to interact with the consumers' blockchain wallets. To properly configure the widget, the projects require you to configure three elements. The widget configuration is done via the Developer Portal.
Configuration between Sandbox and Production is kept separate, allowing you to configure your test environment differently from your production environment. To toggle in the upper right corner can be used to switch between the two environments.

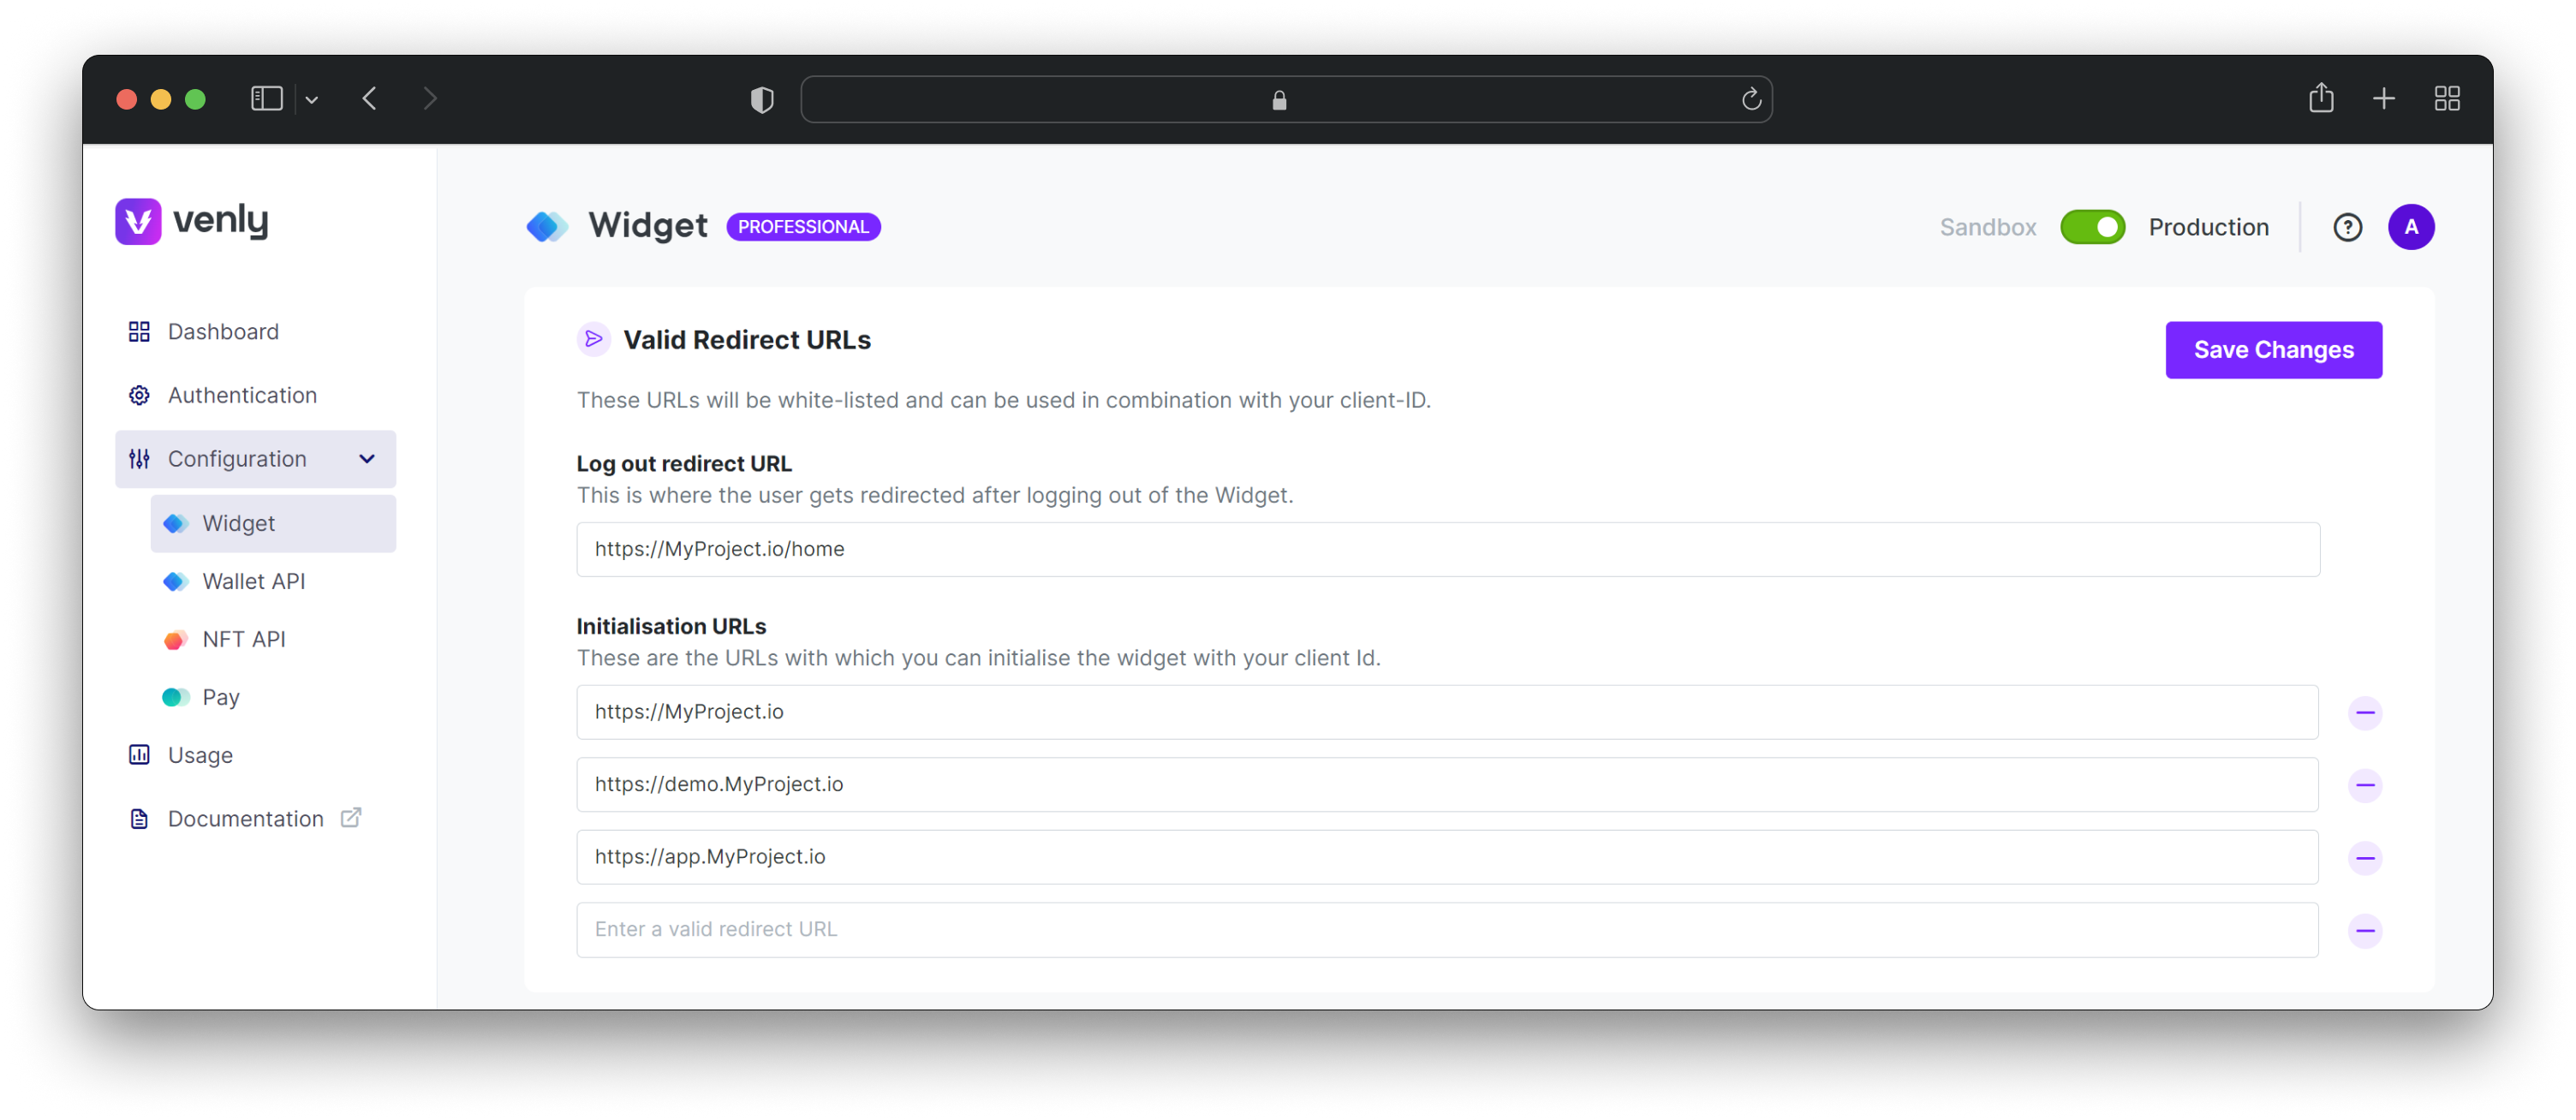
Valid Redirect URLs
Each project receives its Client ID to authenticate. To prevent the Client ID from being used outside of the project, it is required to define the URLs with which to initialize the widget in combination with a project's Client ID.
Any URL that tries to access the Widget with your Client ID will be blocked unless it is defined in the Allow list.
We also allow you to define a Logout redirect URL, which is the URL we will direct a project consumer to after logging out of the Widget.
Make sure to always defined a log out redirect URL as well as minimum one initialisation URL.
Example Widget Configuration
Customize the widget
You can customize the widget screen by uploading your project's logo and defining a description. The logo will be displayed to your user each time there is an interaction between Venly and the user.
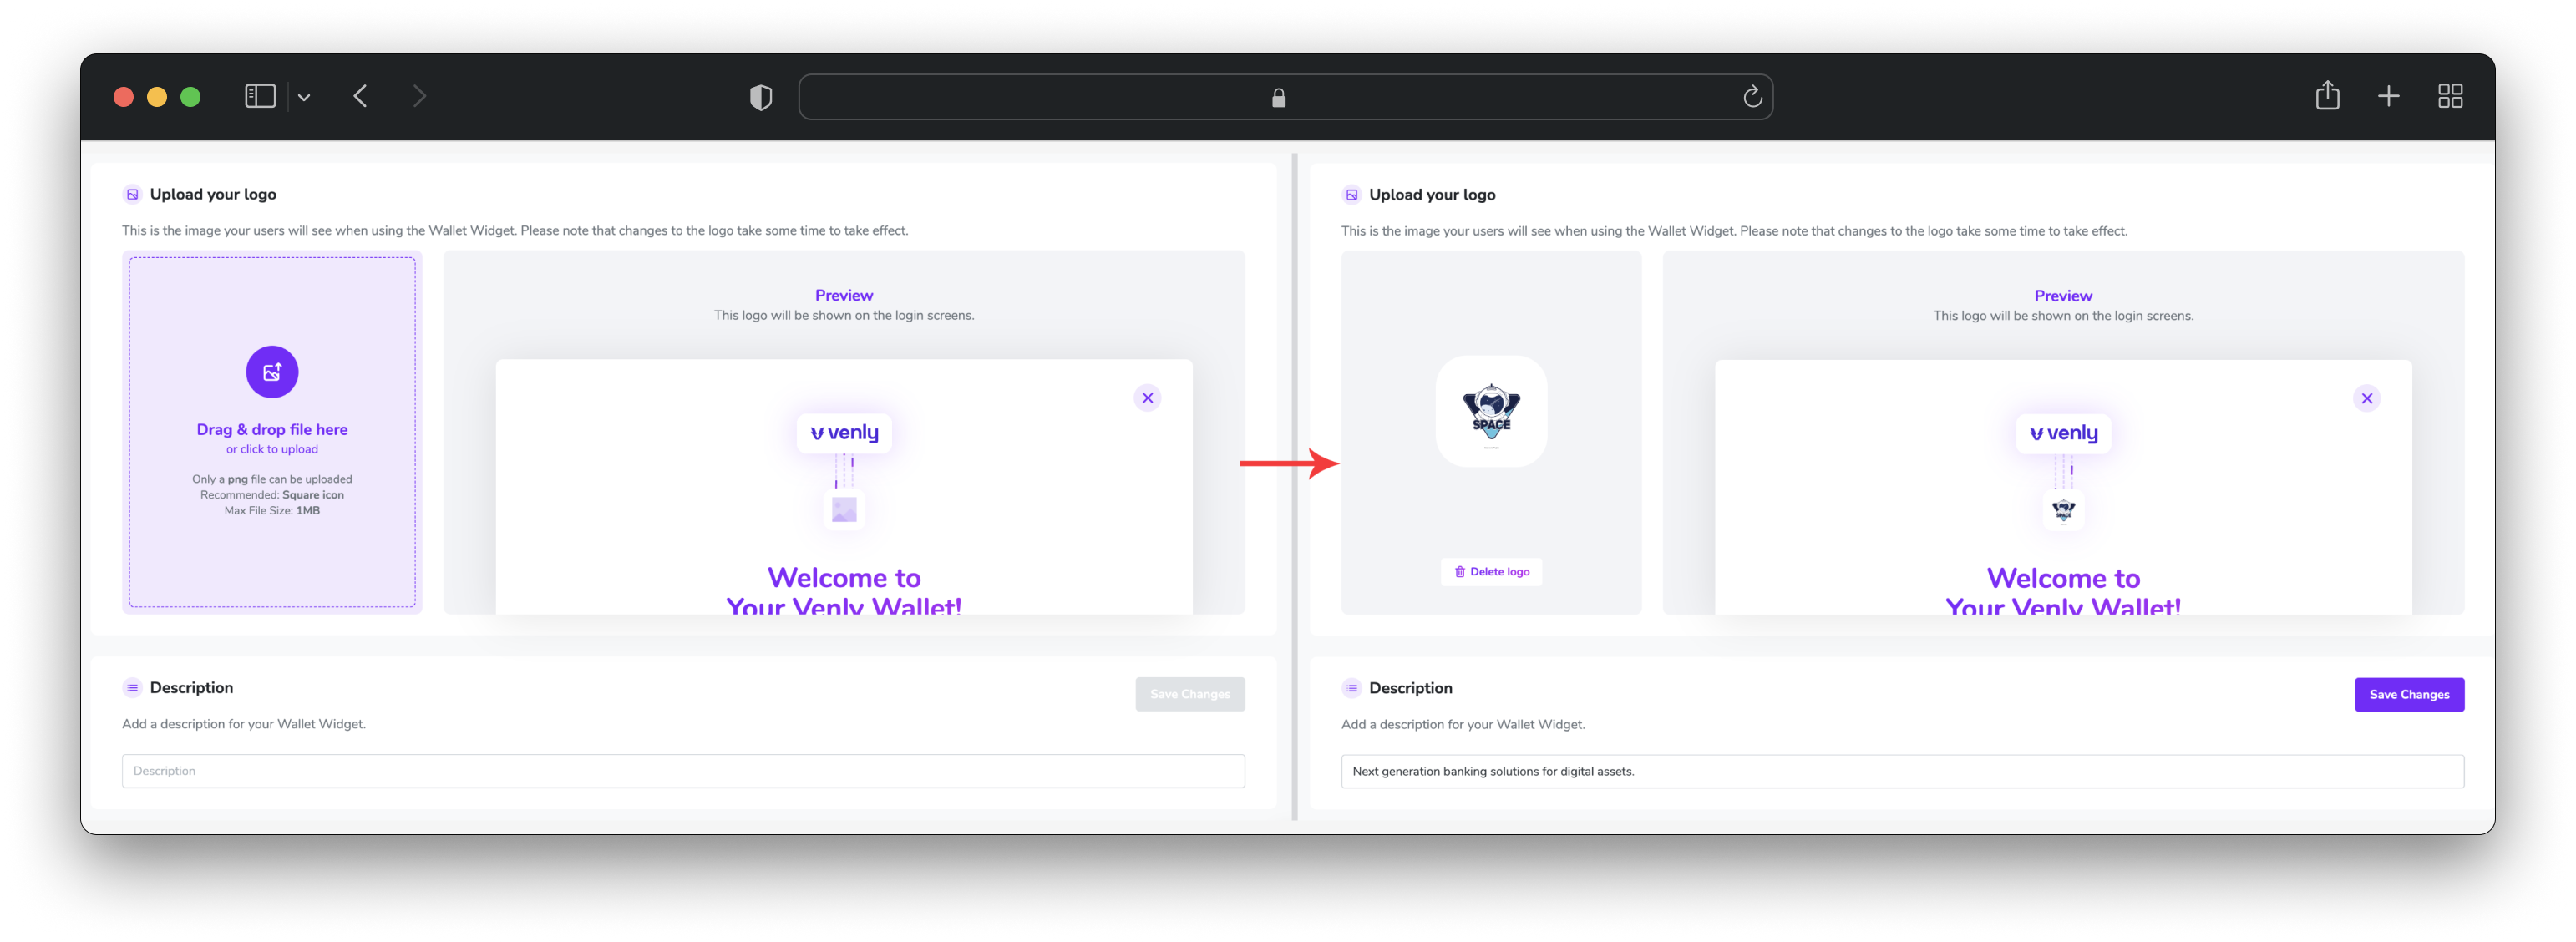
Adding a custom logo and description
Updated 9 months ago