
How to build an NFT store
This guide describes how you can create an NFT e-Commerce store using Shopify.

Scenario Explained

End Result
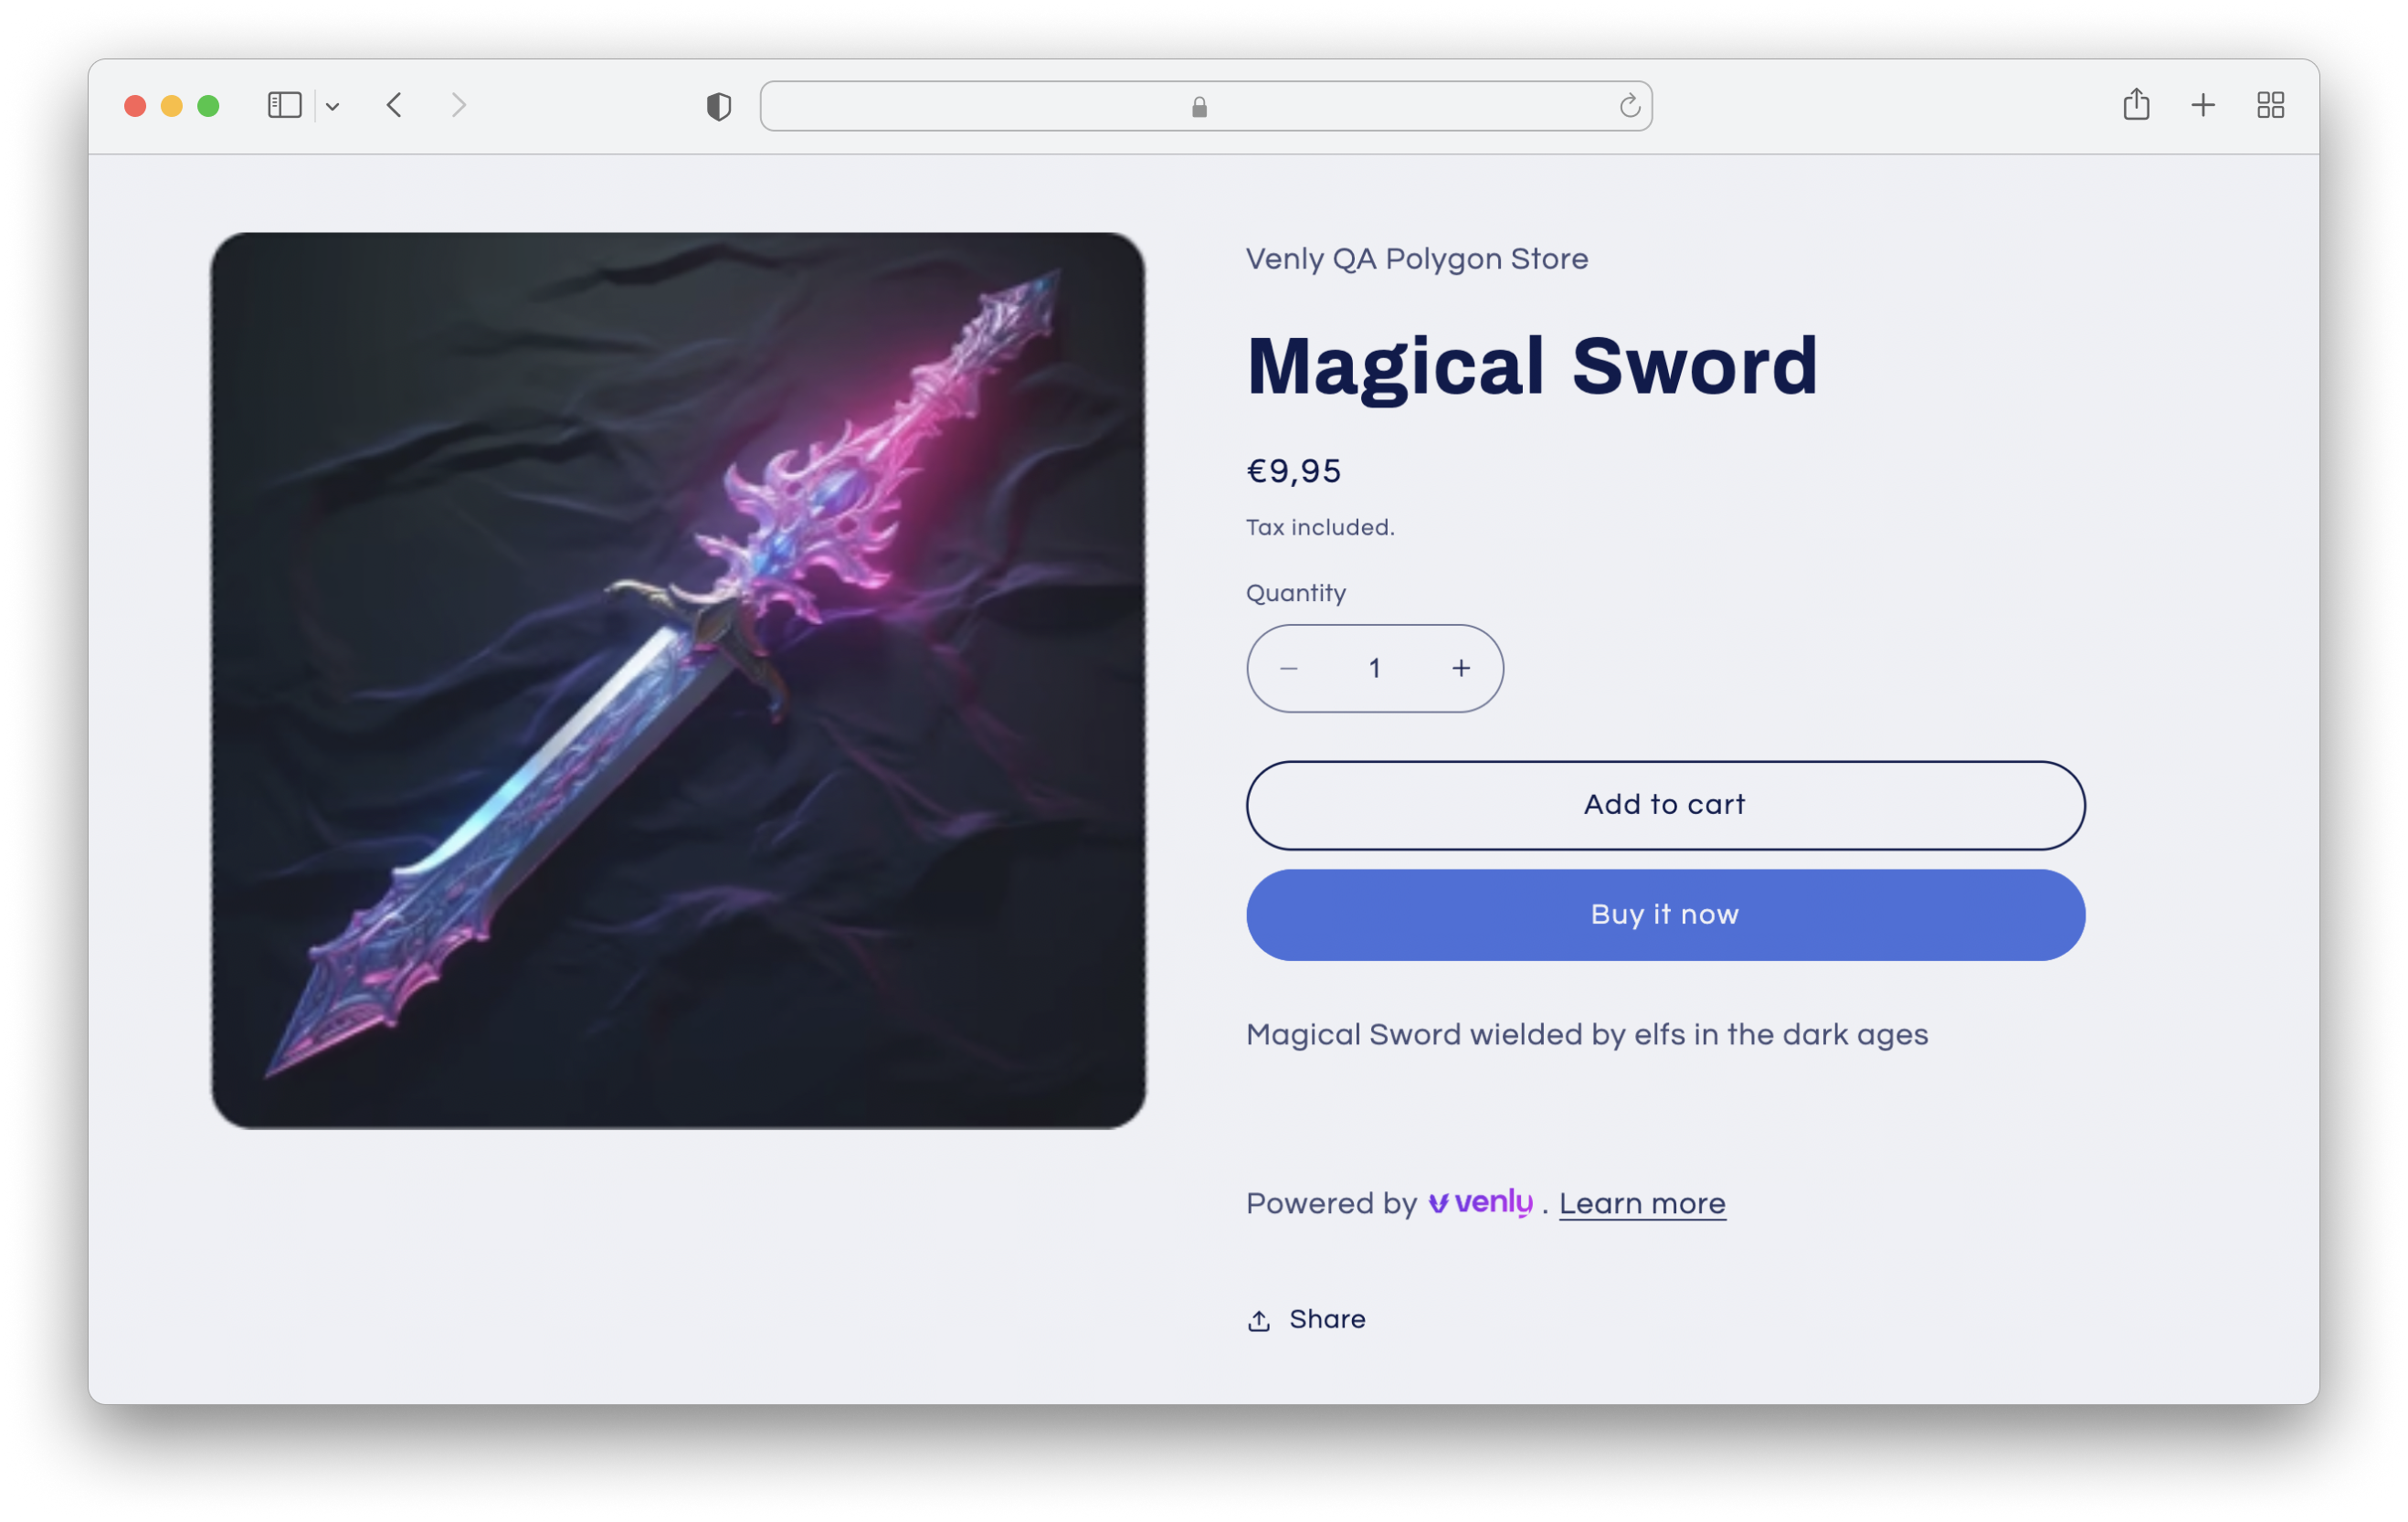
Create and sell NFTs directly from your Shopify store. You can add payment methods to make purchasing easier for your customers.
Prerequisite
- You also need an account on Shopify. You can start a free trial on Shopify by clicking here.
Sign up on Shopify
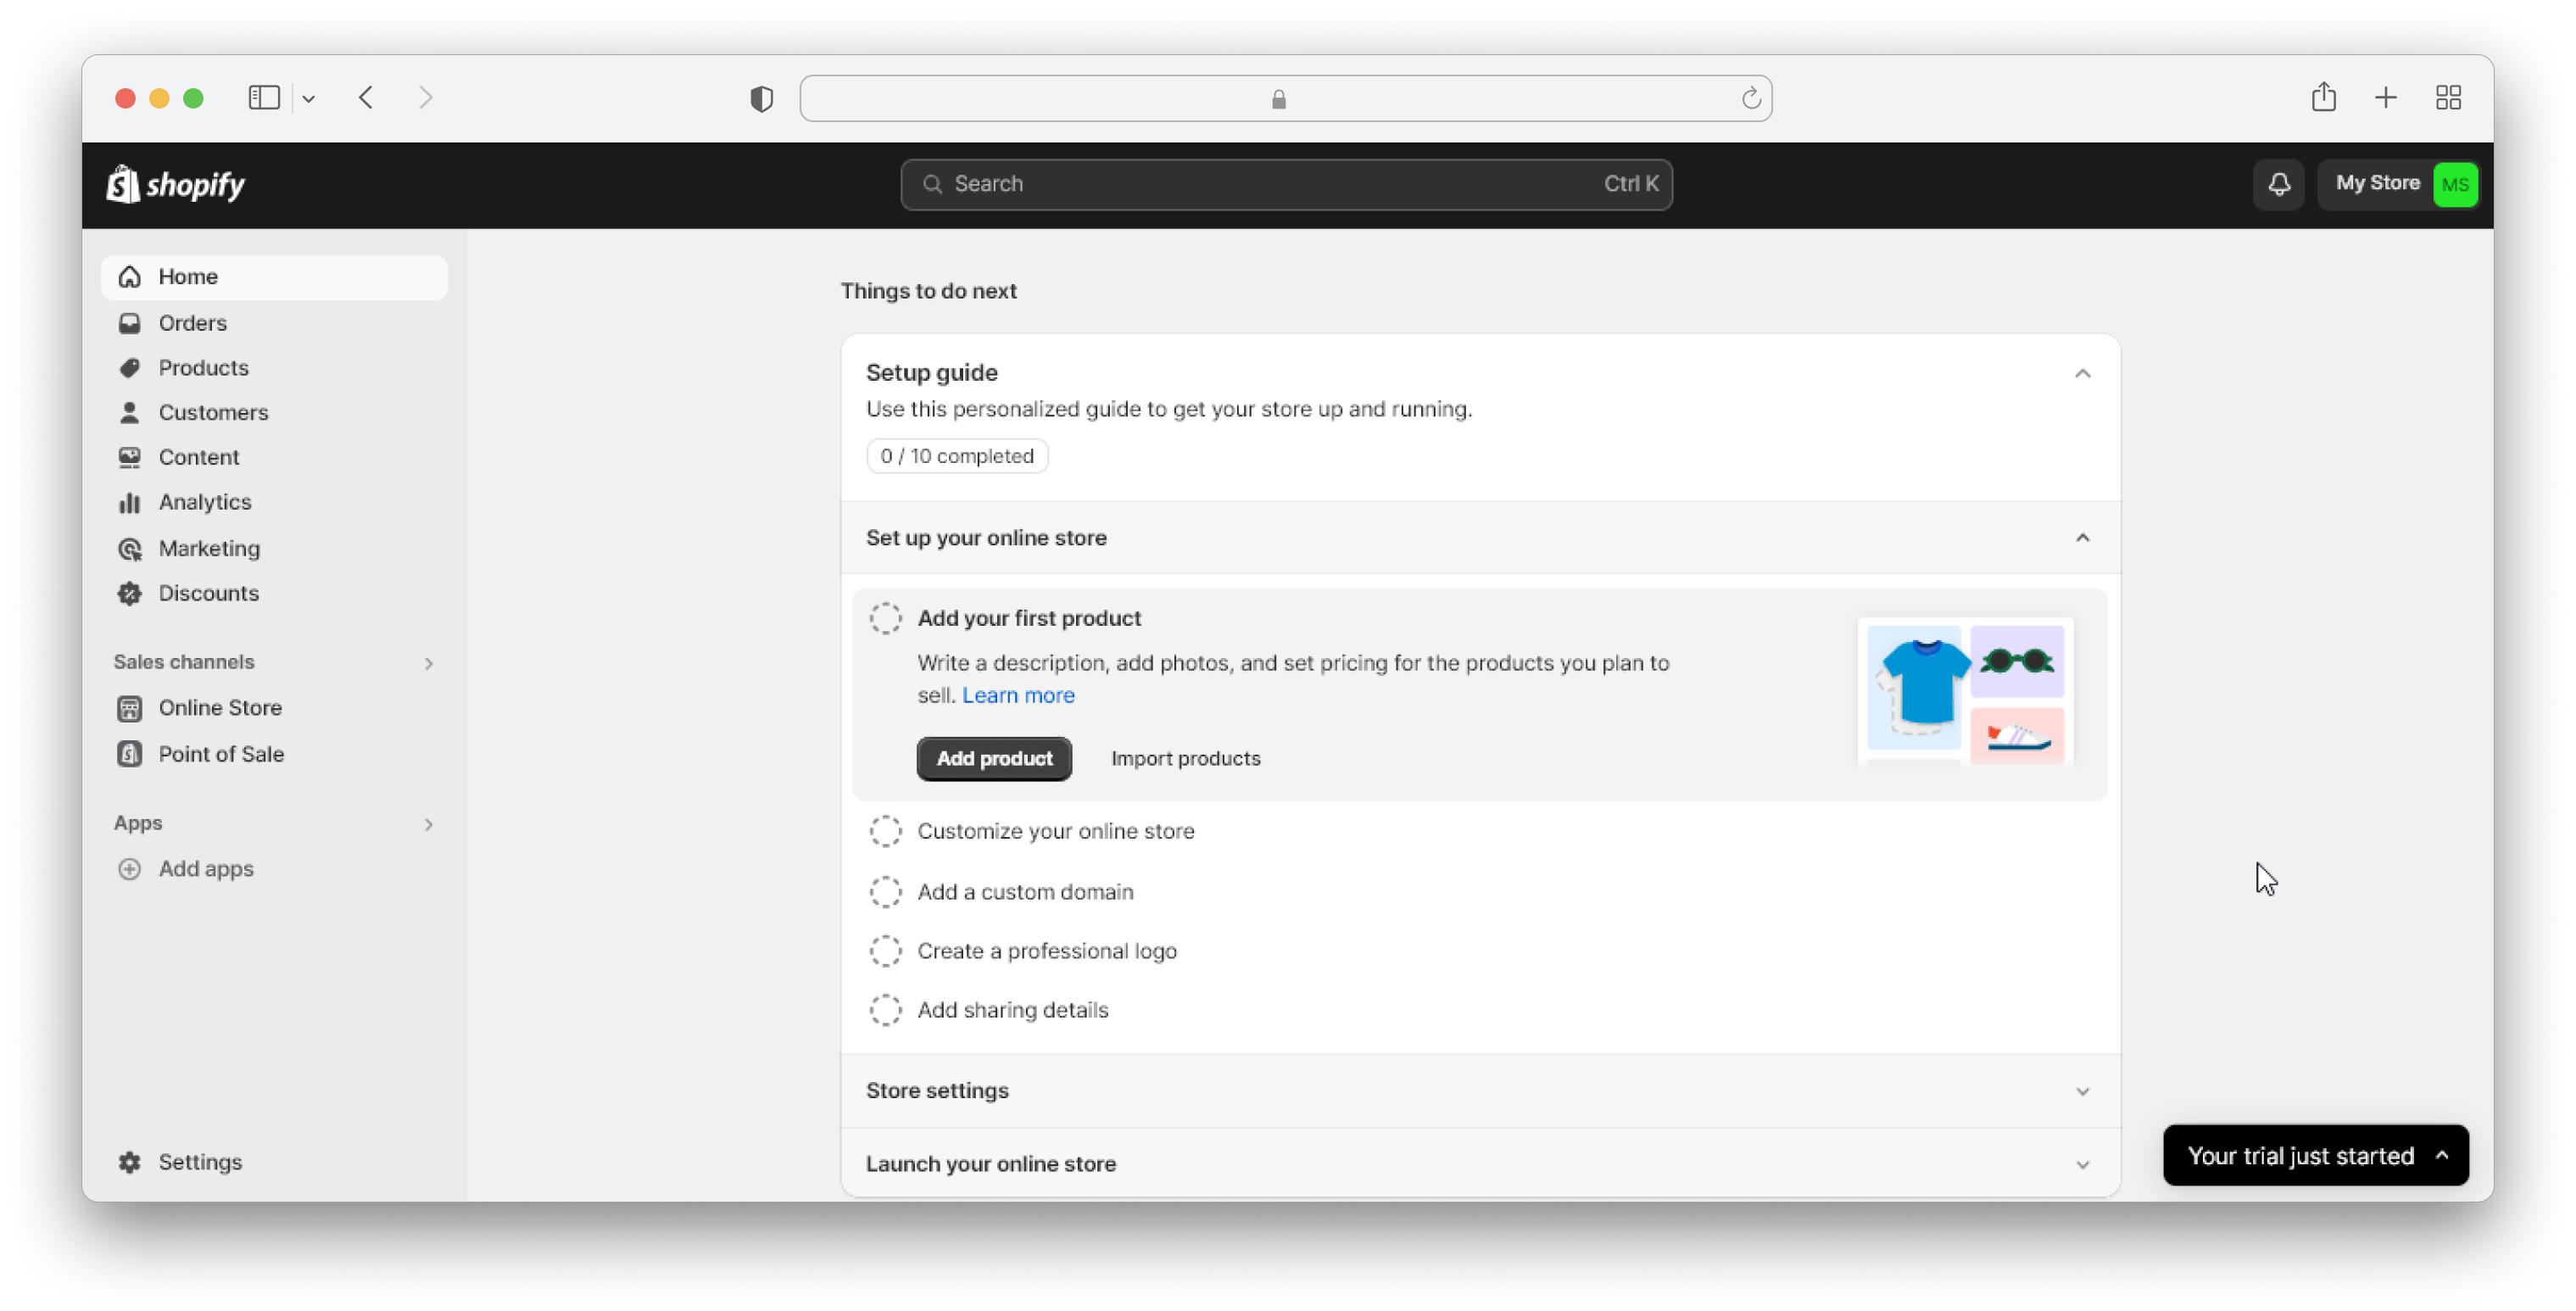
Create an account on Shopify. Shopify offers a trial so you can create a store for free.
Install the Venly Minter App
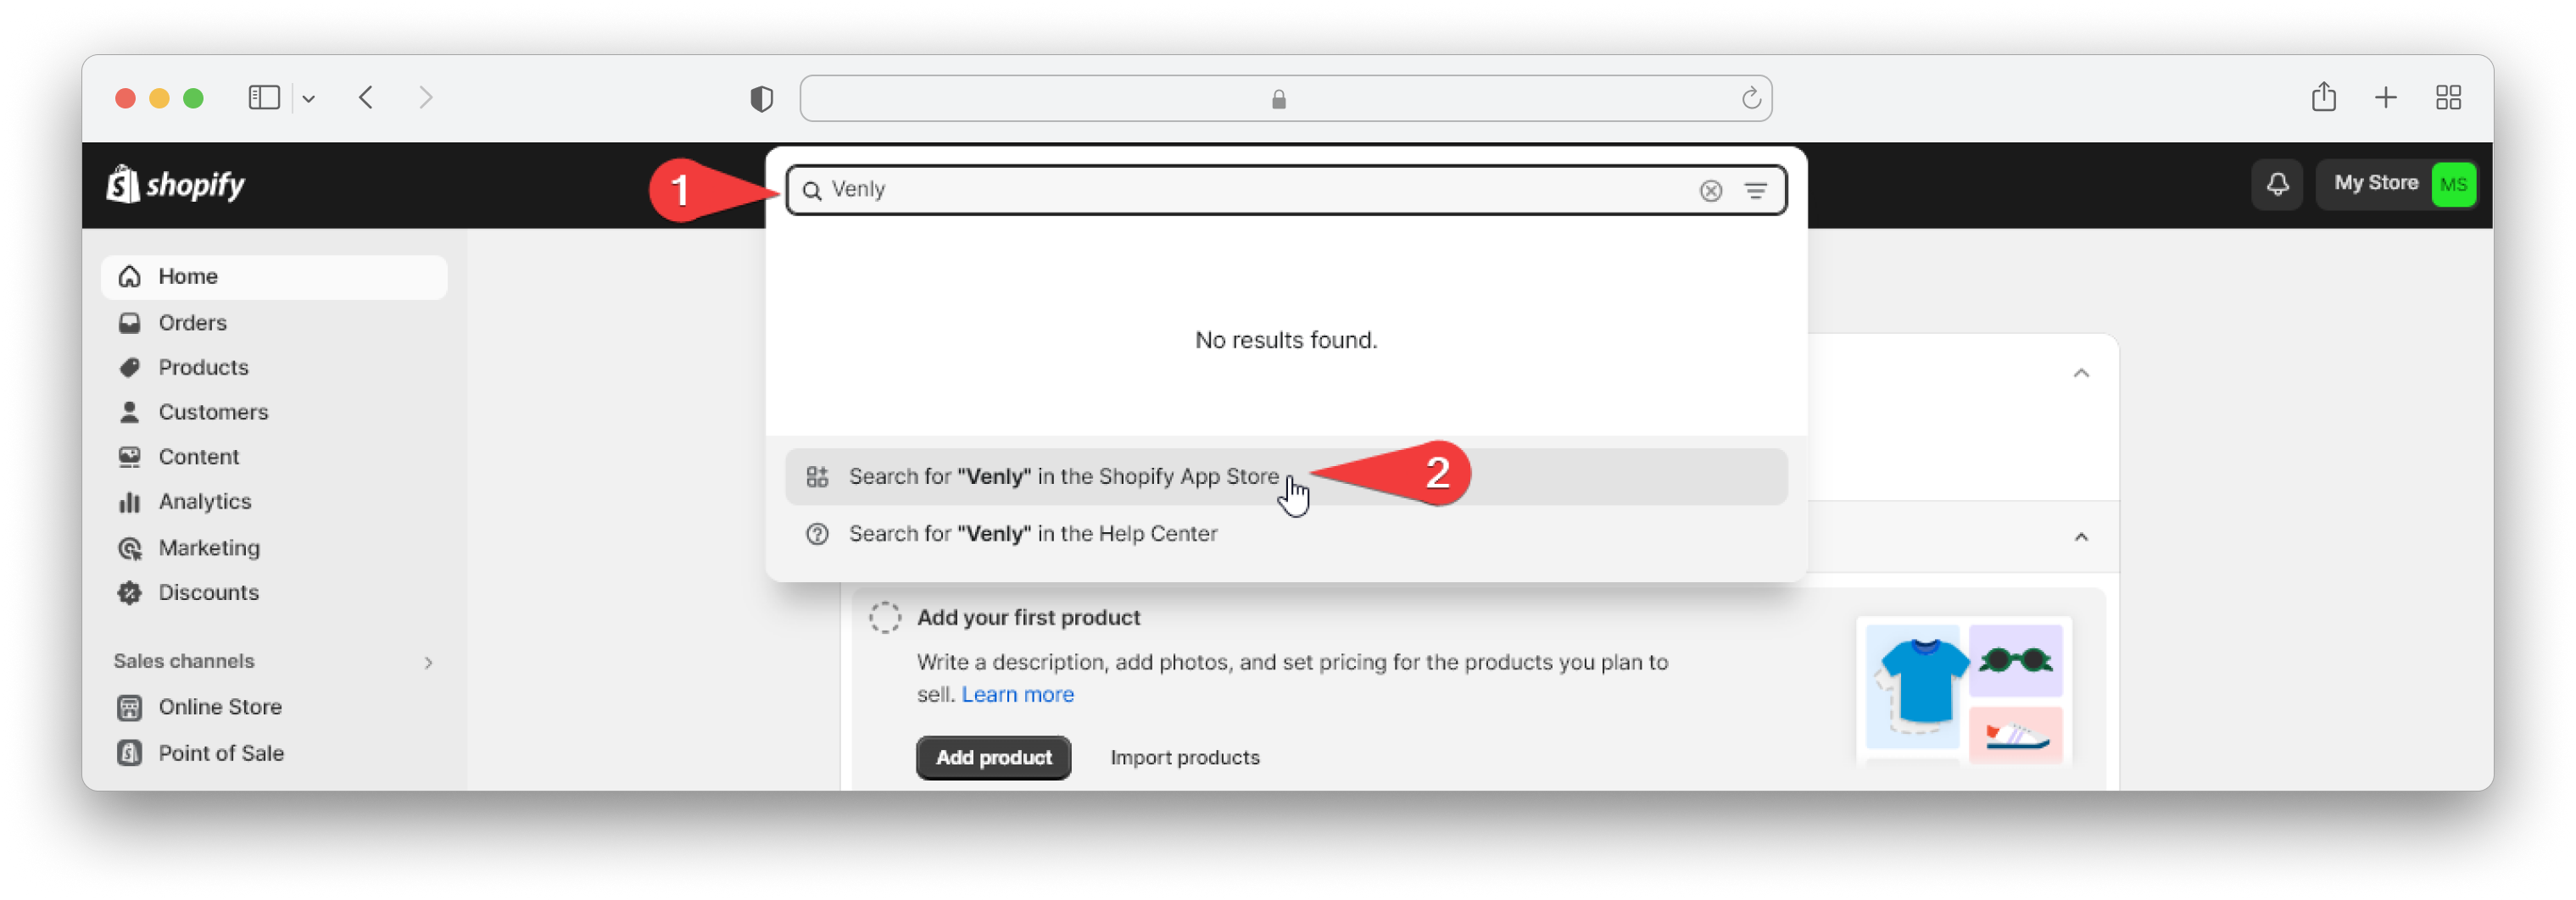
- Install the Venly App by searching for it in the text box.
- Click on Search for "Venly" in the Shopify App Store.
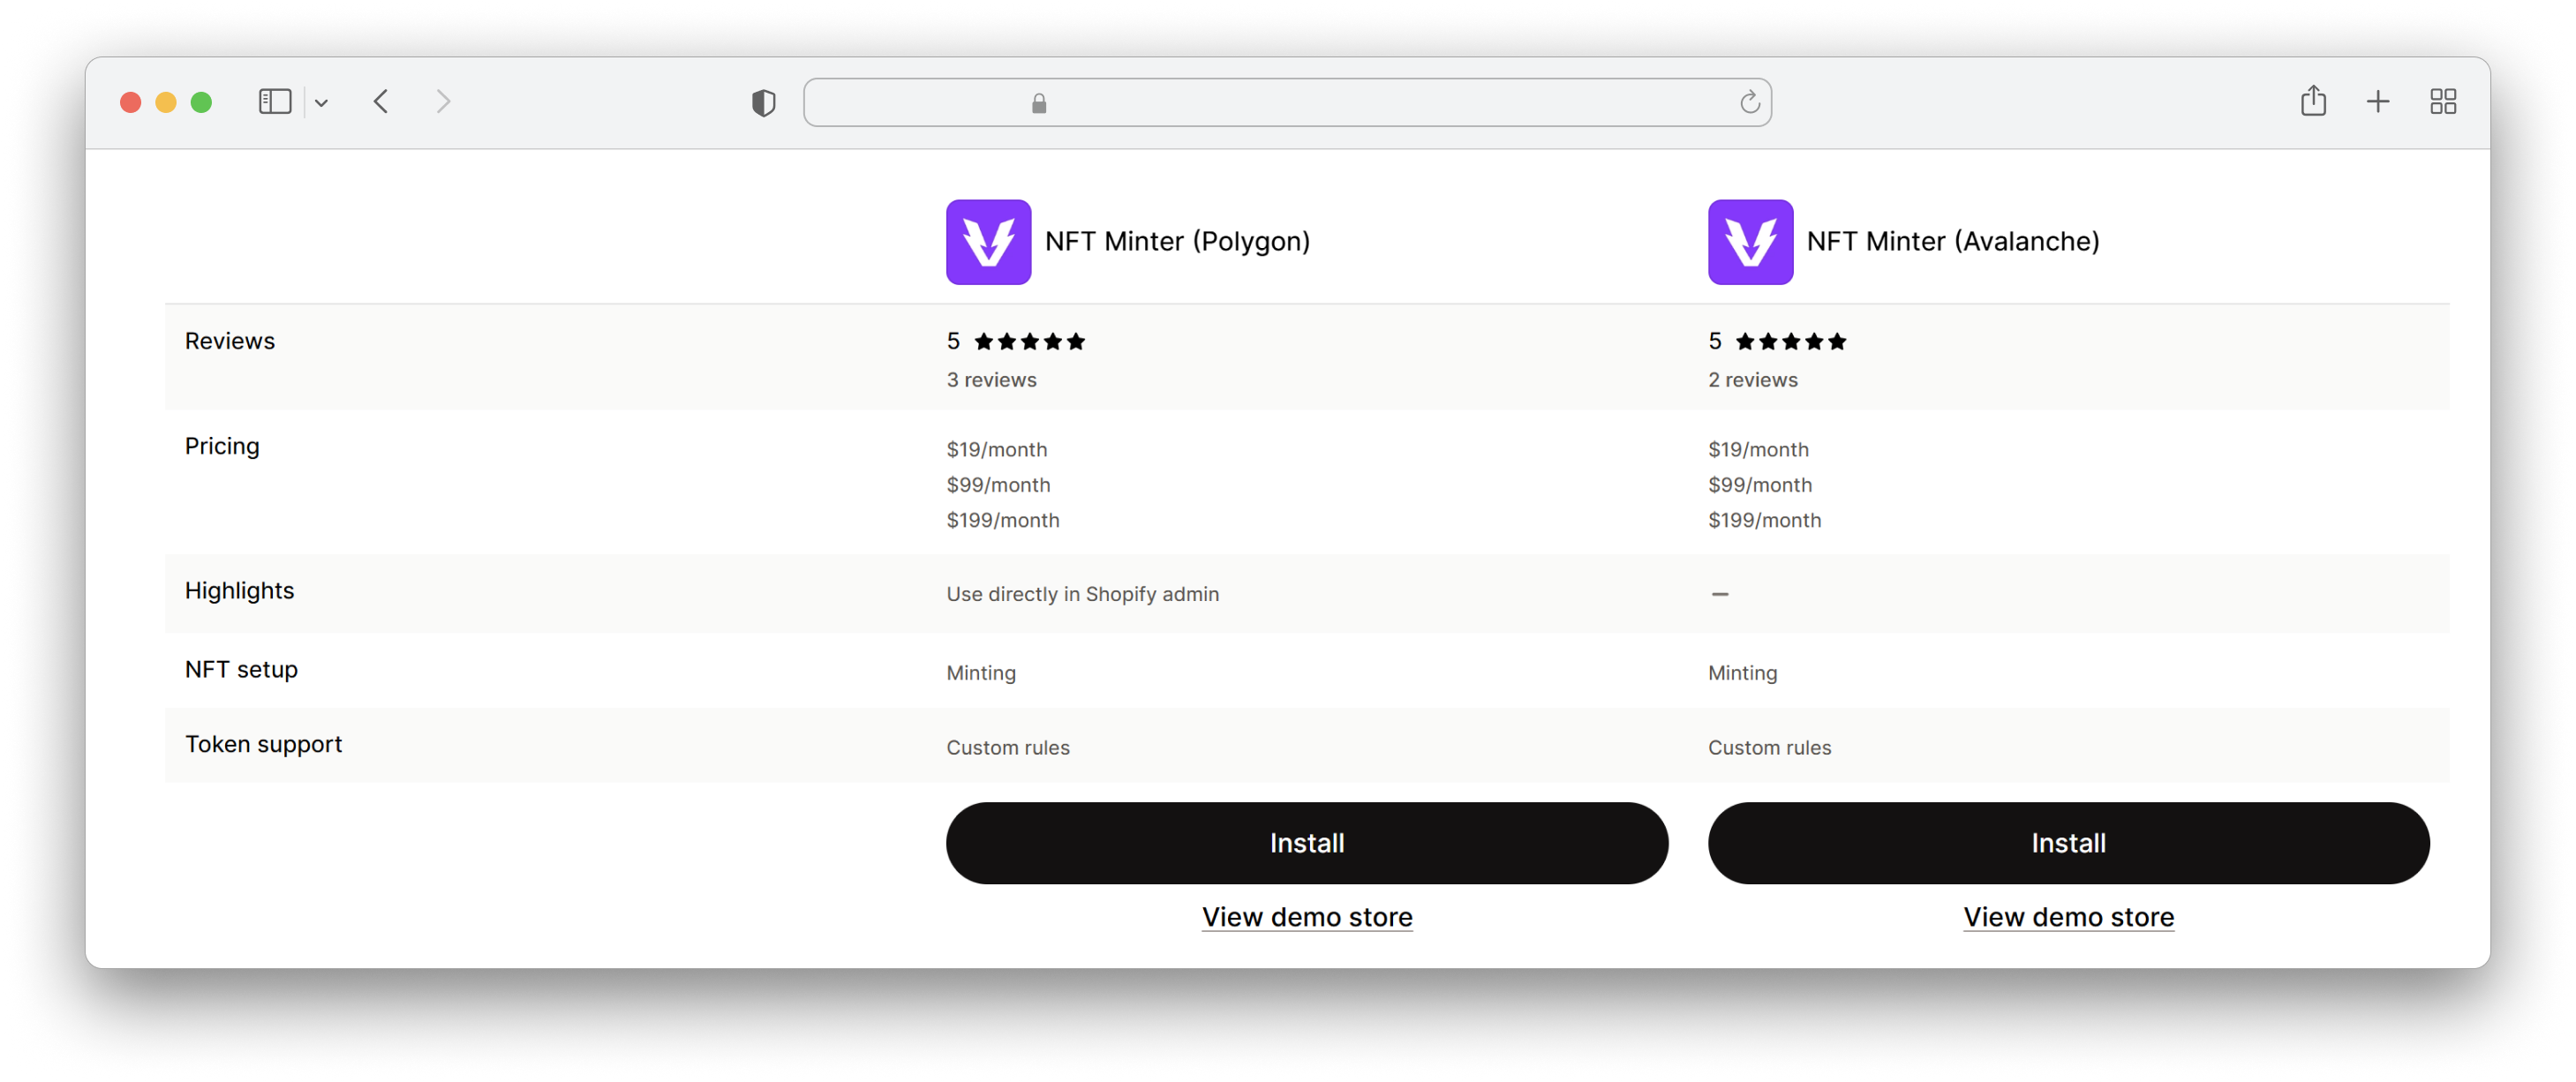
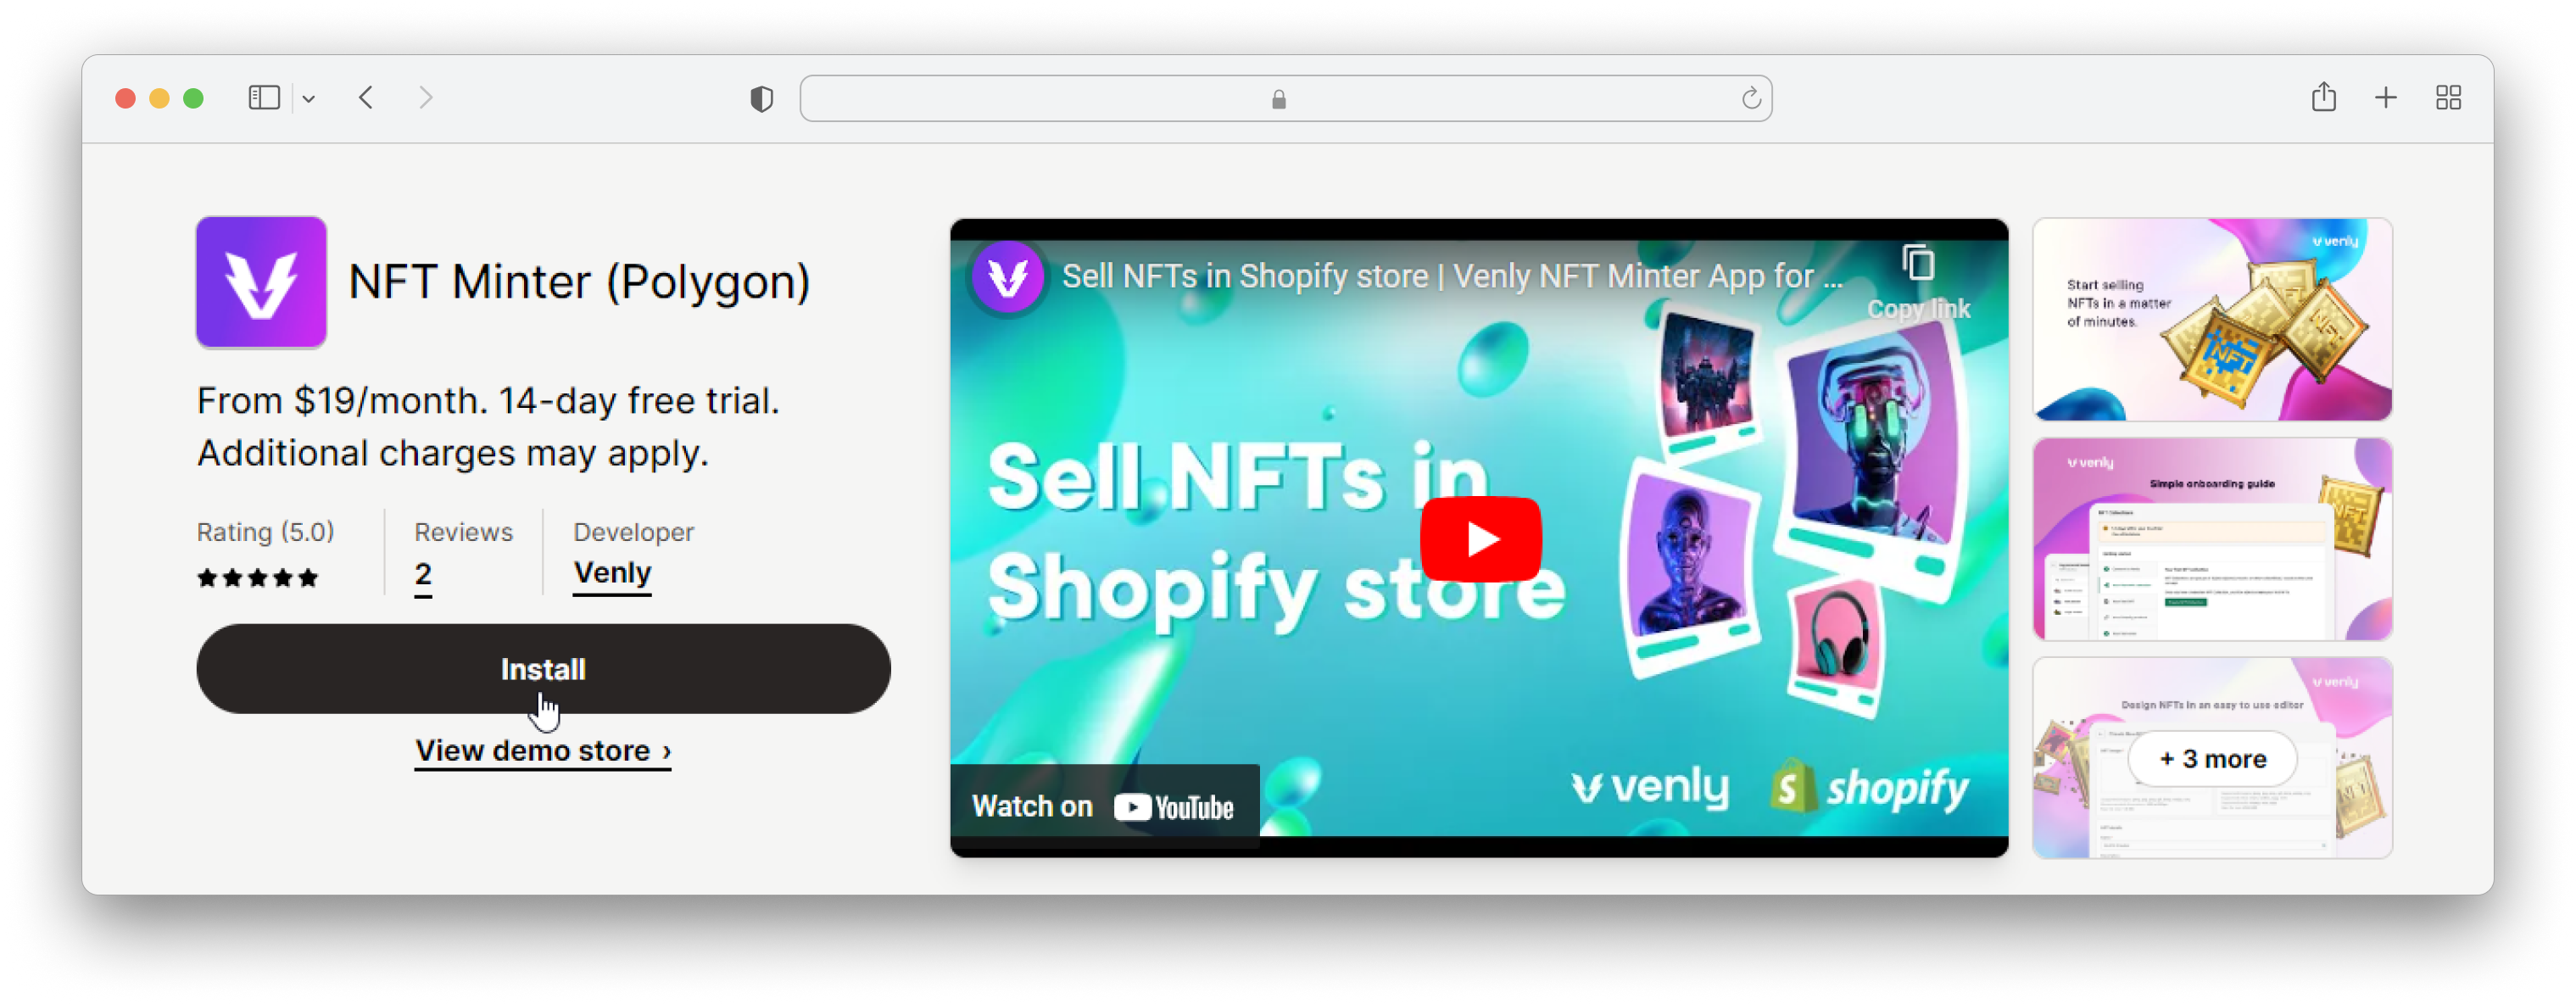
- Select one of the minter apps based on the blockchain you want to choose for your NFTs:
For this example, we will install the NFT Minter (Polygon) app.
- Click on Install:
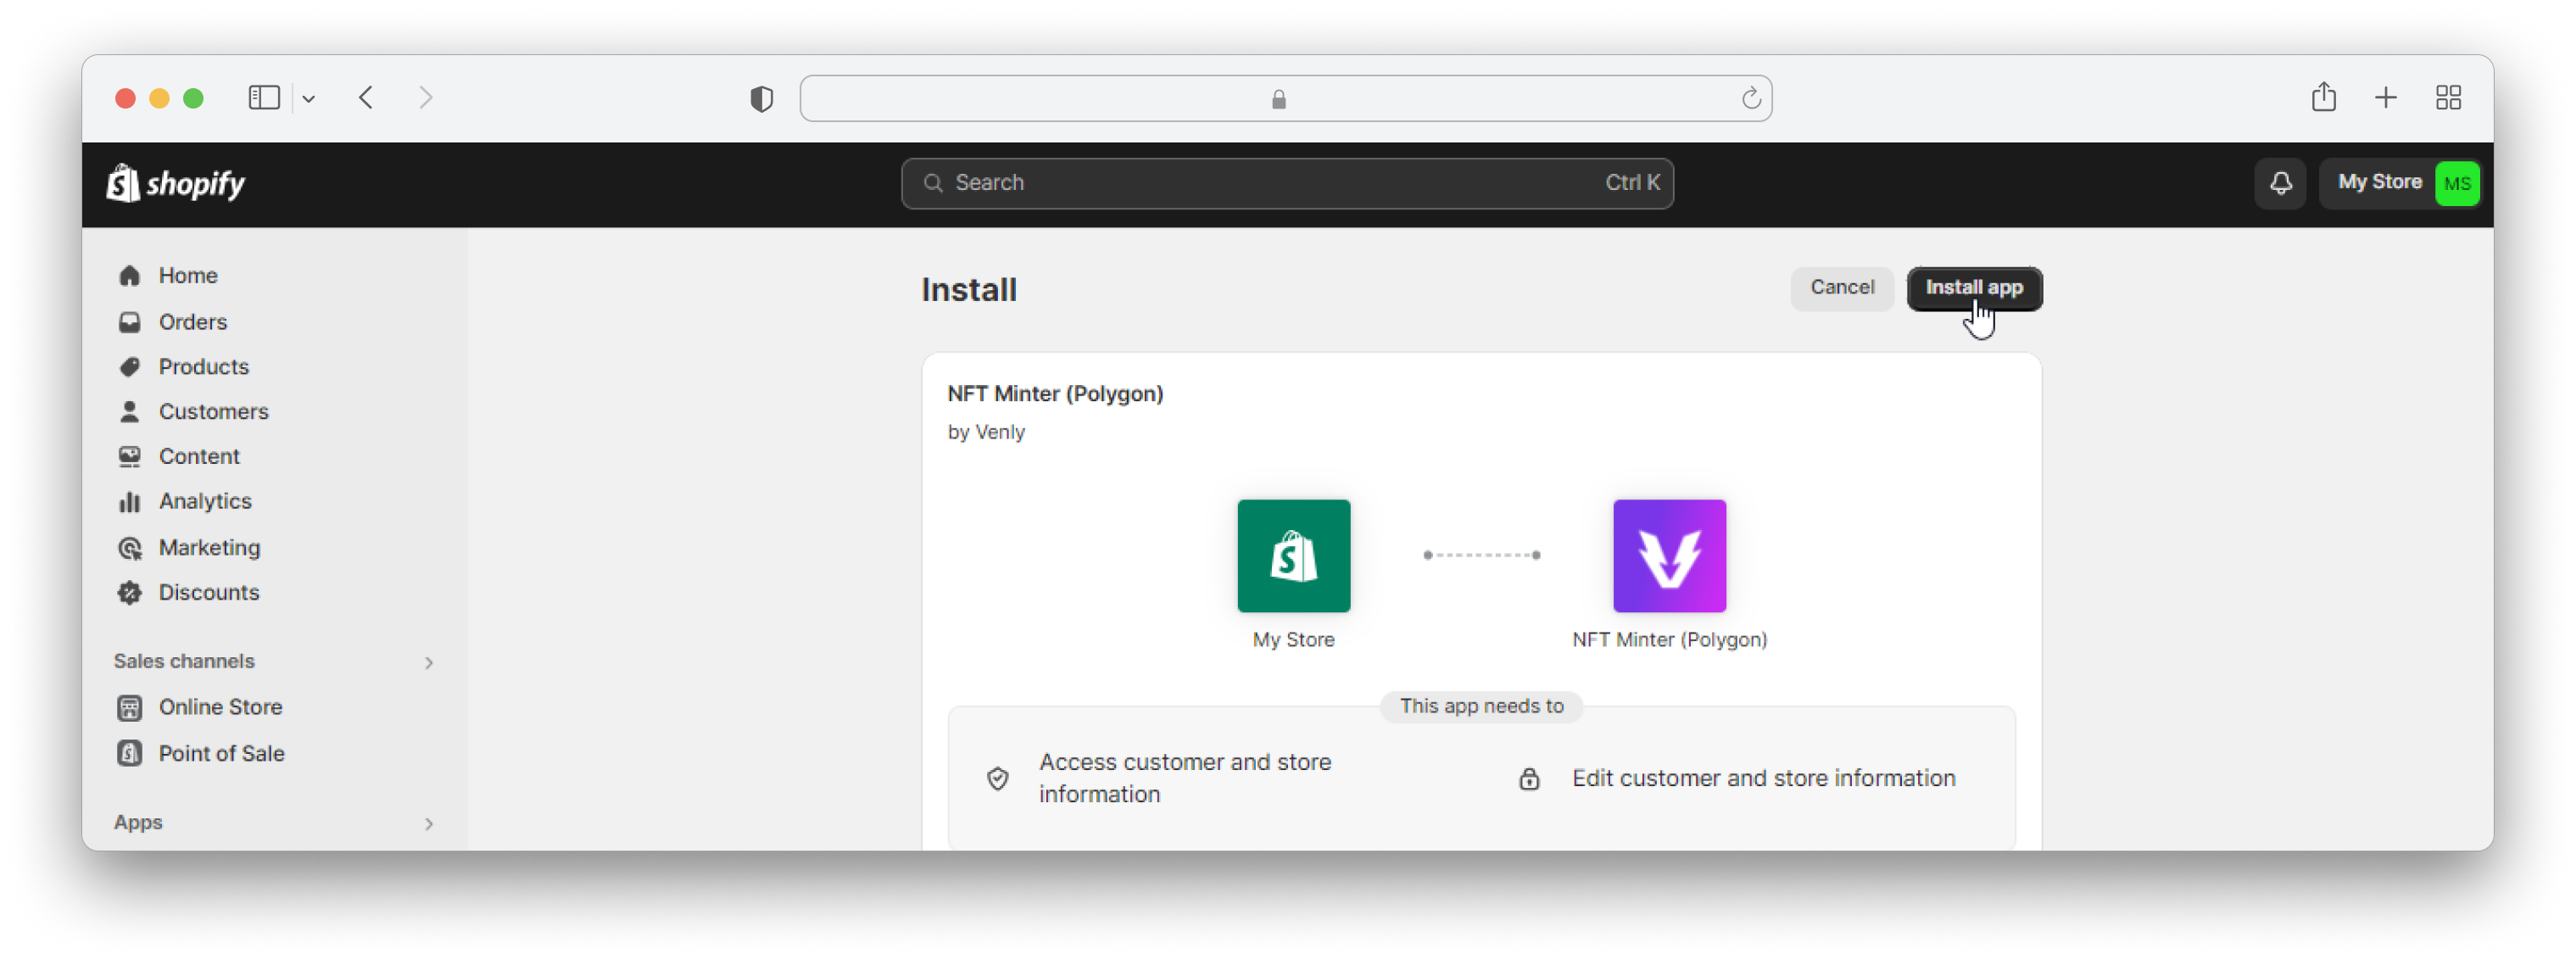
- Click Install app:
- Click on Get Started:
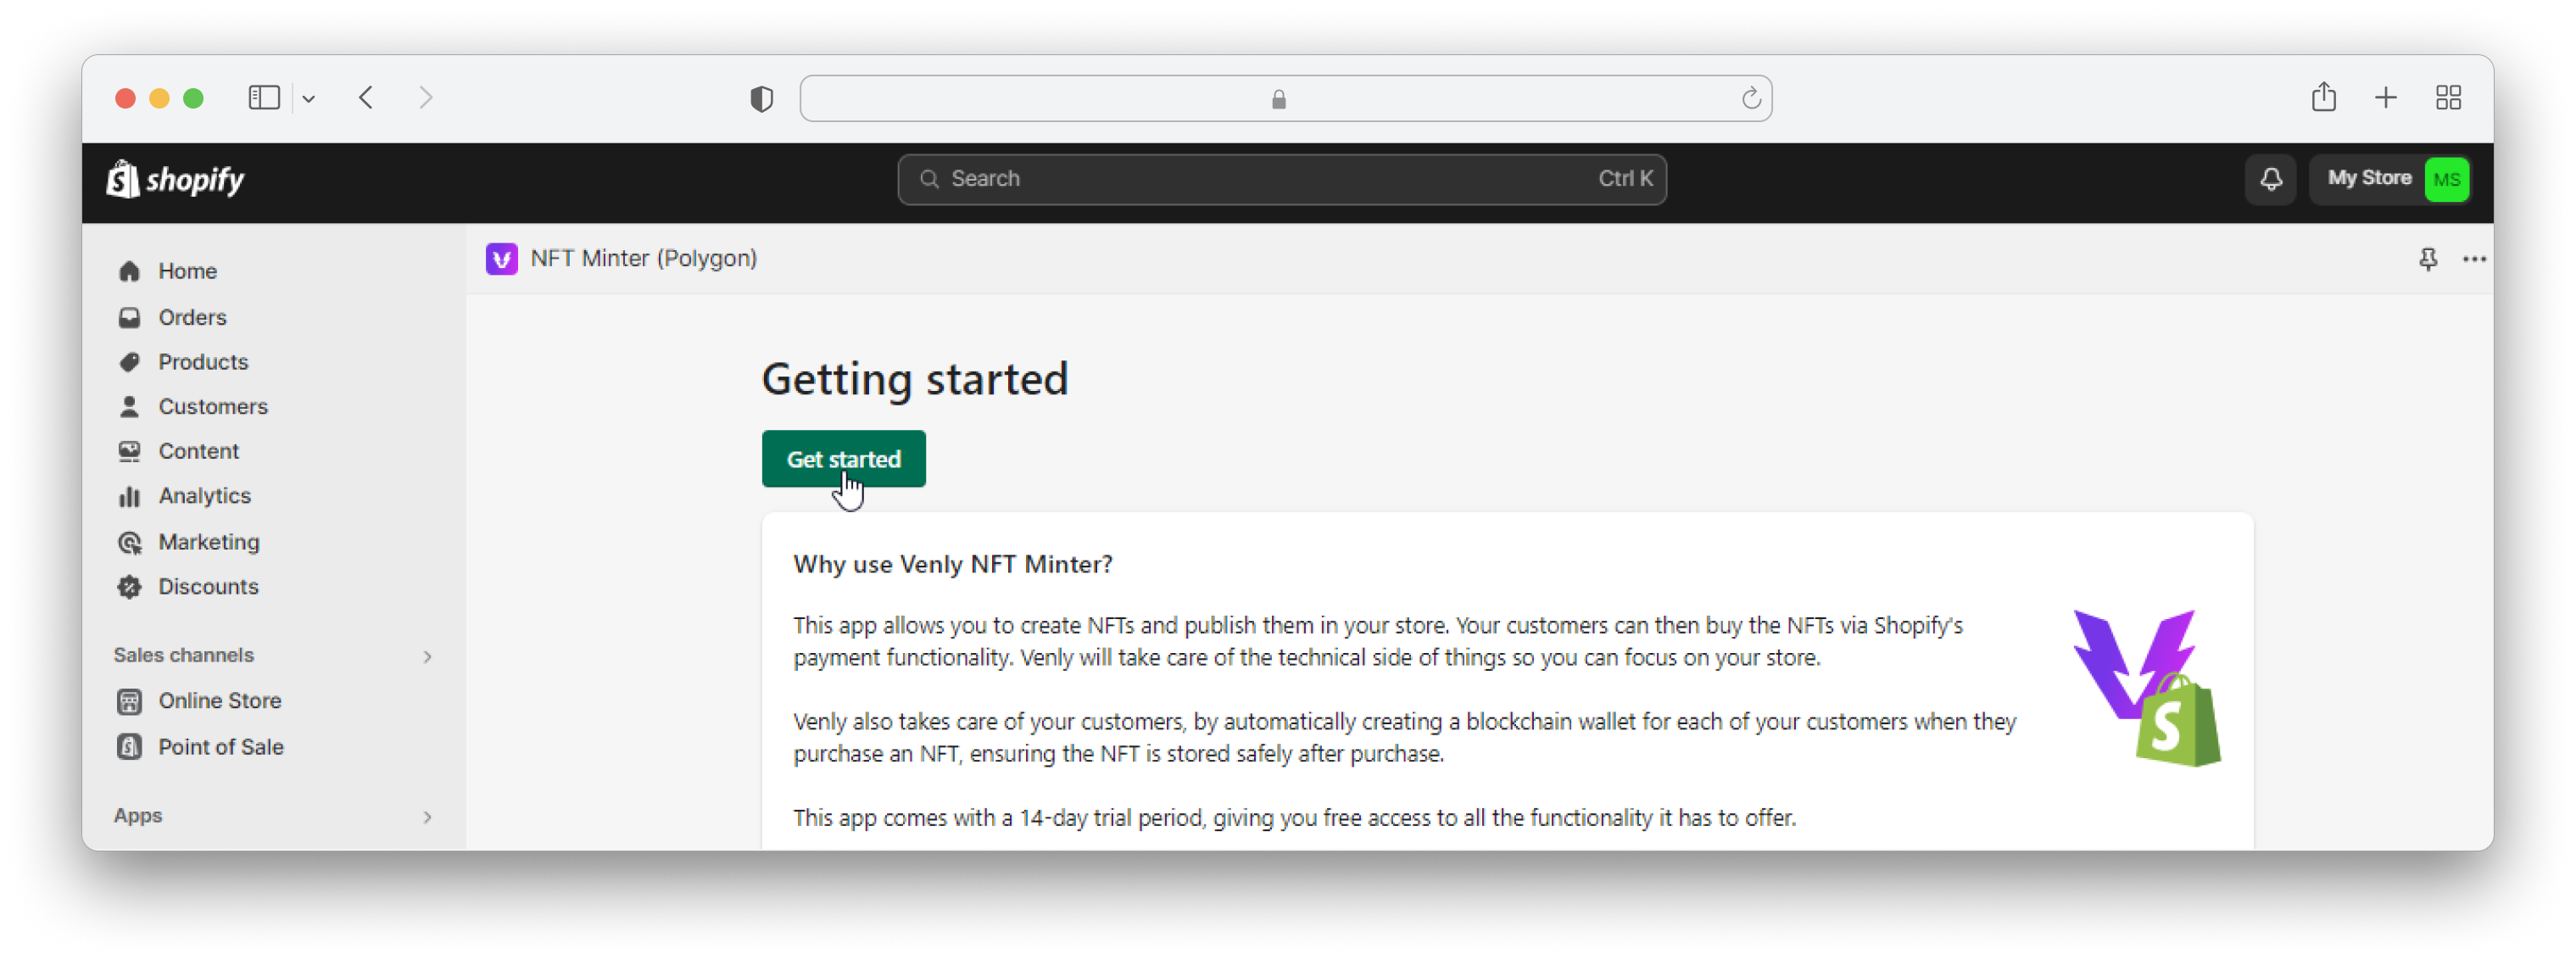
On this page you can read more details on how to use the Minter App.
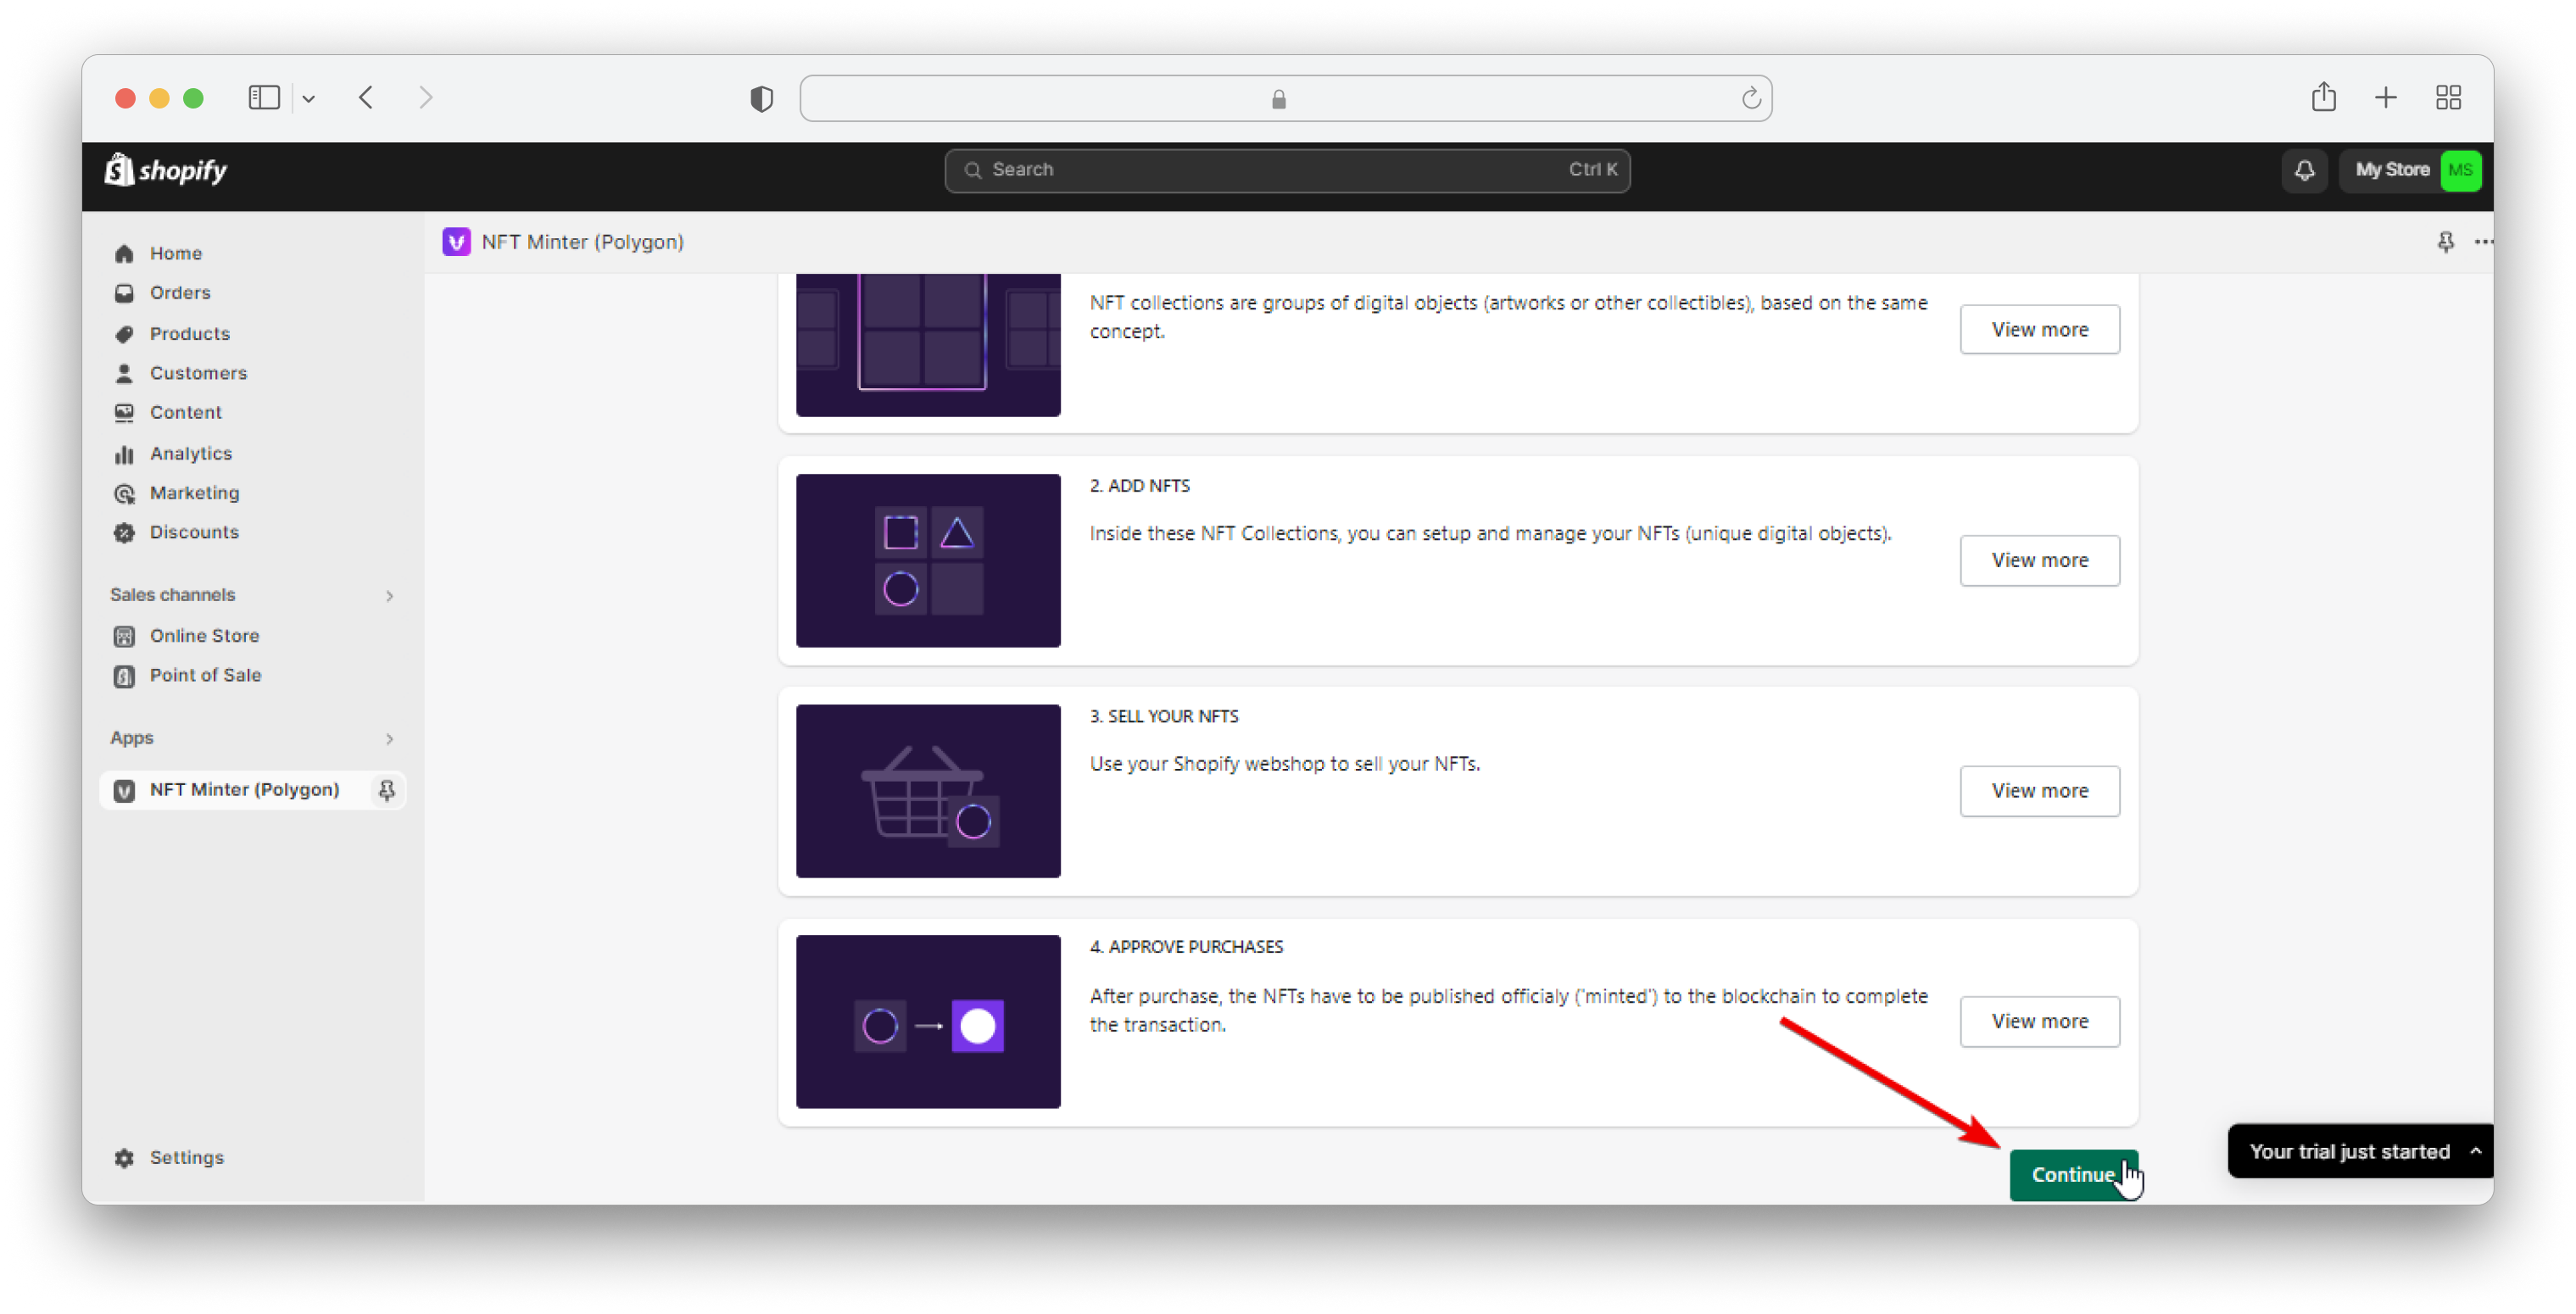
- Scroll down and click on Continue:
Next step is to connect your Venly Account with Shopify.
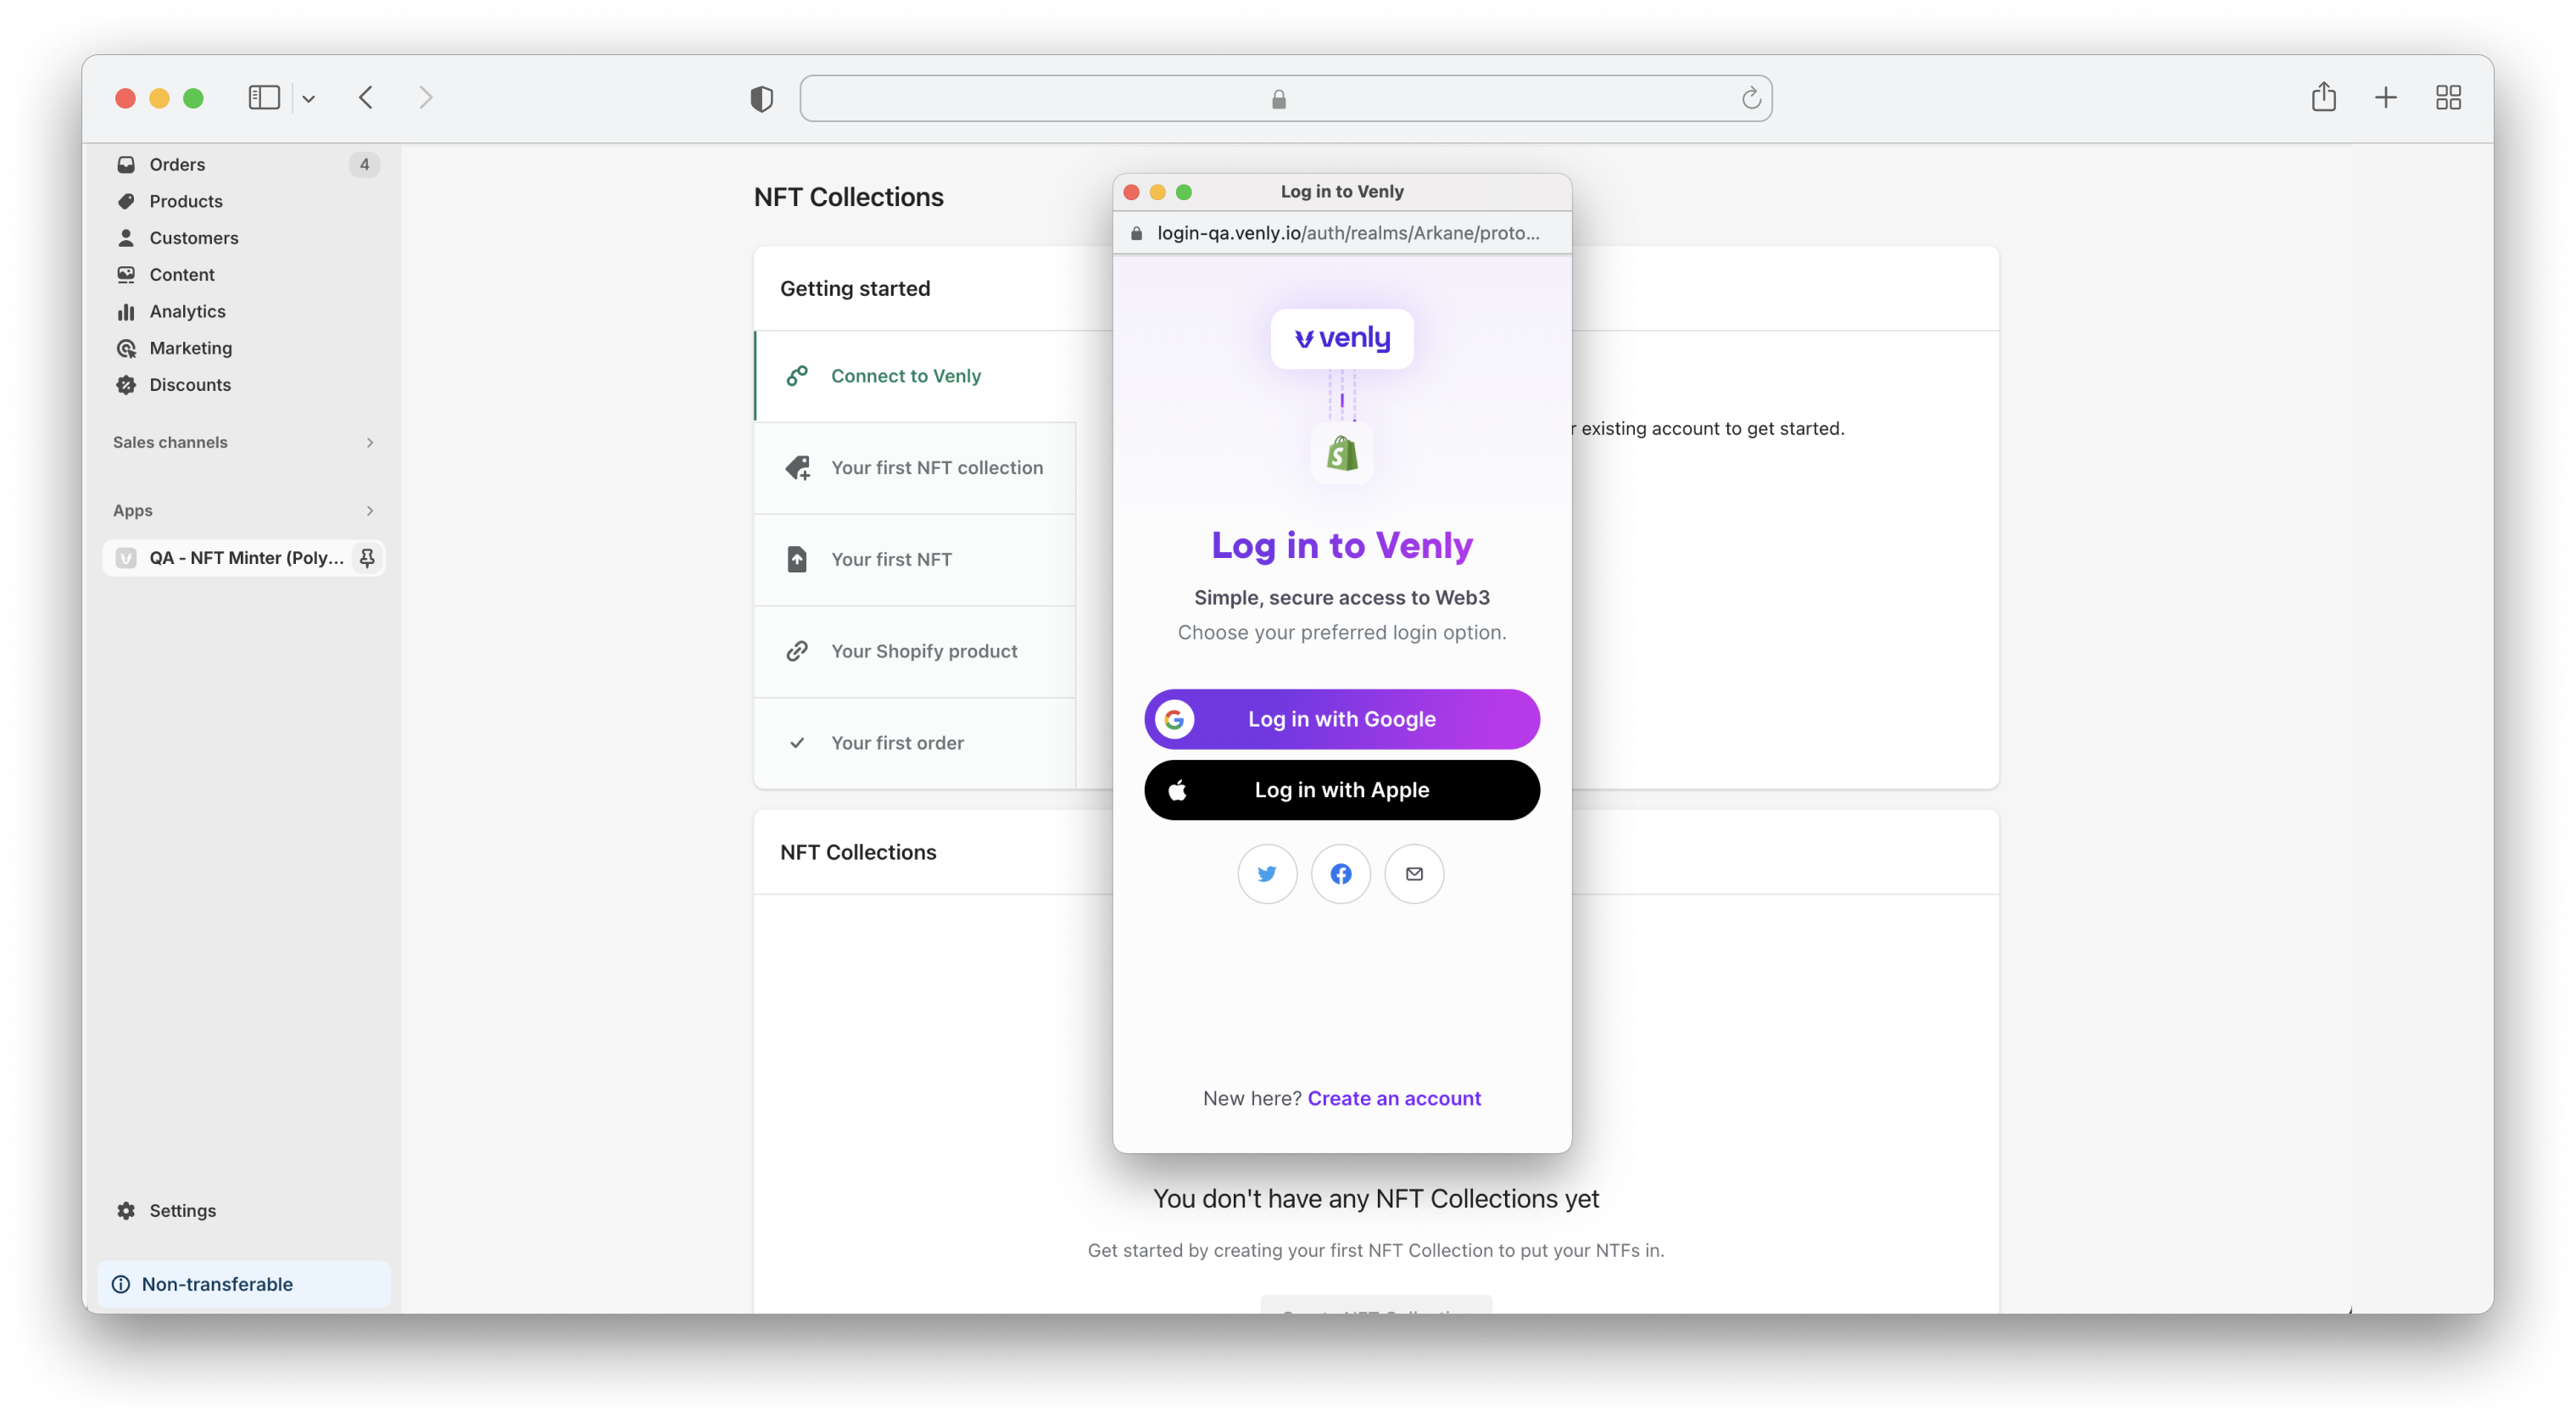
- Next, click on Connect with Venly:

- A pop-up window will appear. Enter your login credentials:
- You have successfully connected with Venly:
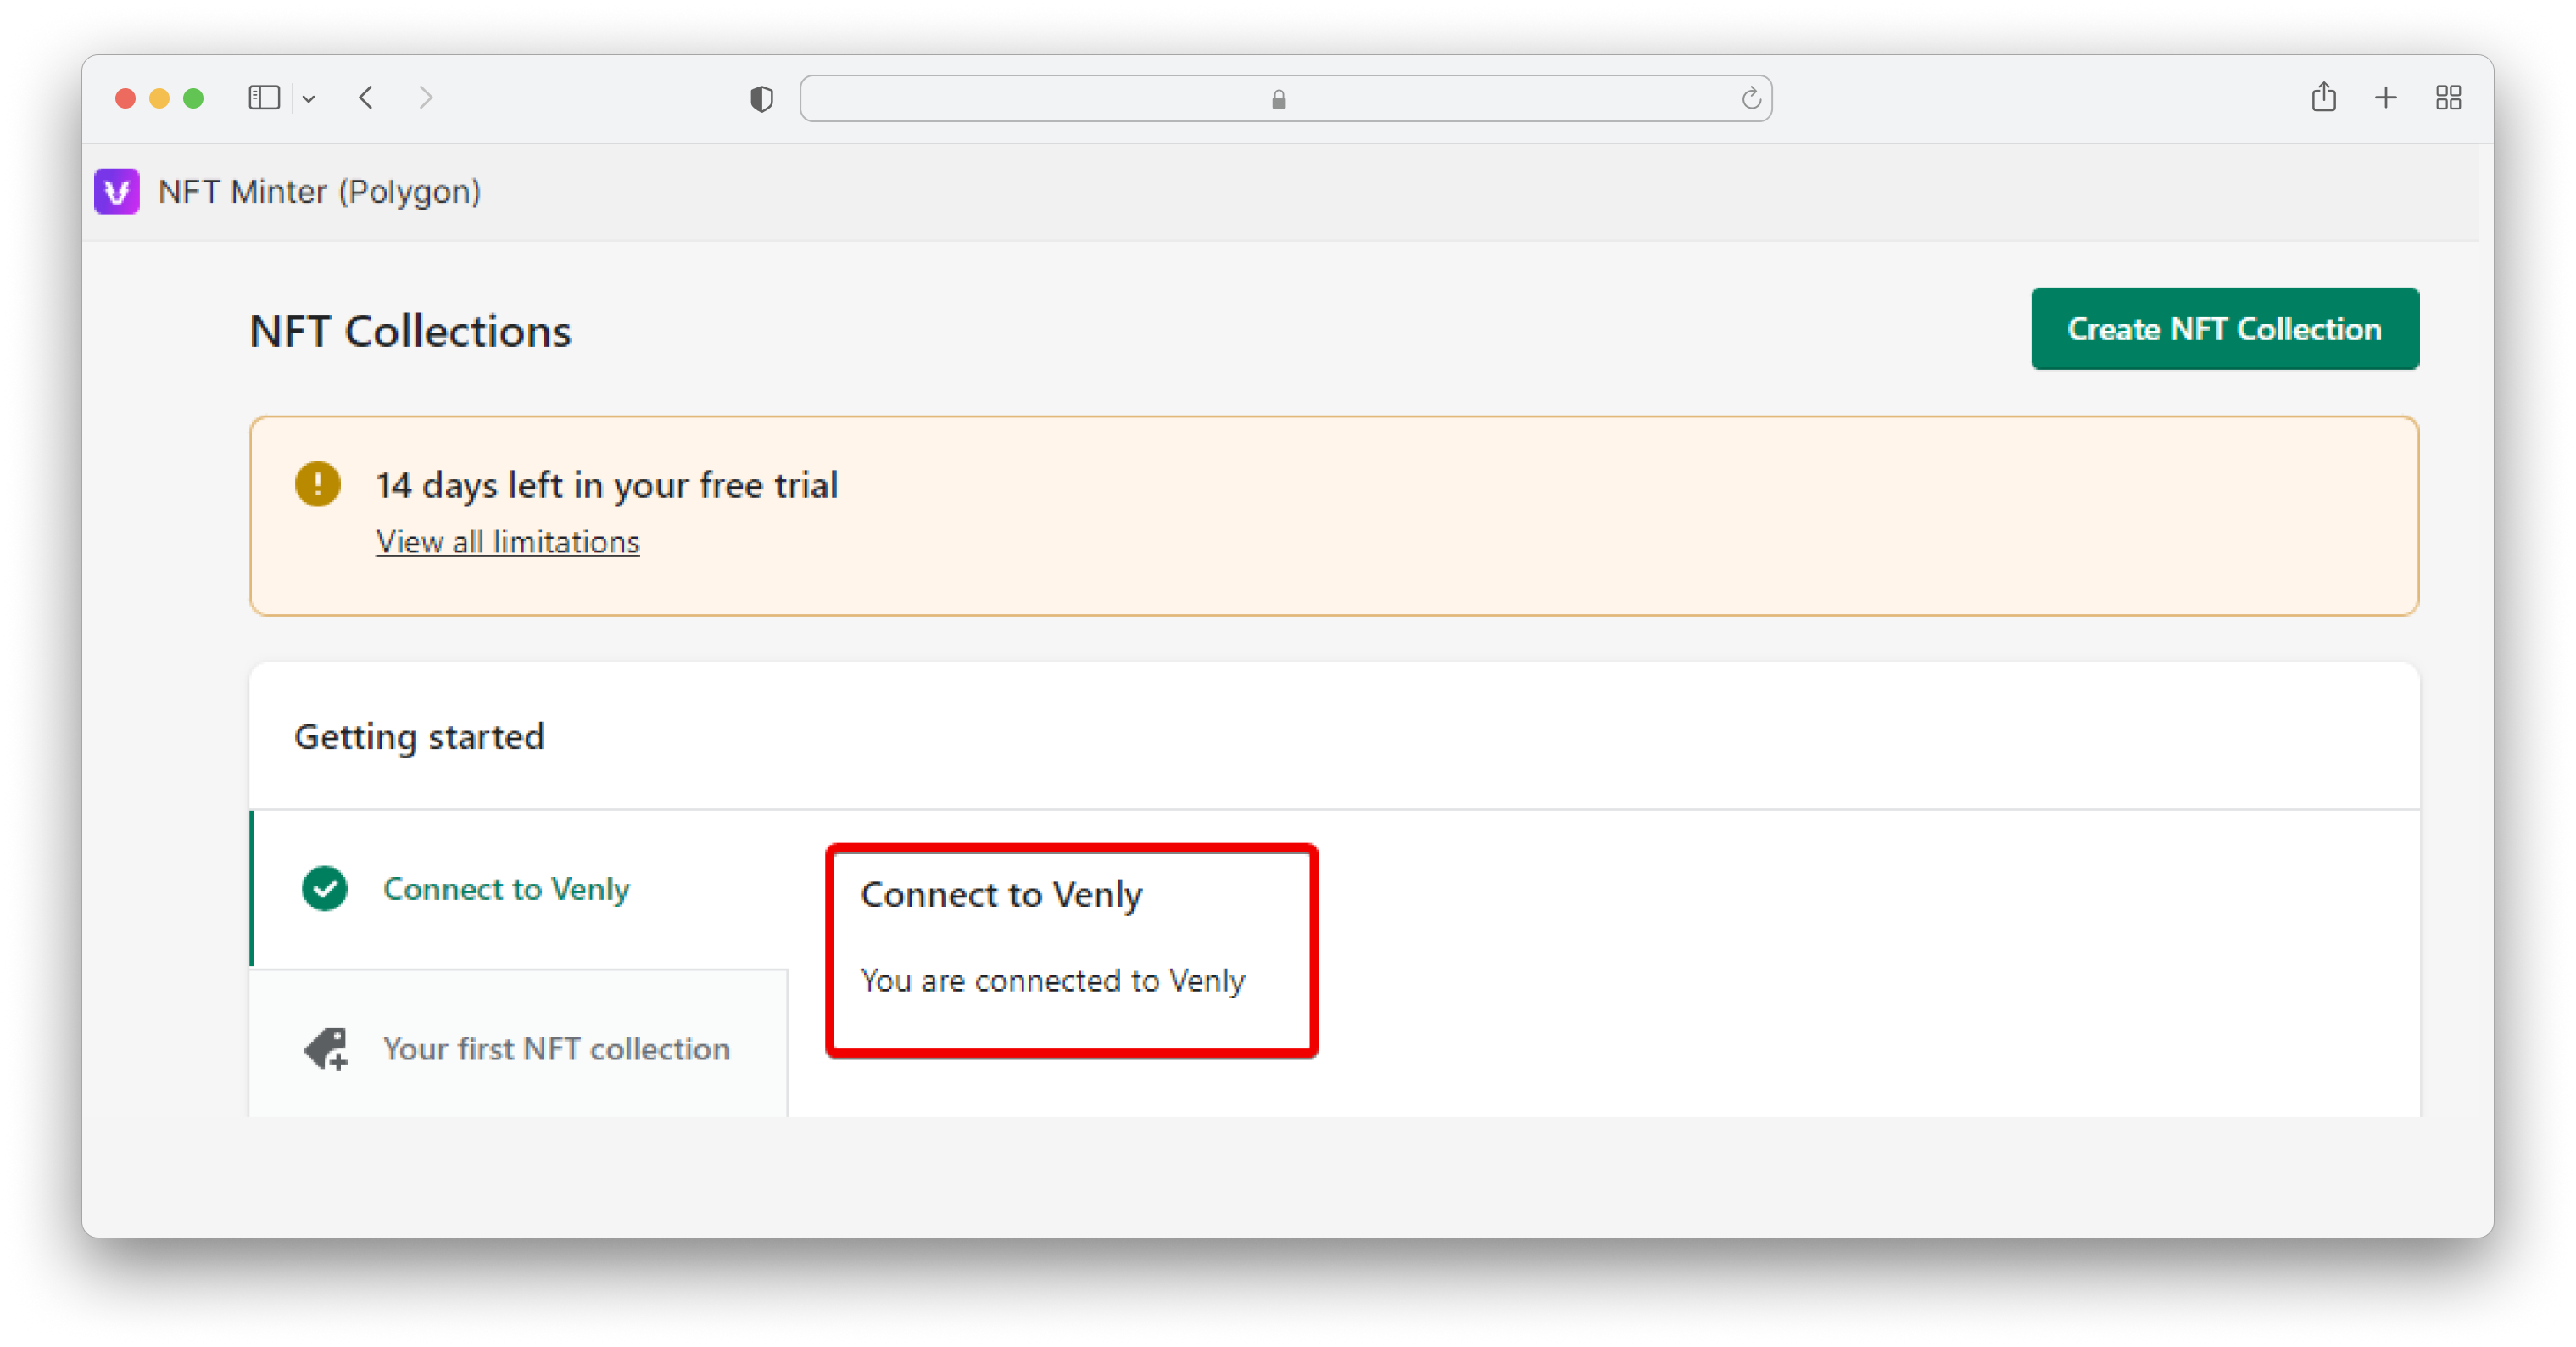
Your Venly account has been successfully linked with Shopify. Now you can continue to create NFT collections and mint NFTs.
Create an NFT collection
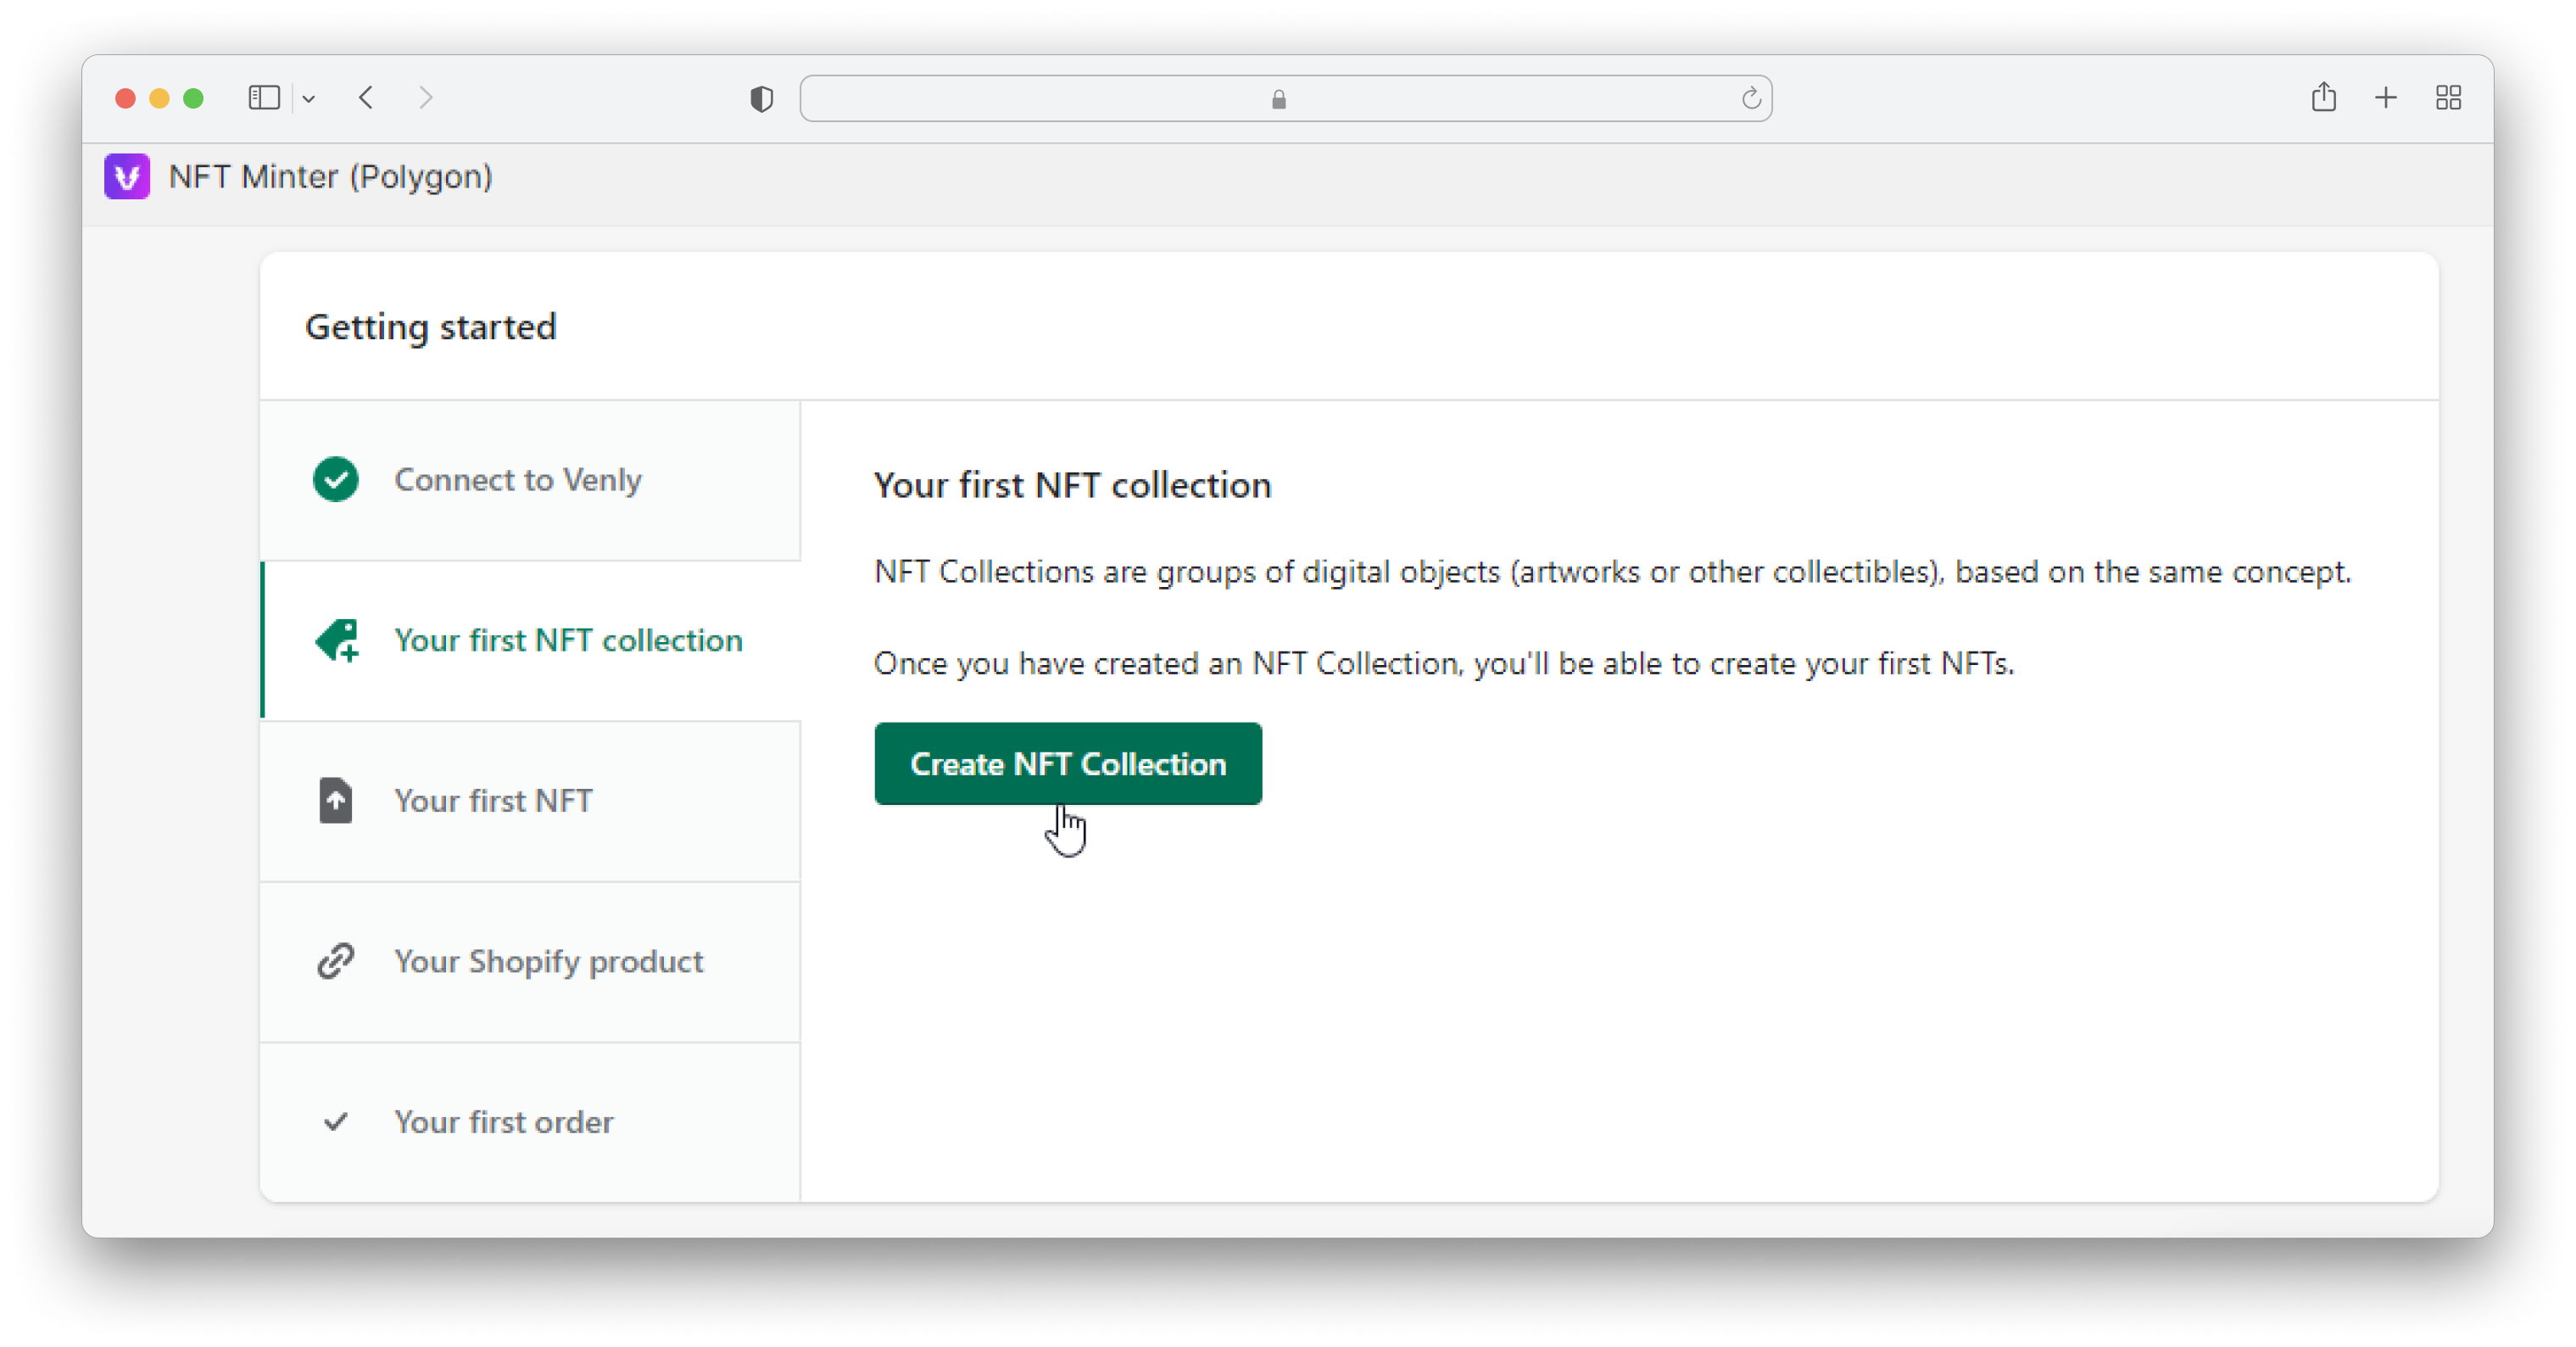
You need to create an NFT collection first before you can create NFTs.
- Click on Your first NFT collection, and proceed by clicking on Create NFT Collection.
The trial version of the Venly Shopify app only allows you to create one collection and five NFTs.
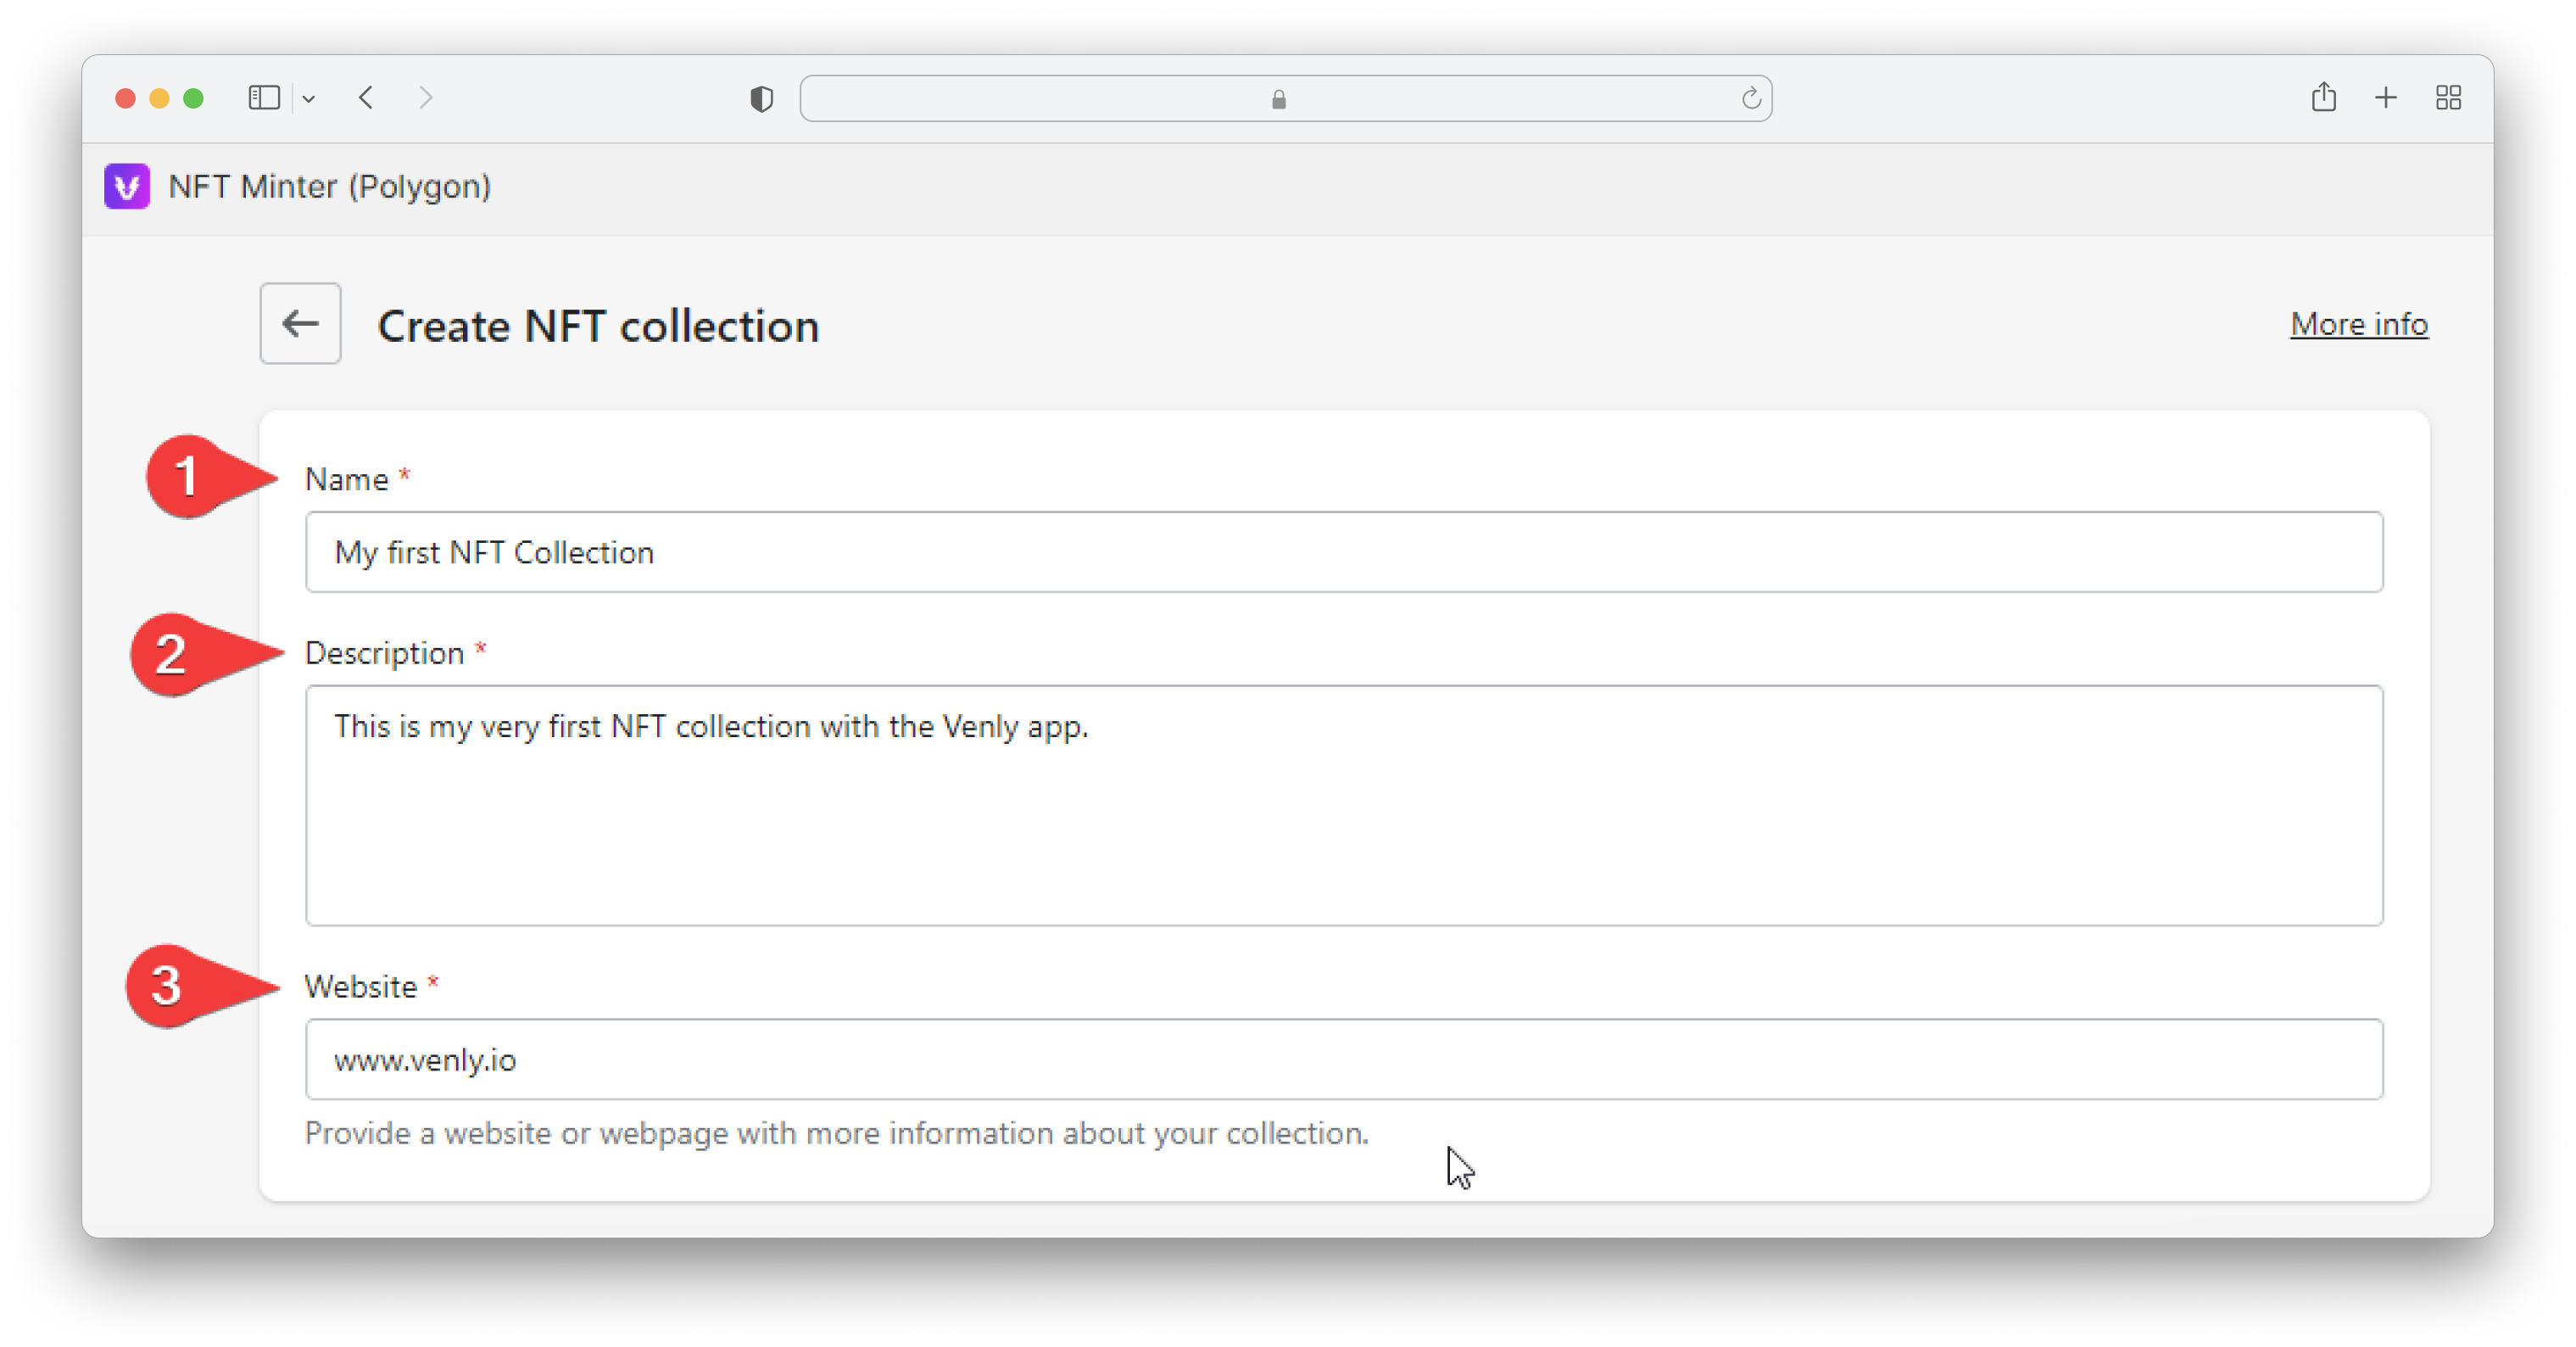
- Enter details of the NFT collection on the next screen:
- Name: This is the name of your NFT collection.
- Description: This is the description of your NFT collection.
- Website: You can add a URL to your NFT collection. This can be anything such as a link to your website.
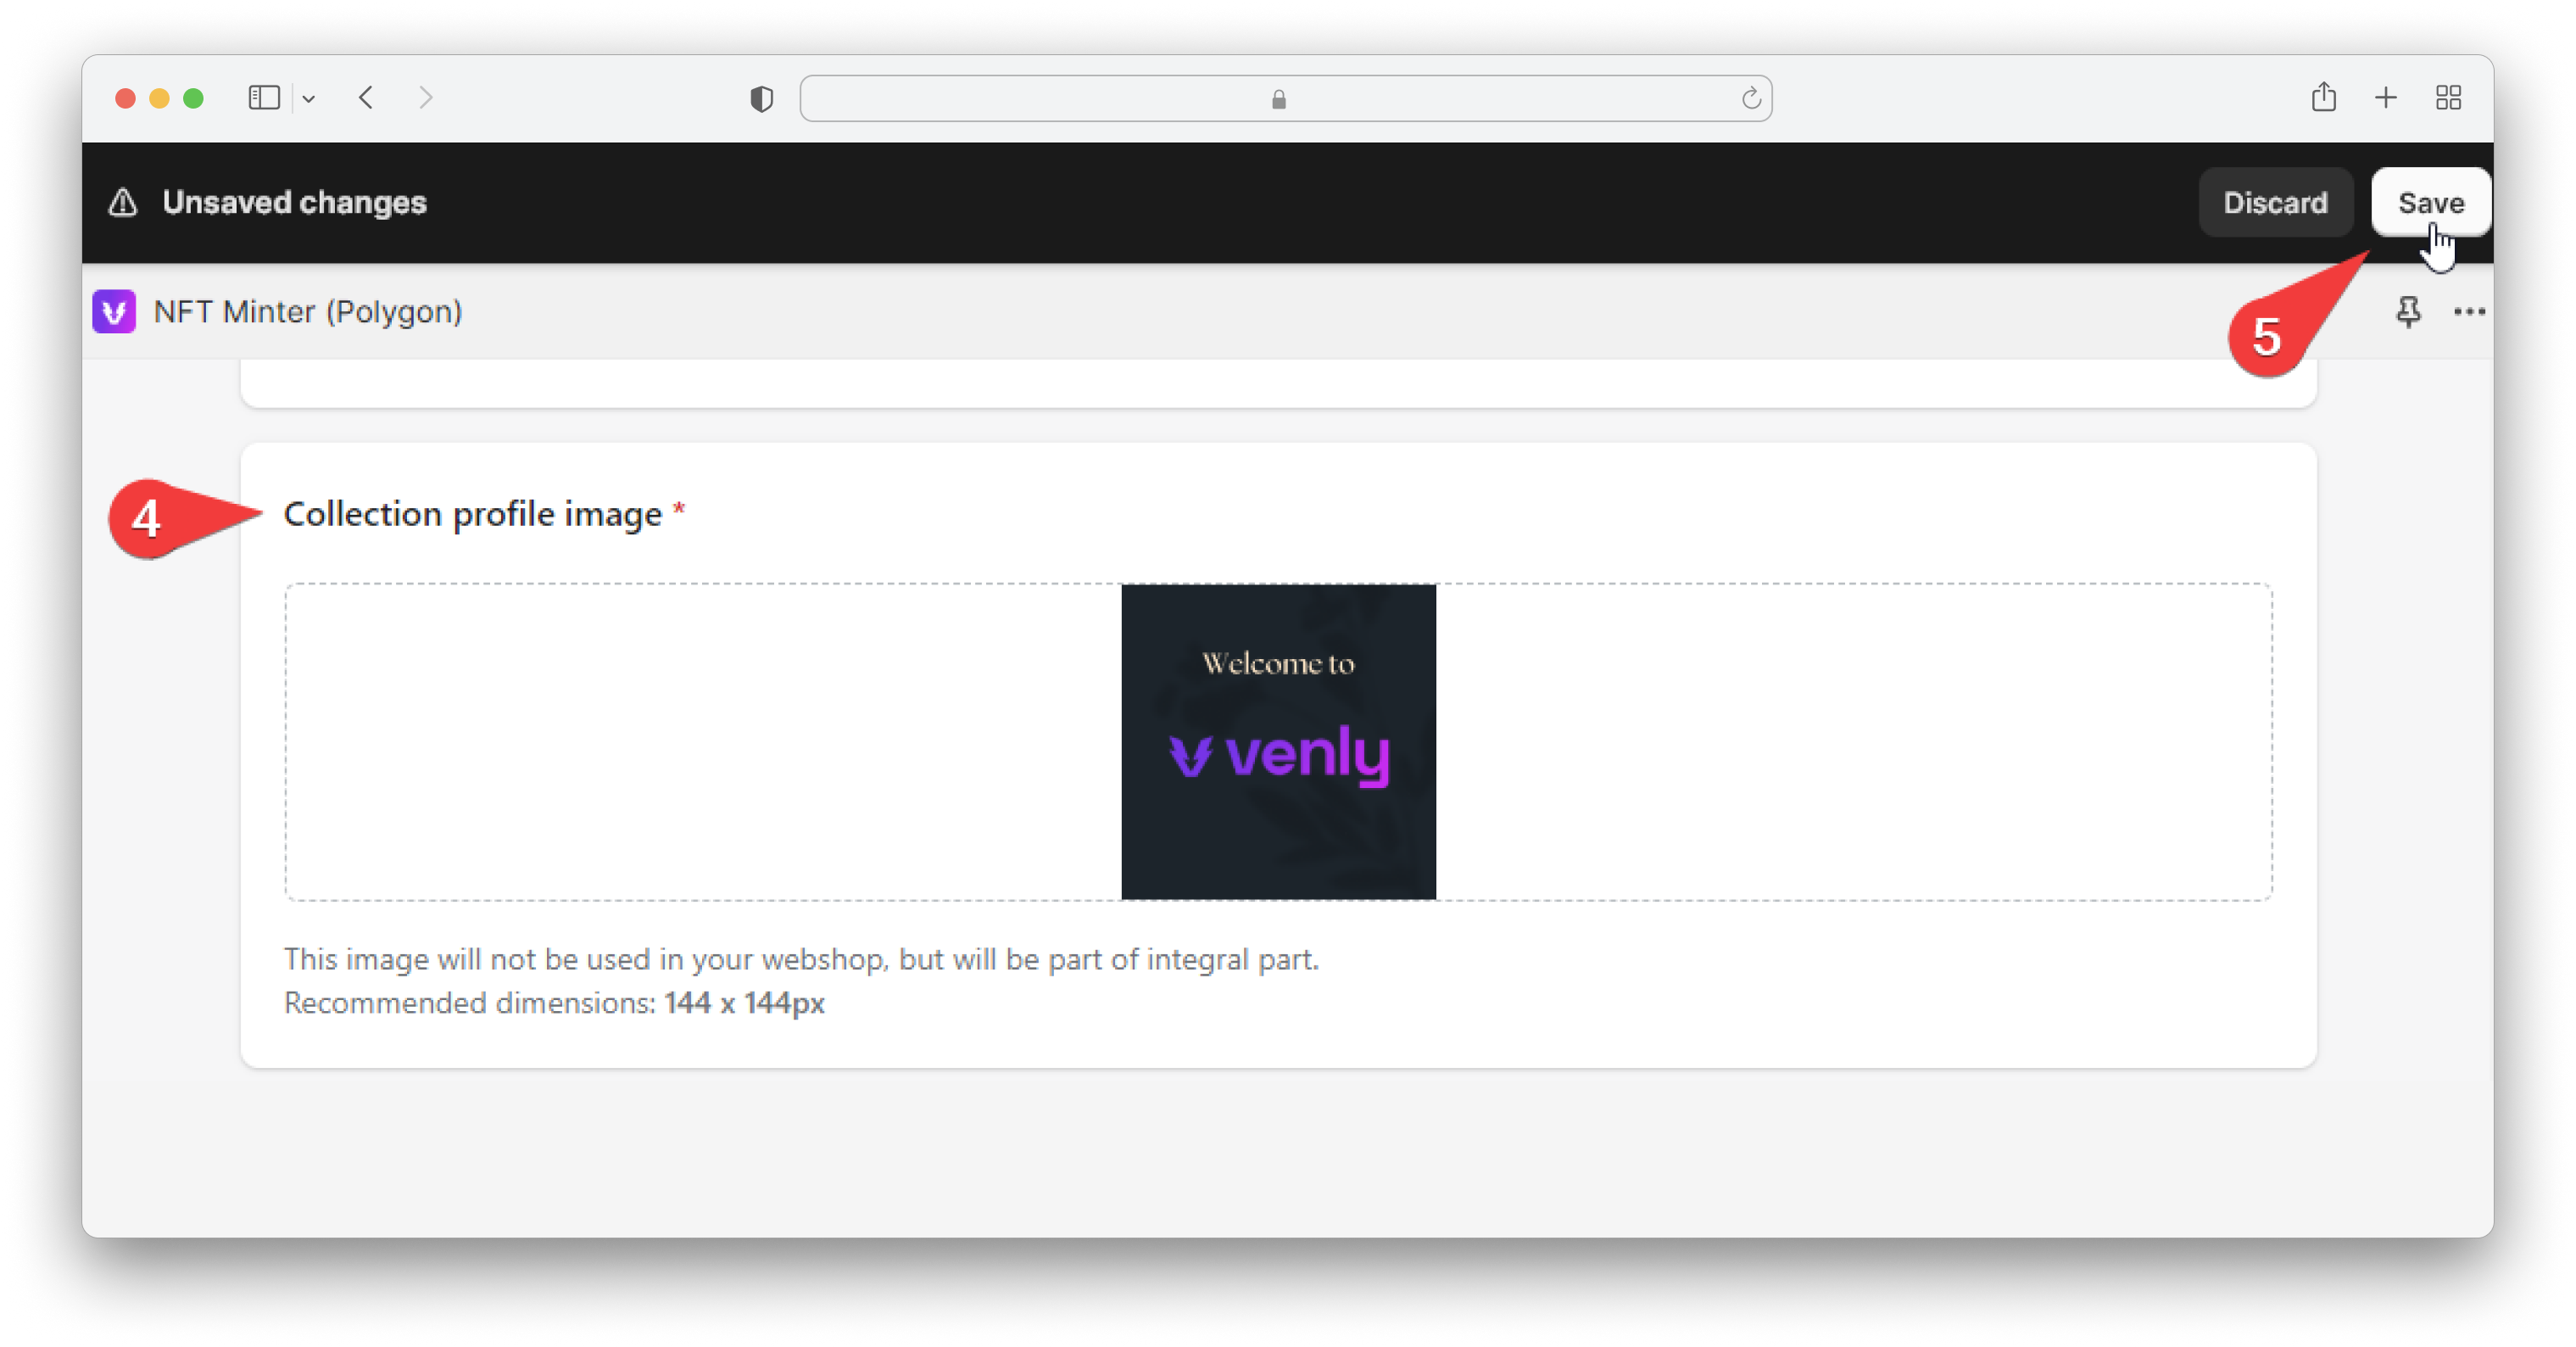
- Scroll down to add additional NFT collection details.
- Collection profile image: This image will be displayed for your collection.
- Finally, click on Save.
Congrats, you have created your very first NFT collection. The next step is to create NFTs!
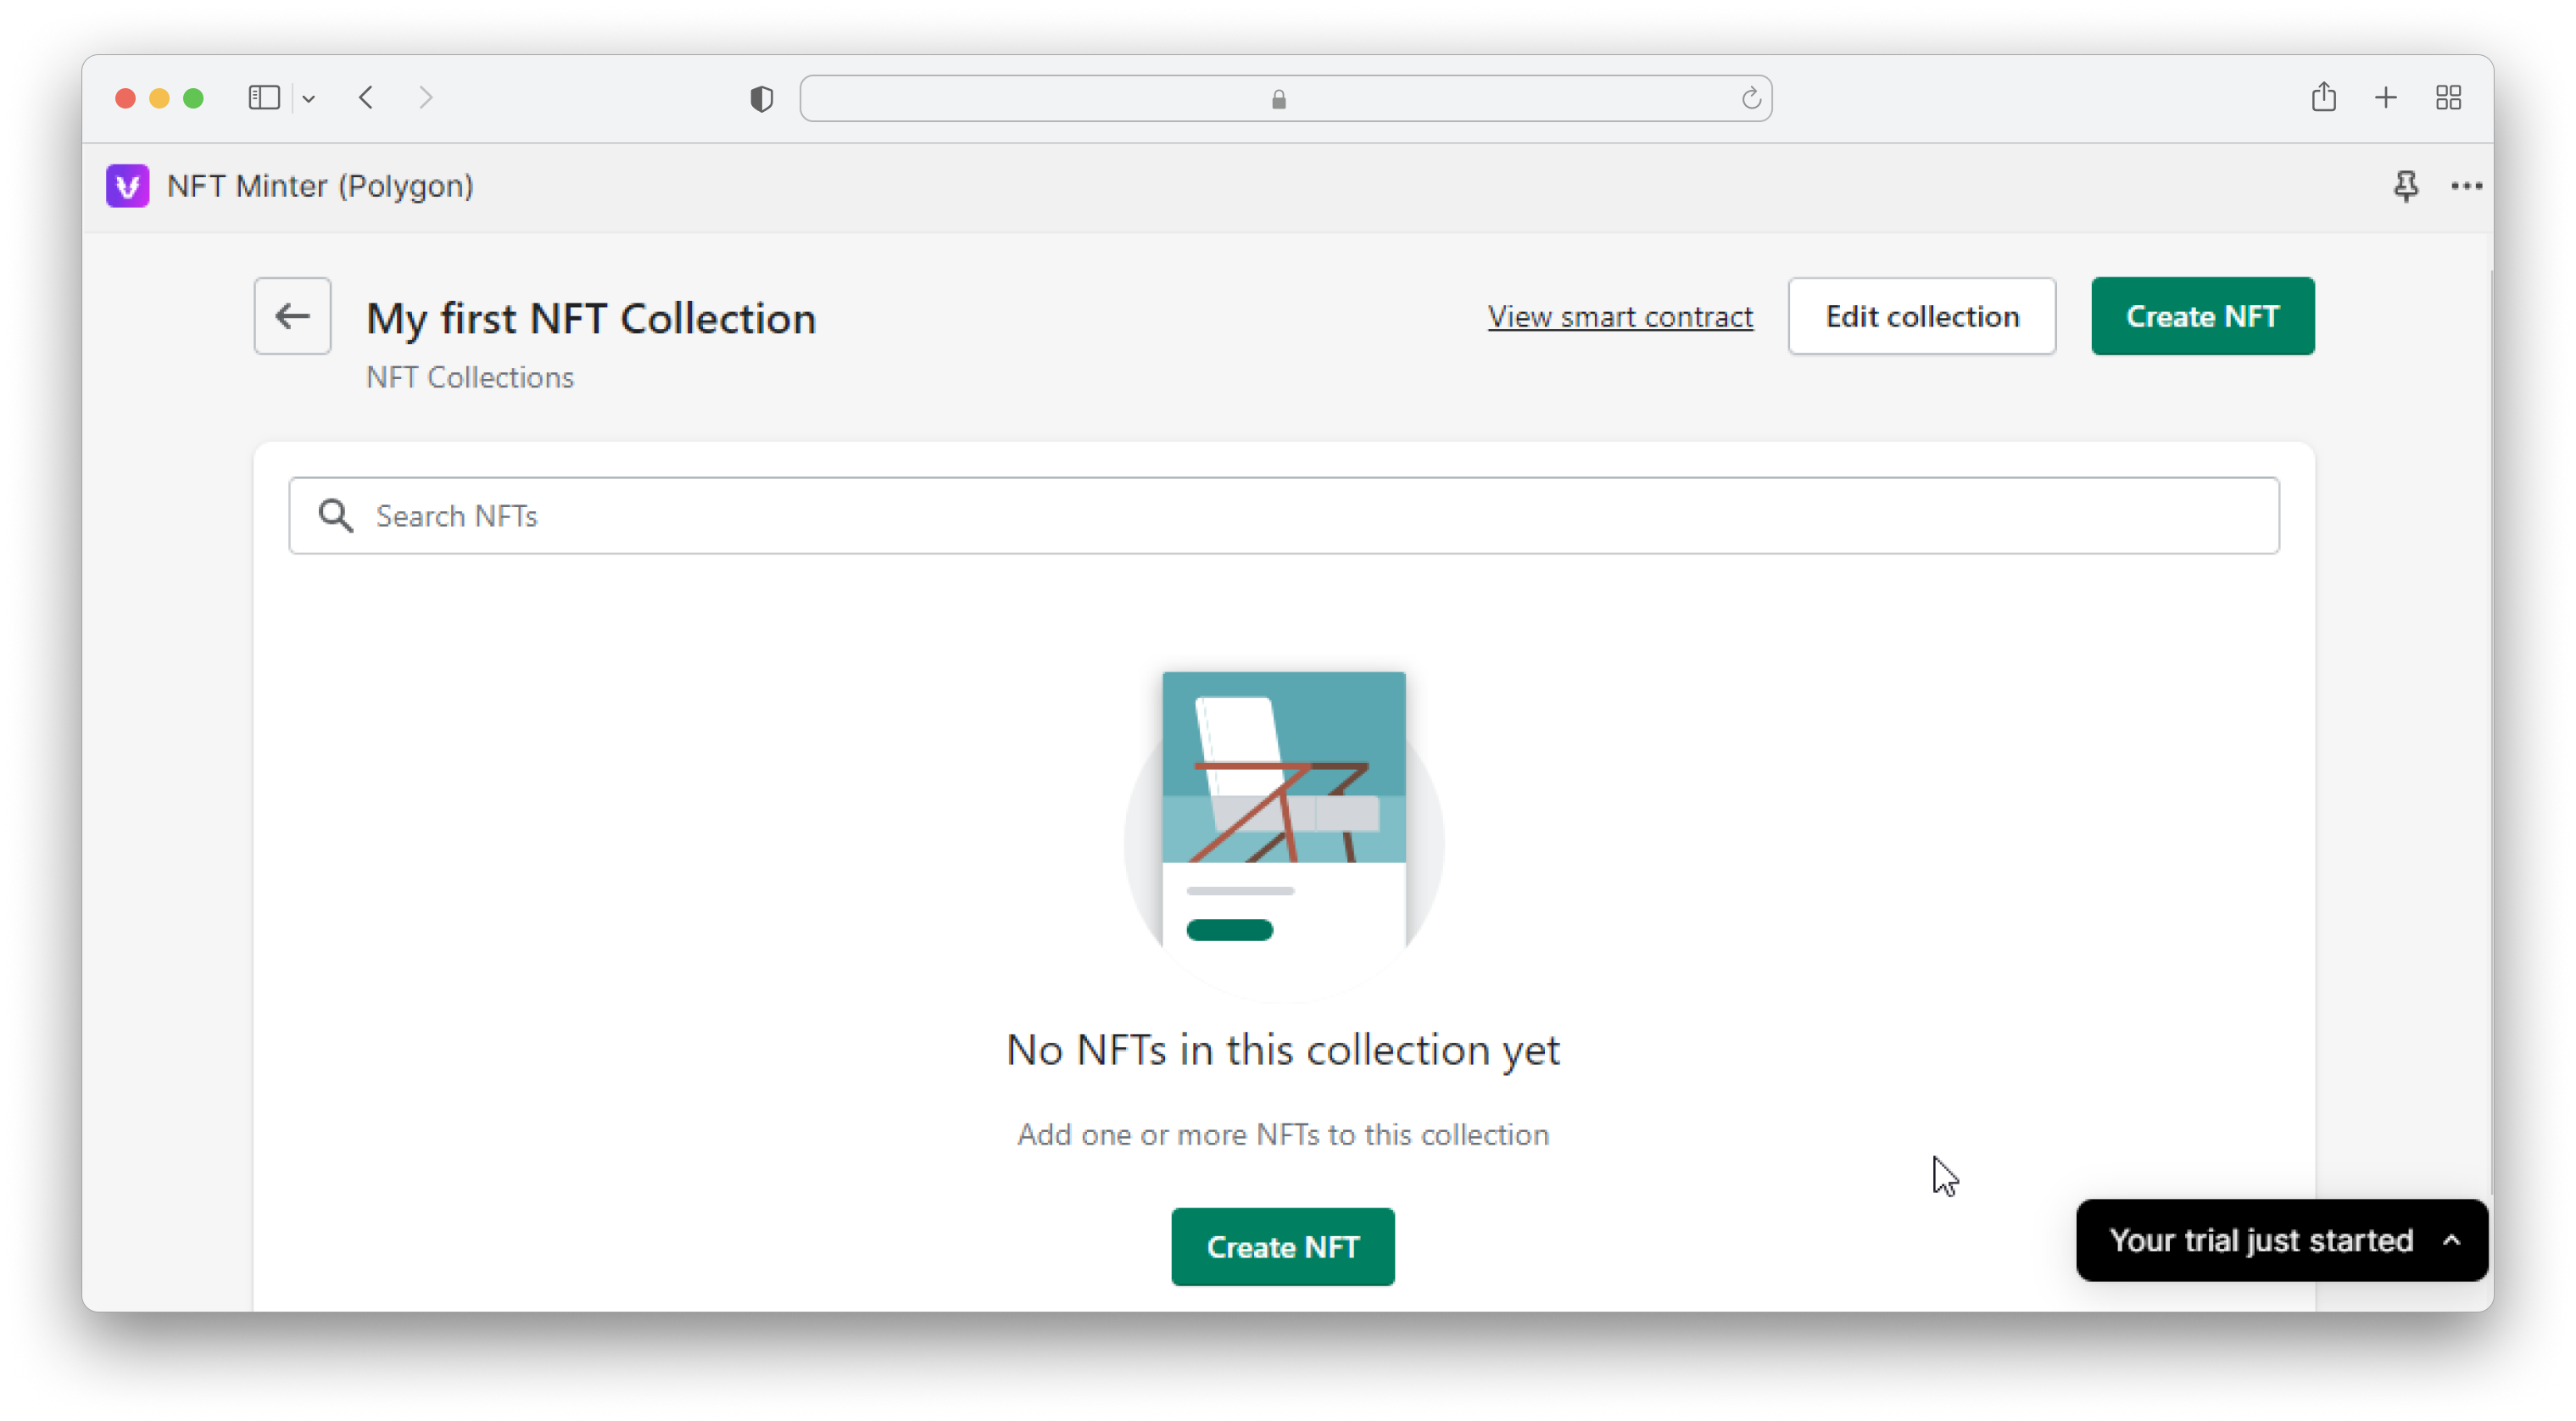
Create NFTs
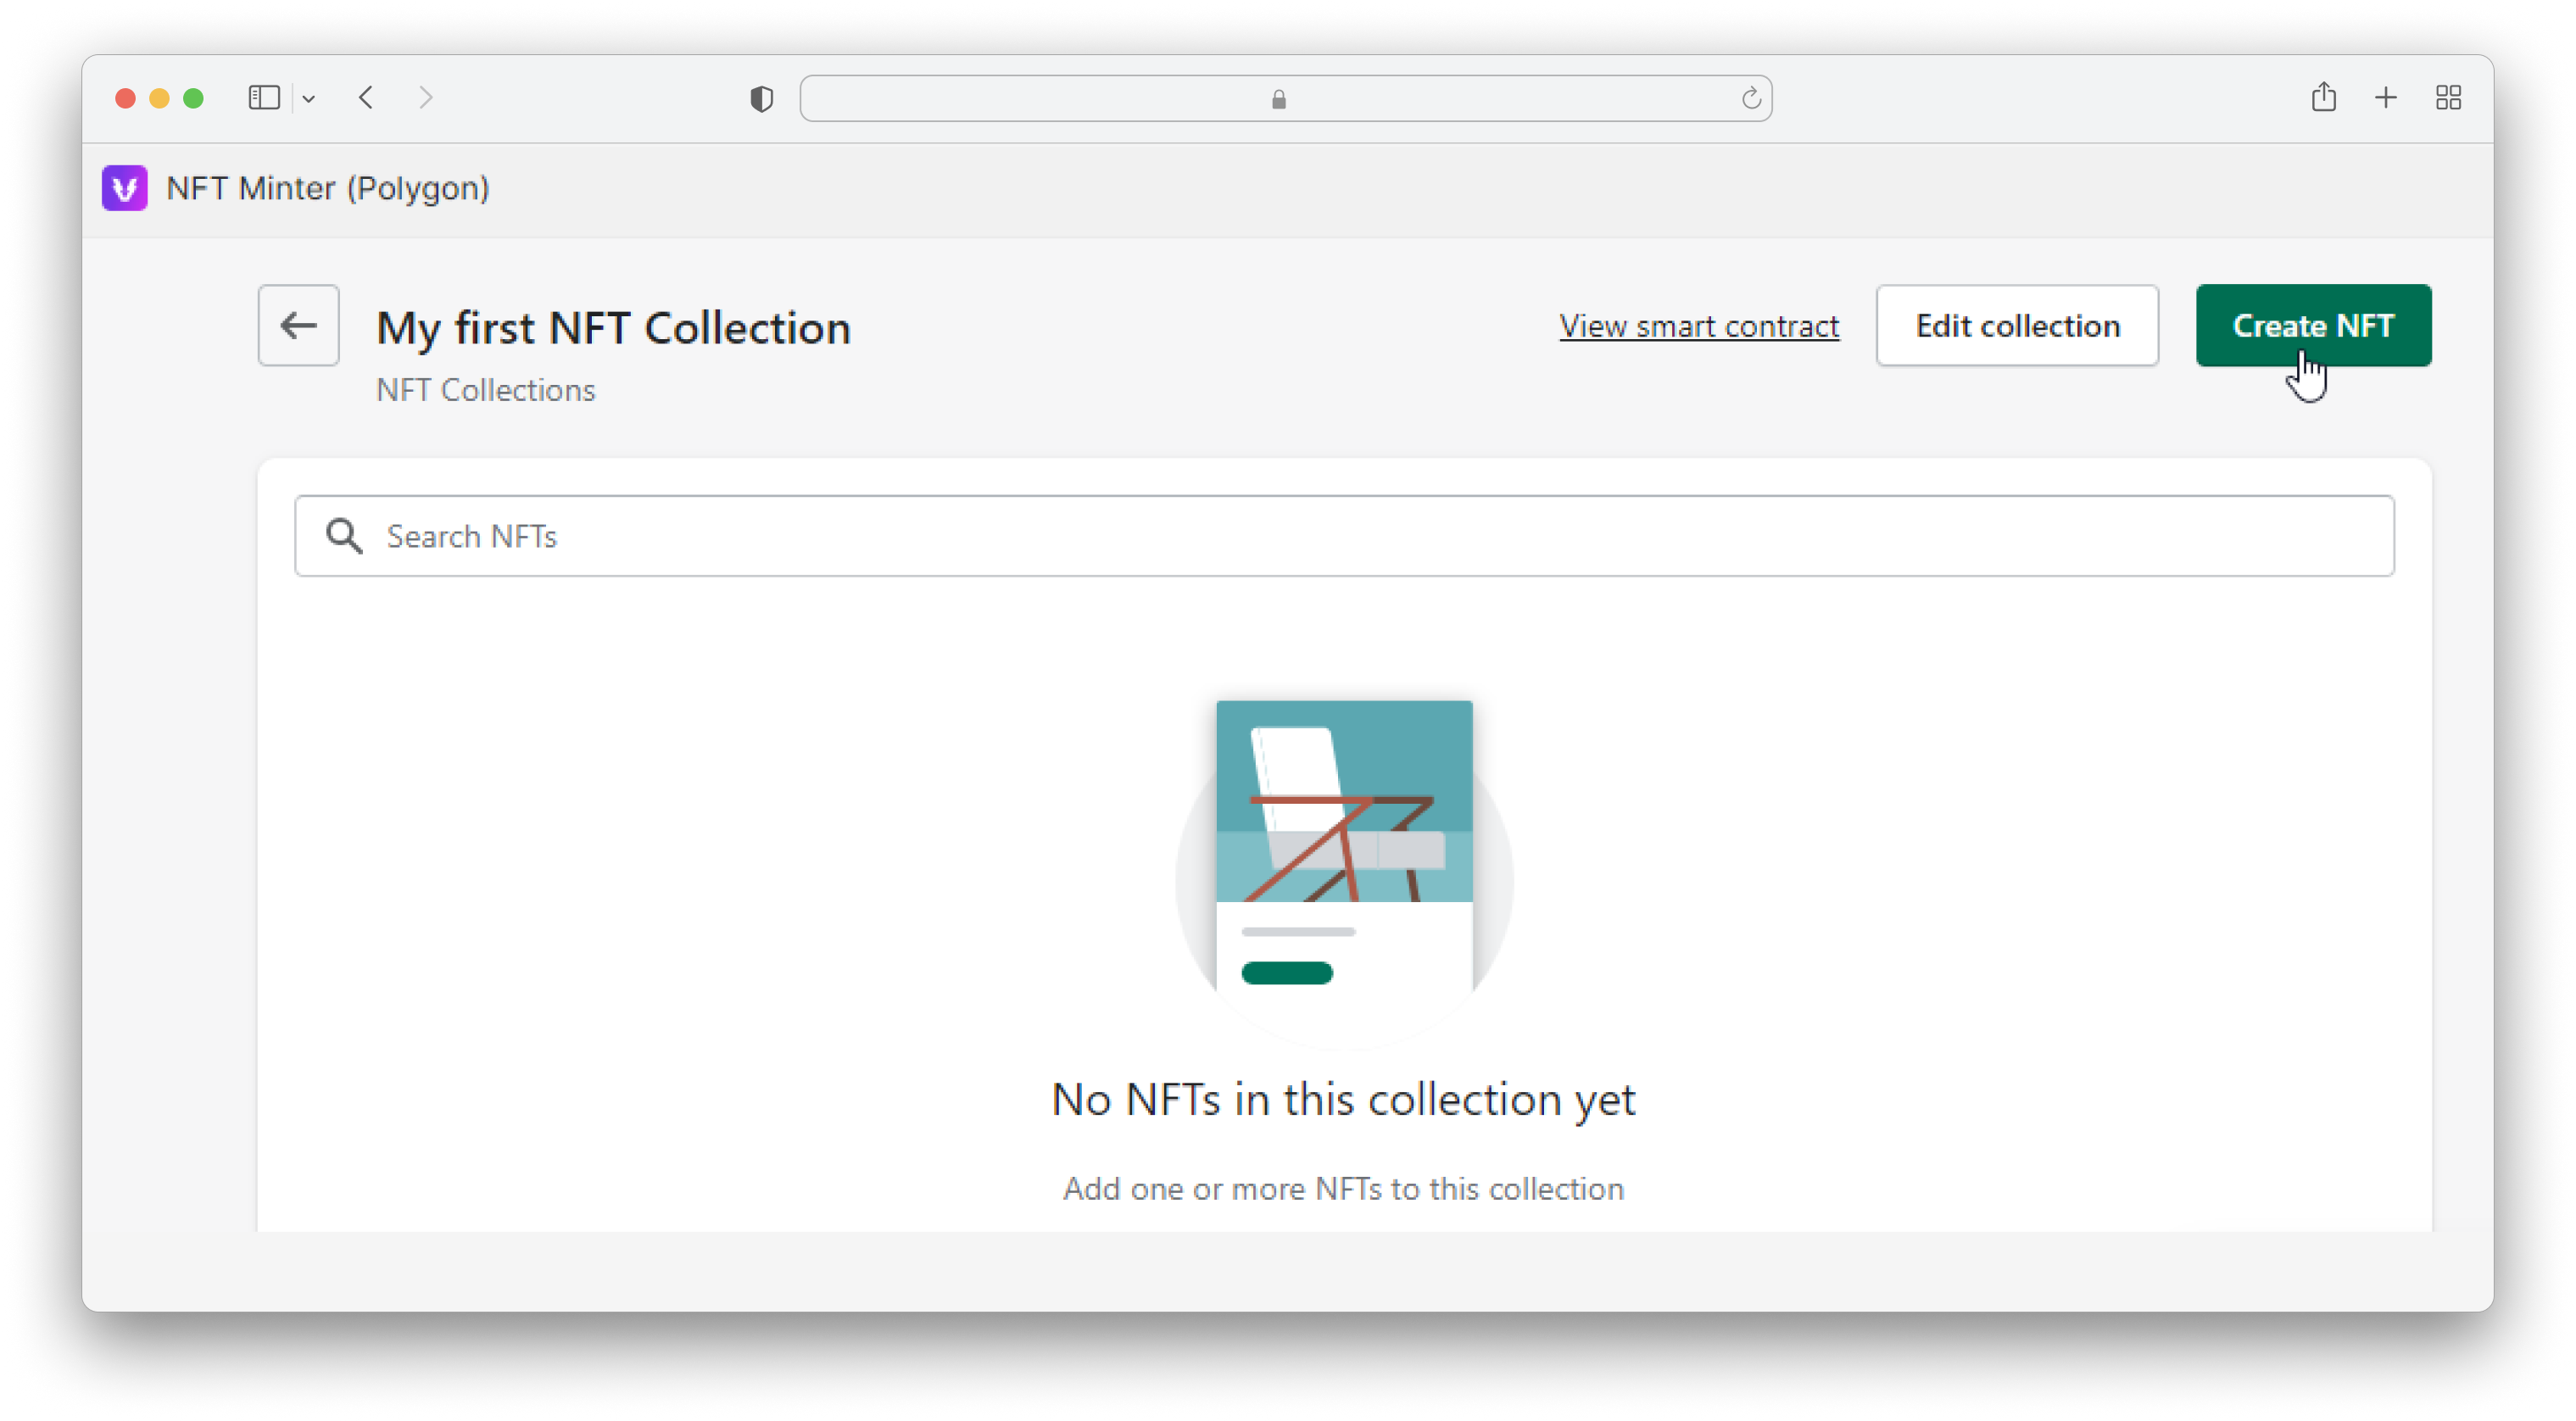
Now we can create NFTs under the collection we just created.
Proceed by clicking on Create NFT.
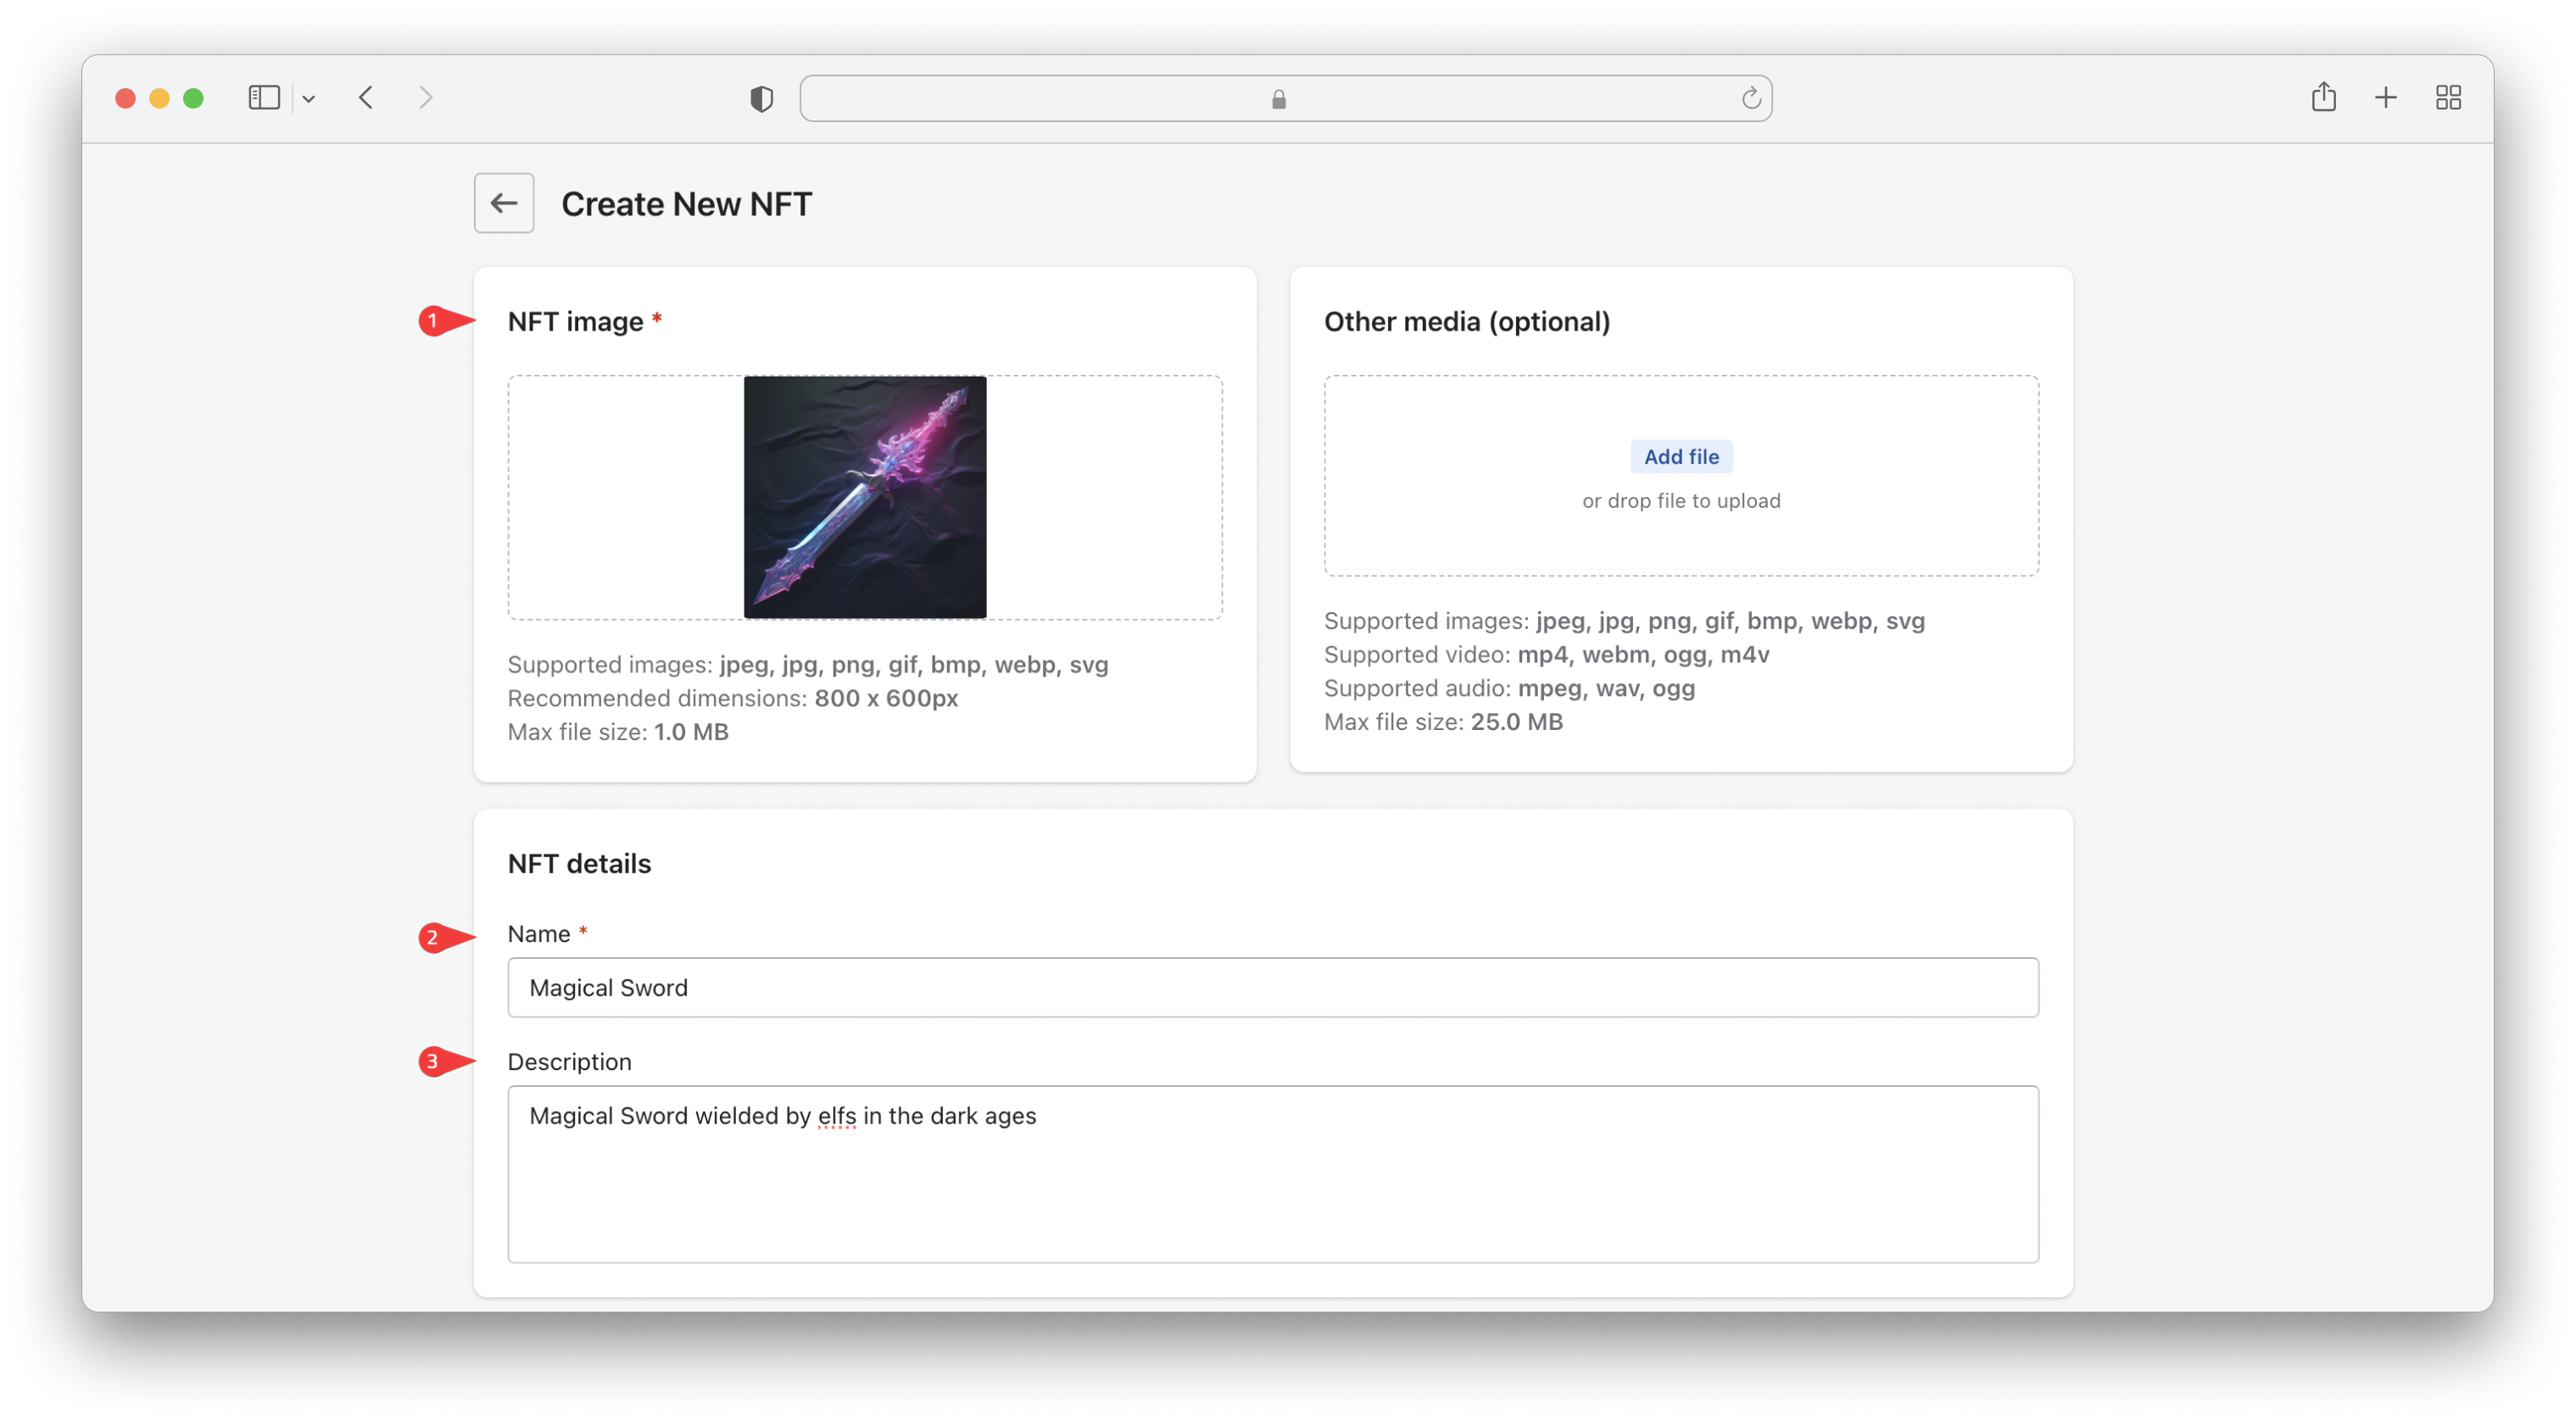
Add the details for the NFT:
- NFT Image: This is the image that will be displayed for the NFT. Make sure the image is under 1.0MB and ideally has 800x600px dimensions. You can additionally add other media such as video or audio.
- Name: The name of the NFT.
- Description: A description for the NFT.
Scroll down and continue to add details:

- NFT properties: Each NFT you create can have its own properties. You can add as many properties as you want and also add its value.
- Supply Quantity: Defining a specific supply quantity is defining the maximum supply, meaning the maximum number of NFTs that will ever exist in the lifetime of that NFT. You can specify a custom value, or set it as No limit, meaning an unlimited number of NFTs can be created.
- Shopify product: Select how you want to store the NFT as a product:
- Store NFT as a new Shopify product: This will automatically create and save your NFT as a new product.
- Link NFT to existing Shopify product: You can link your NFT to an already created product.
- Once you have configured all the data fields, click on Save.
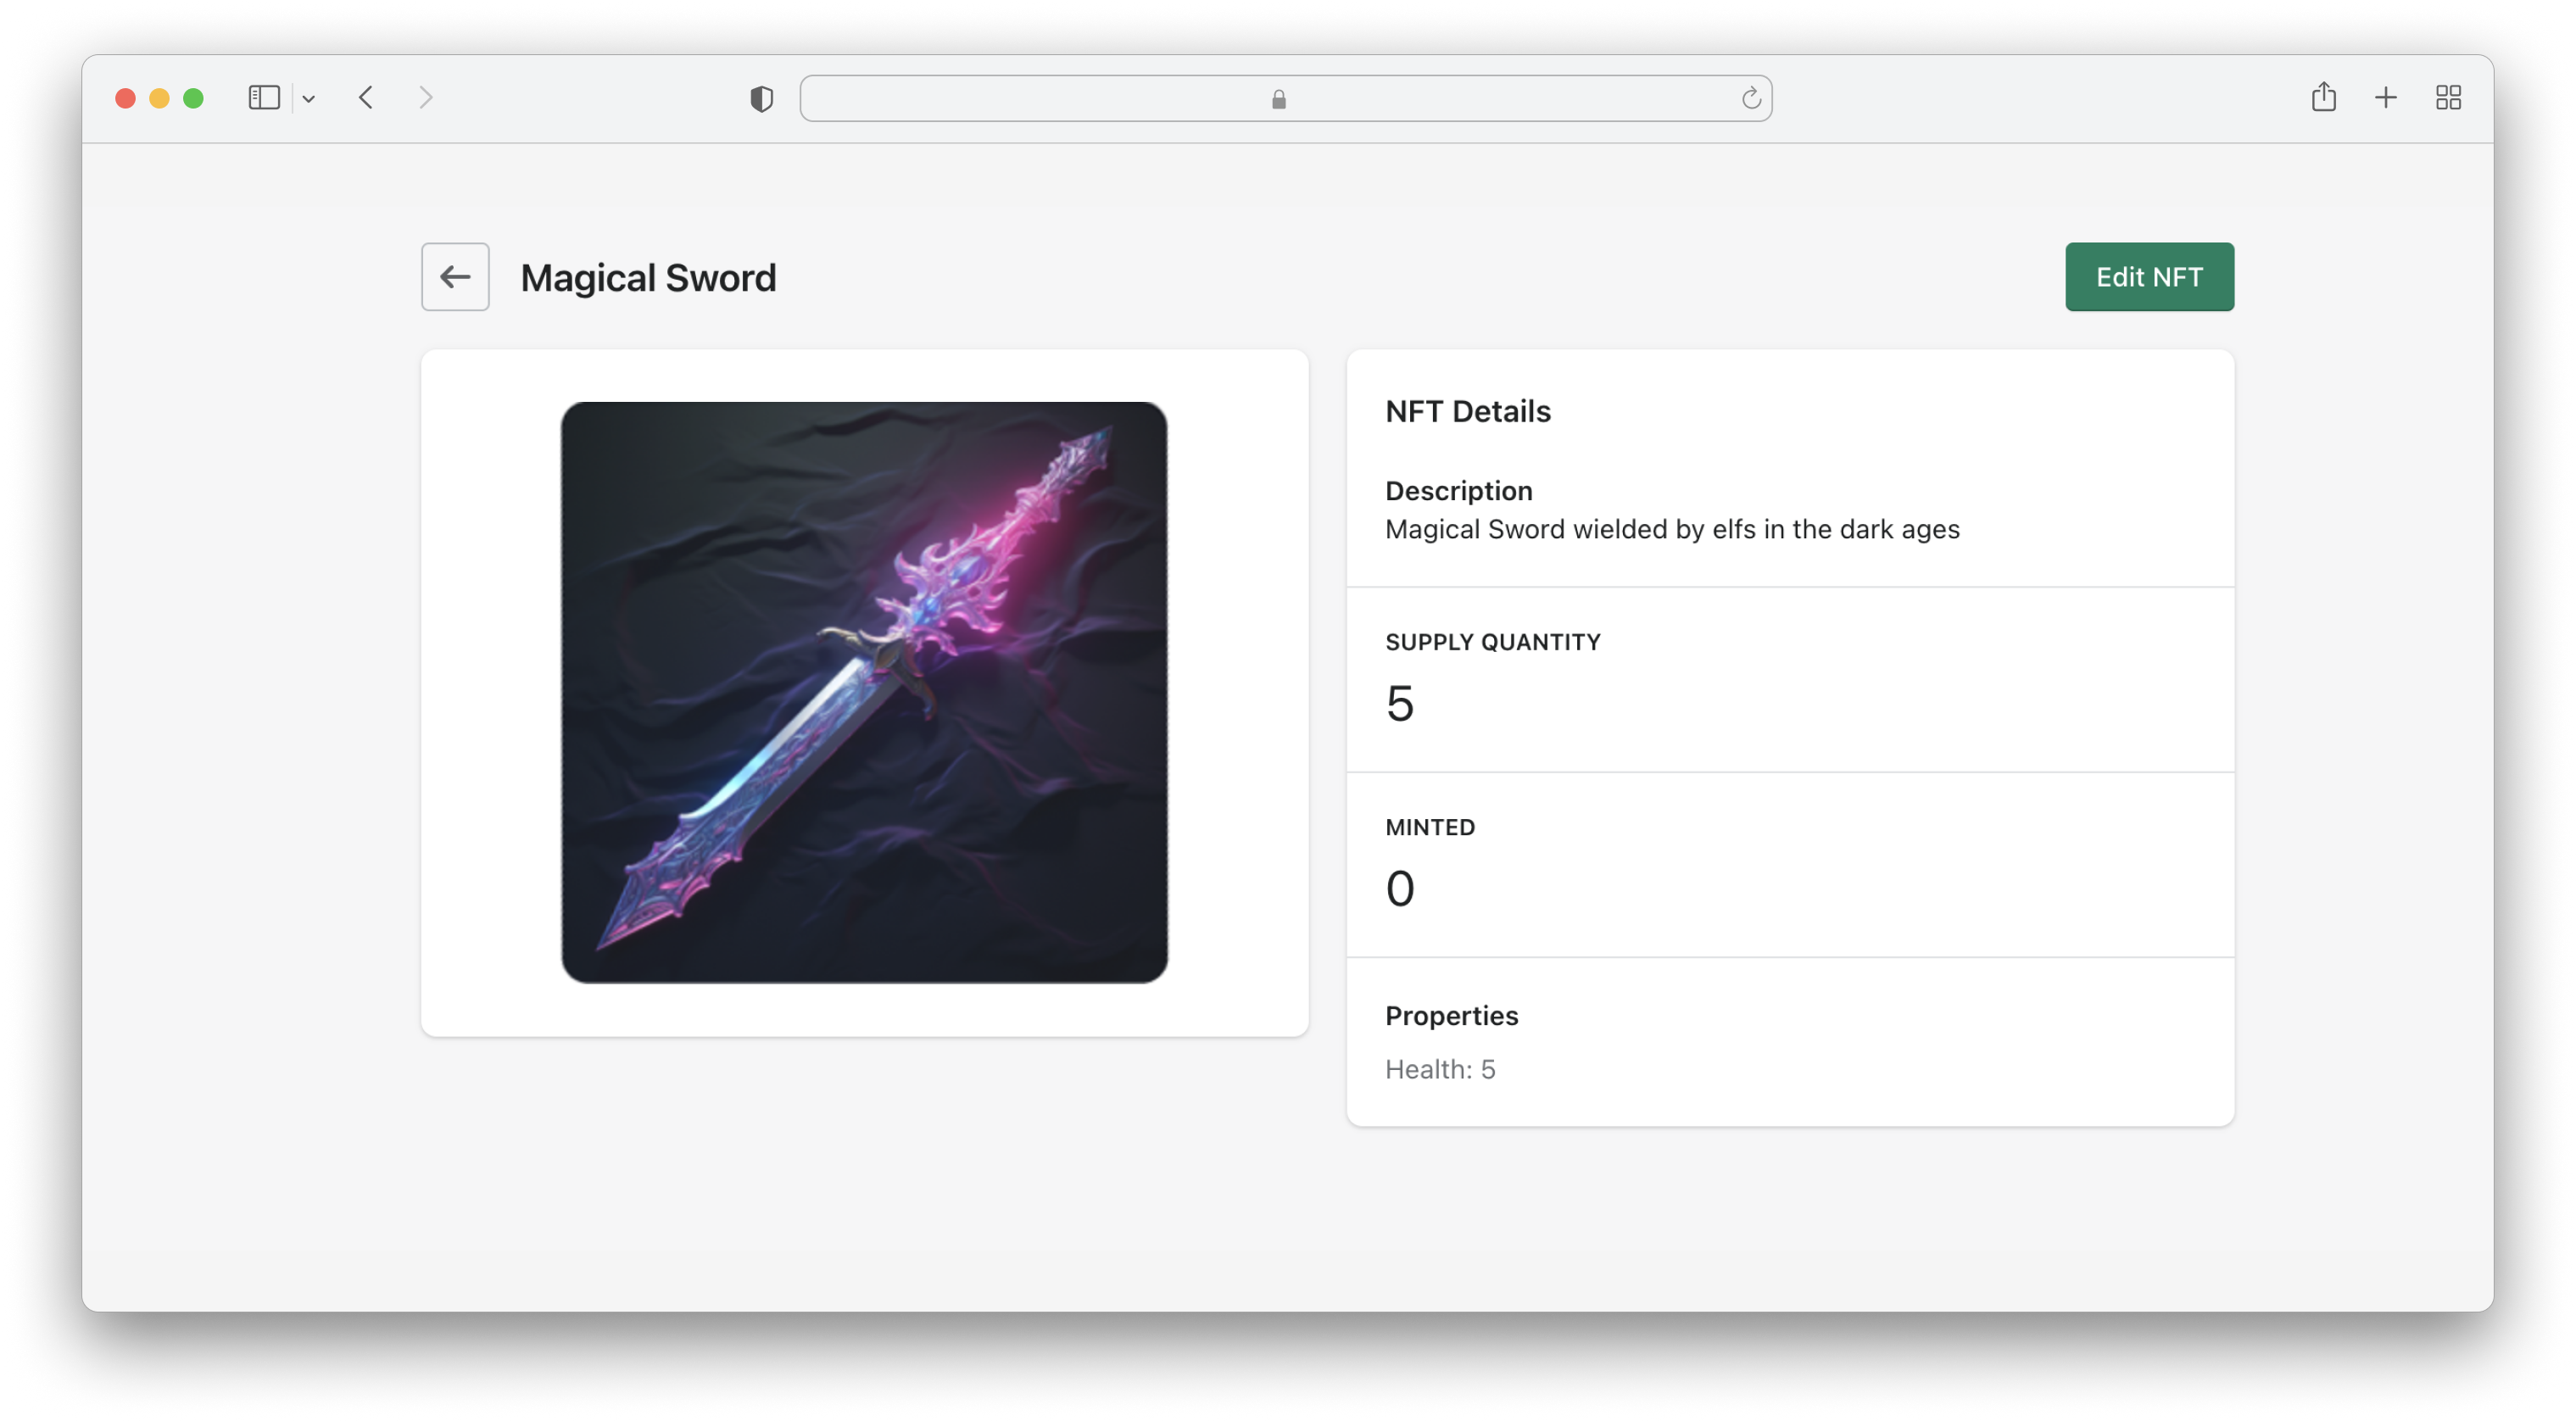
- For this example we added a Health property with a value of 90.* We also specified the supply quantity as 5, meaning only 5 NFTs can be created of the same type.
The NFT was created successfully.
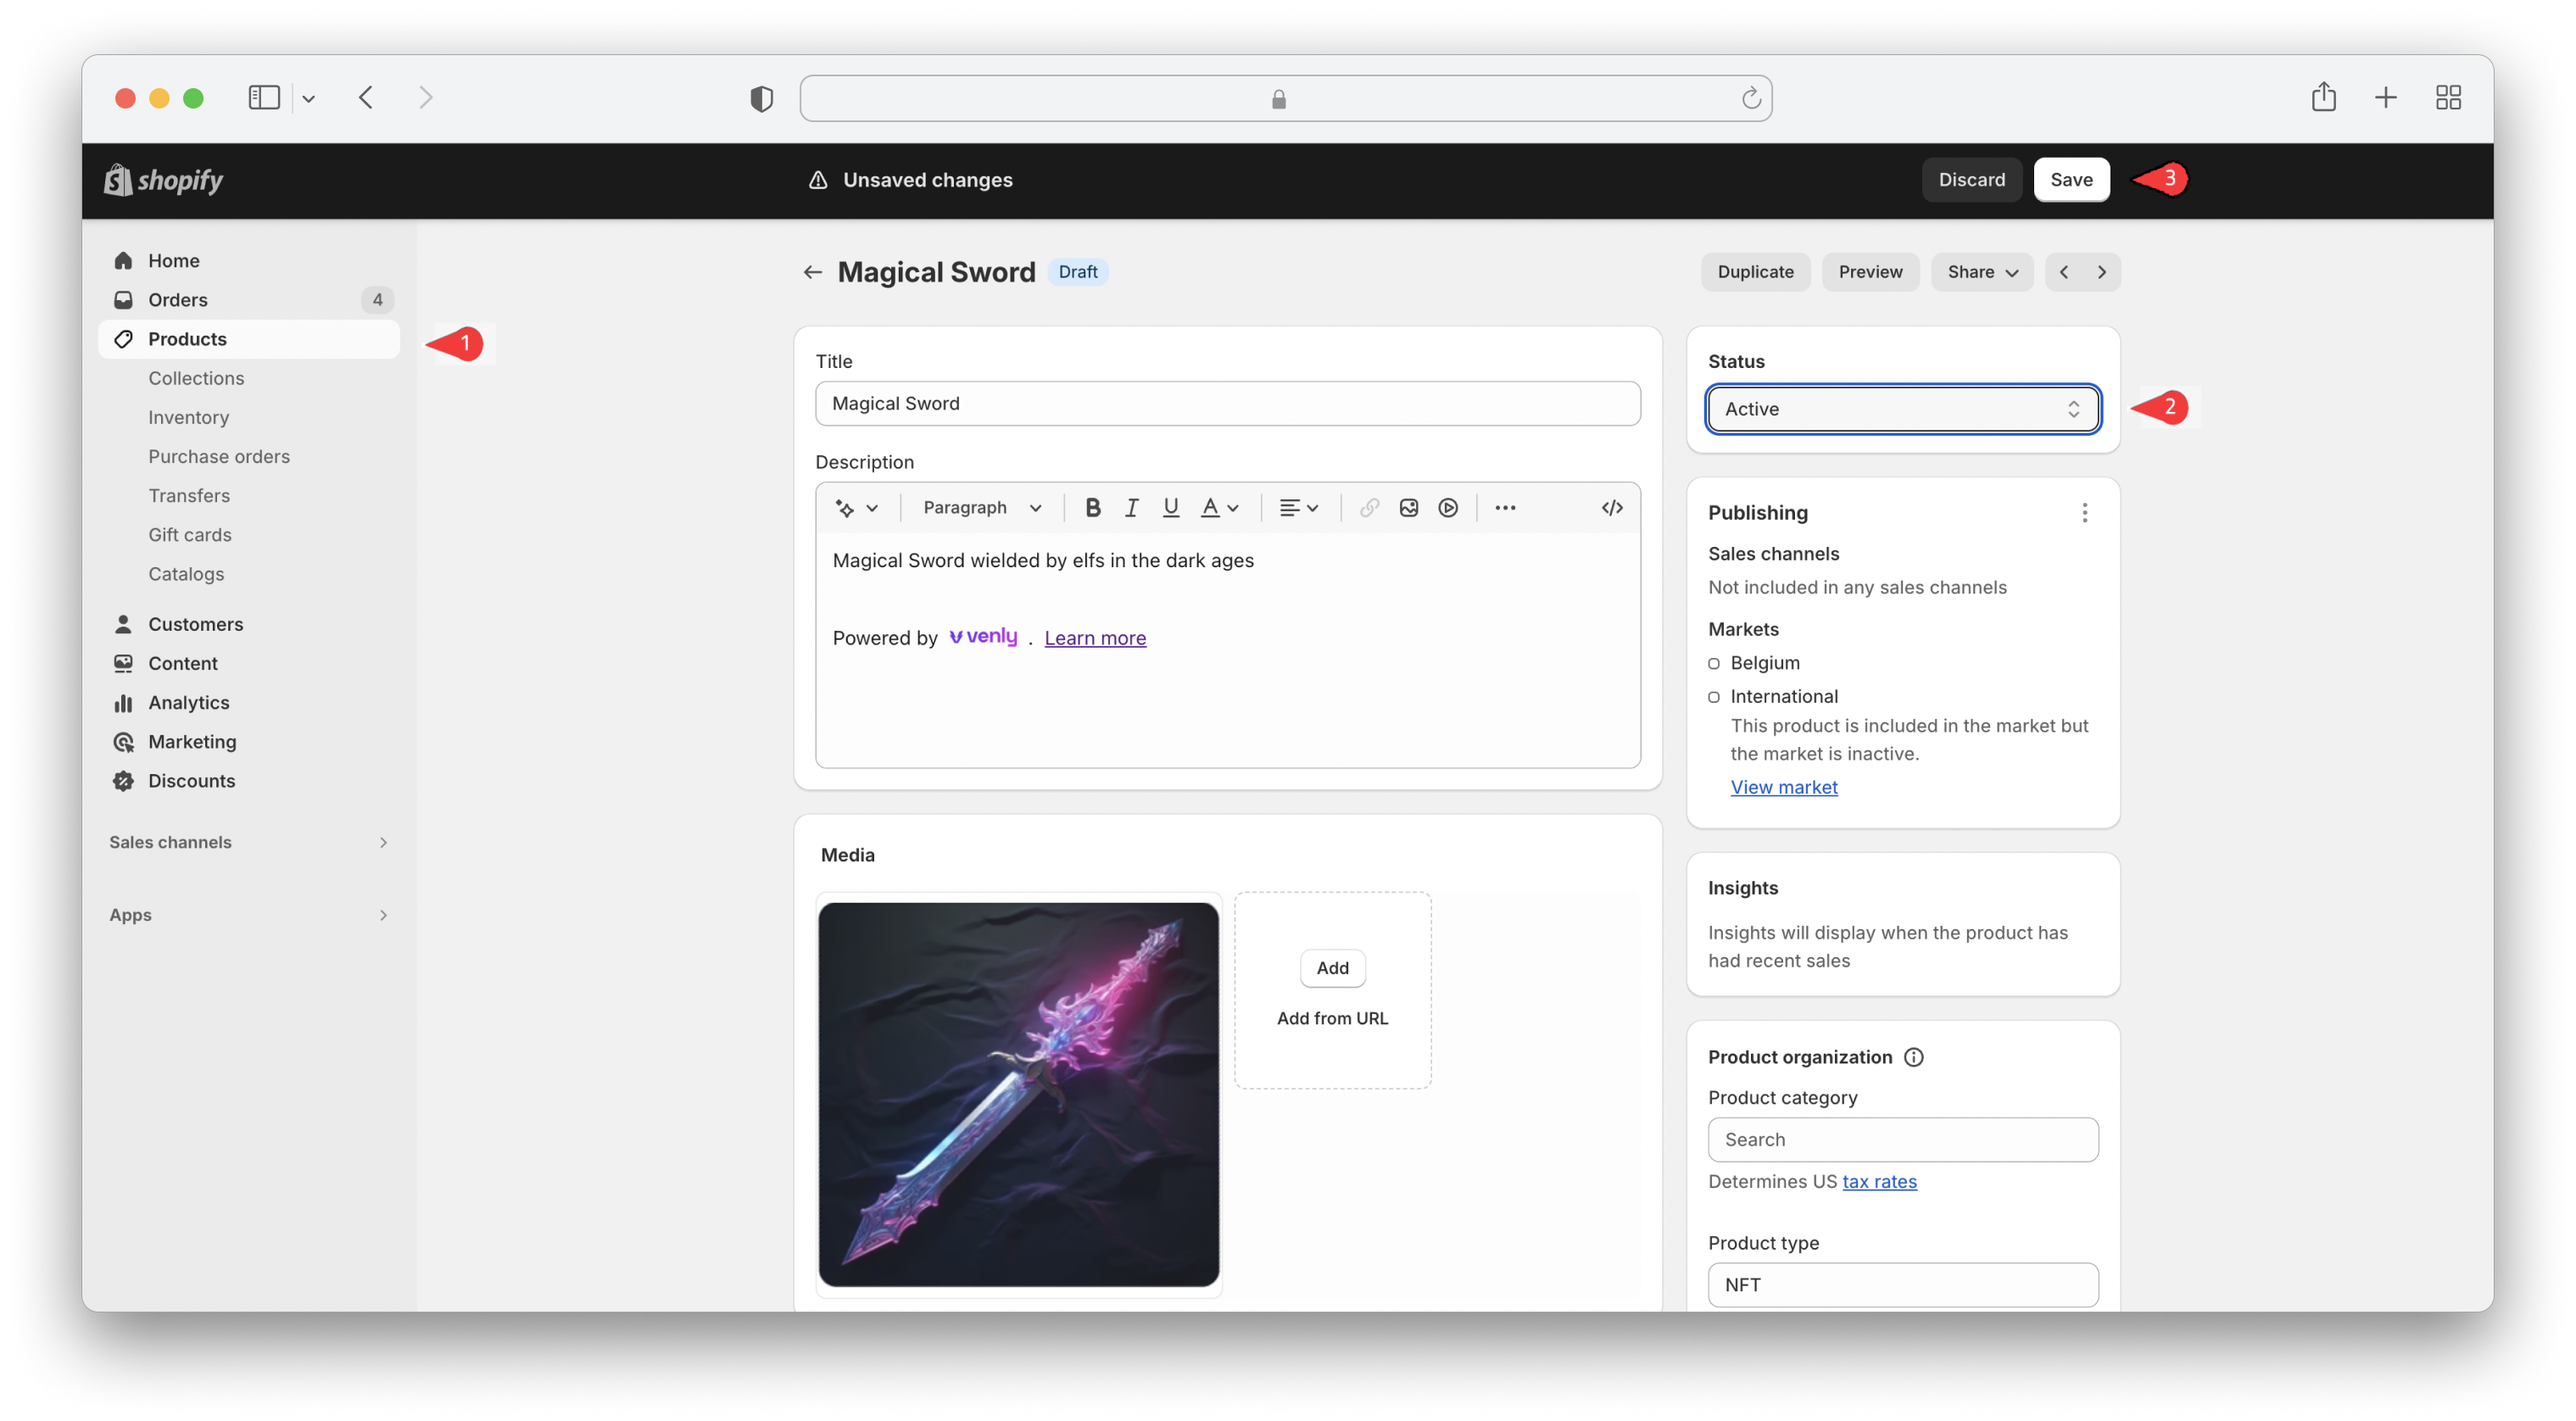
Make Product Live
- Head over to the Products section and click on the newly created NFT product.
- Set the Status as Active.
- You can also define the price of the NFT here. Once done, click on Save.
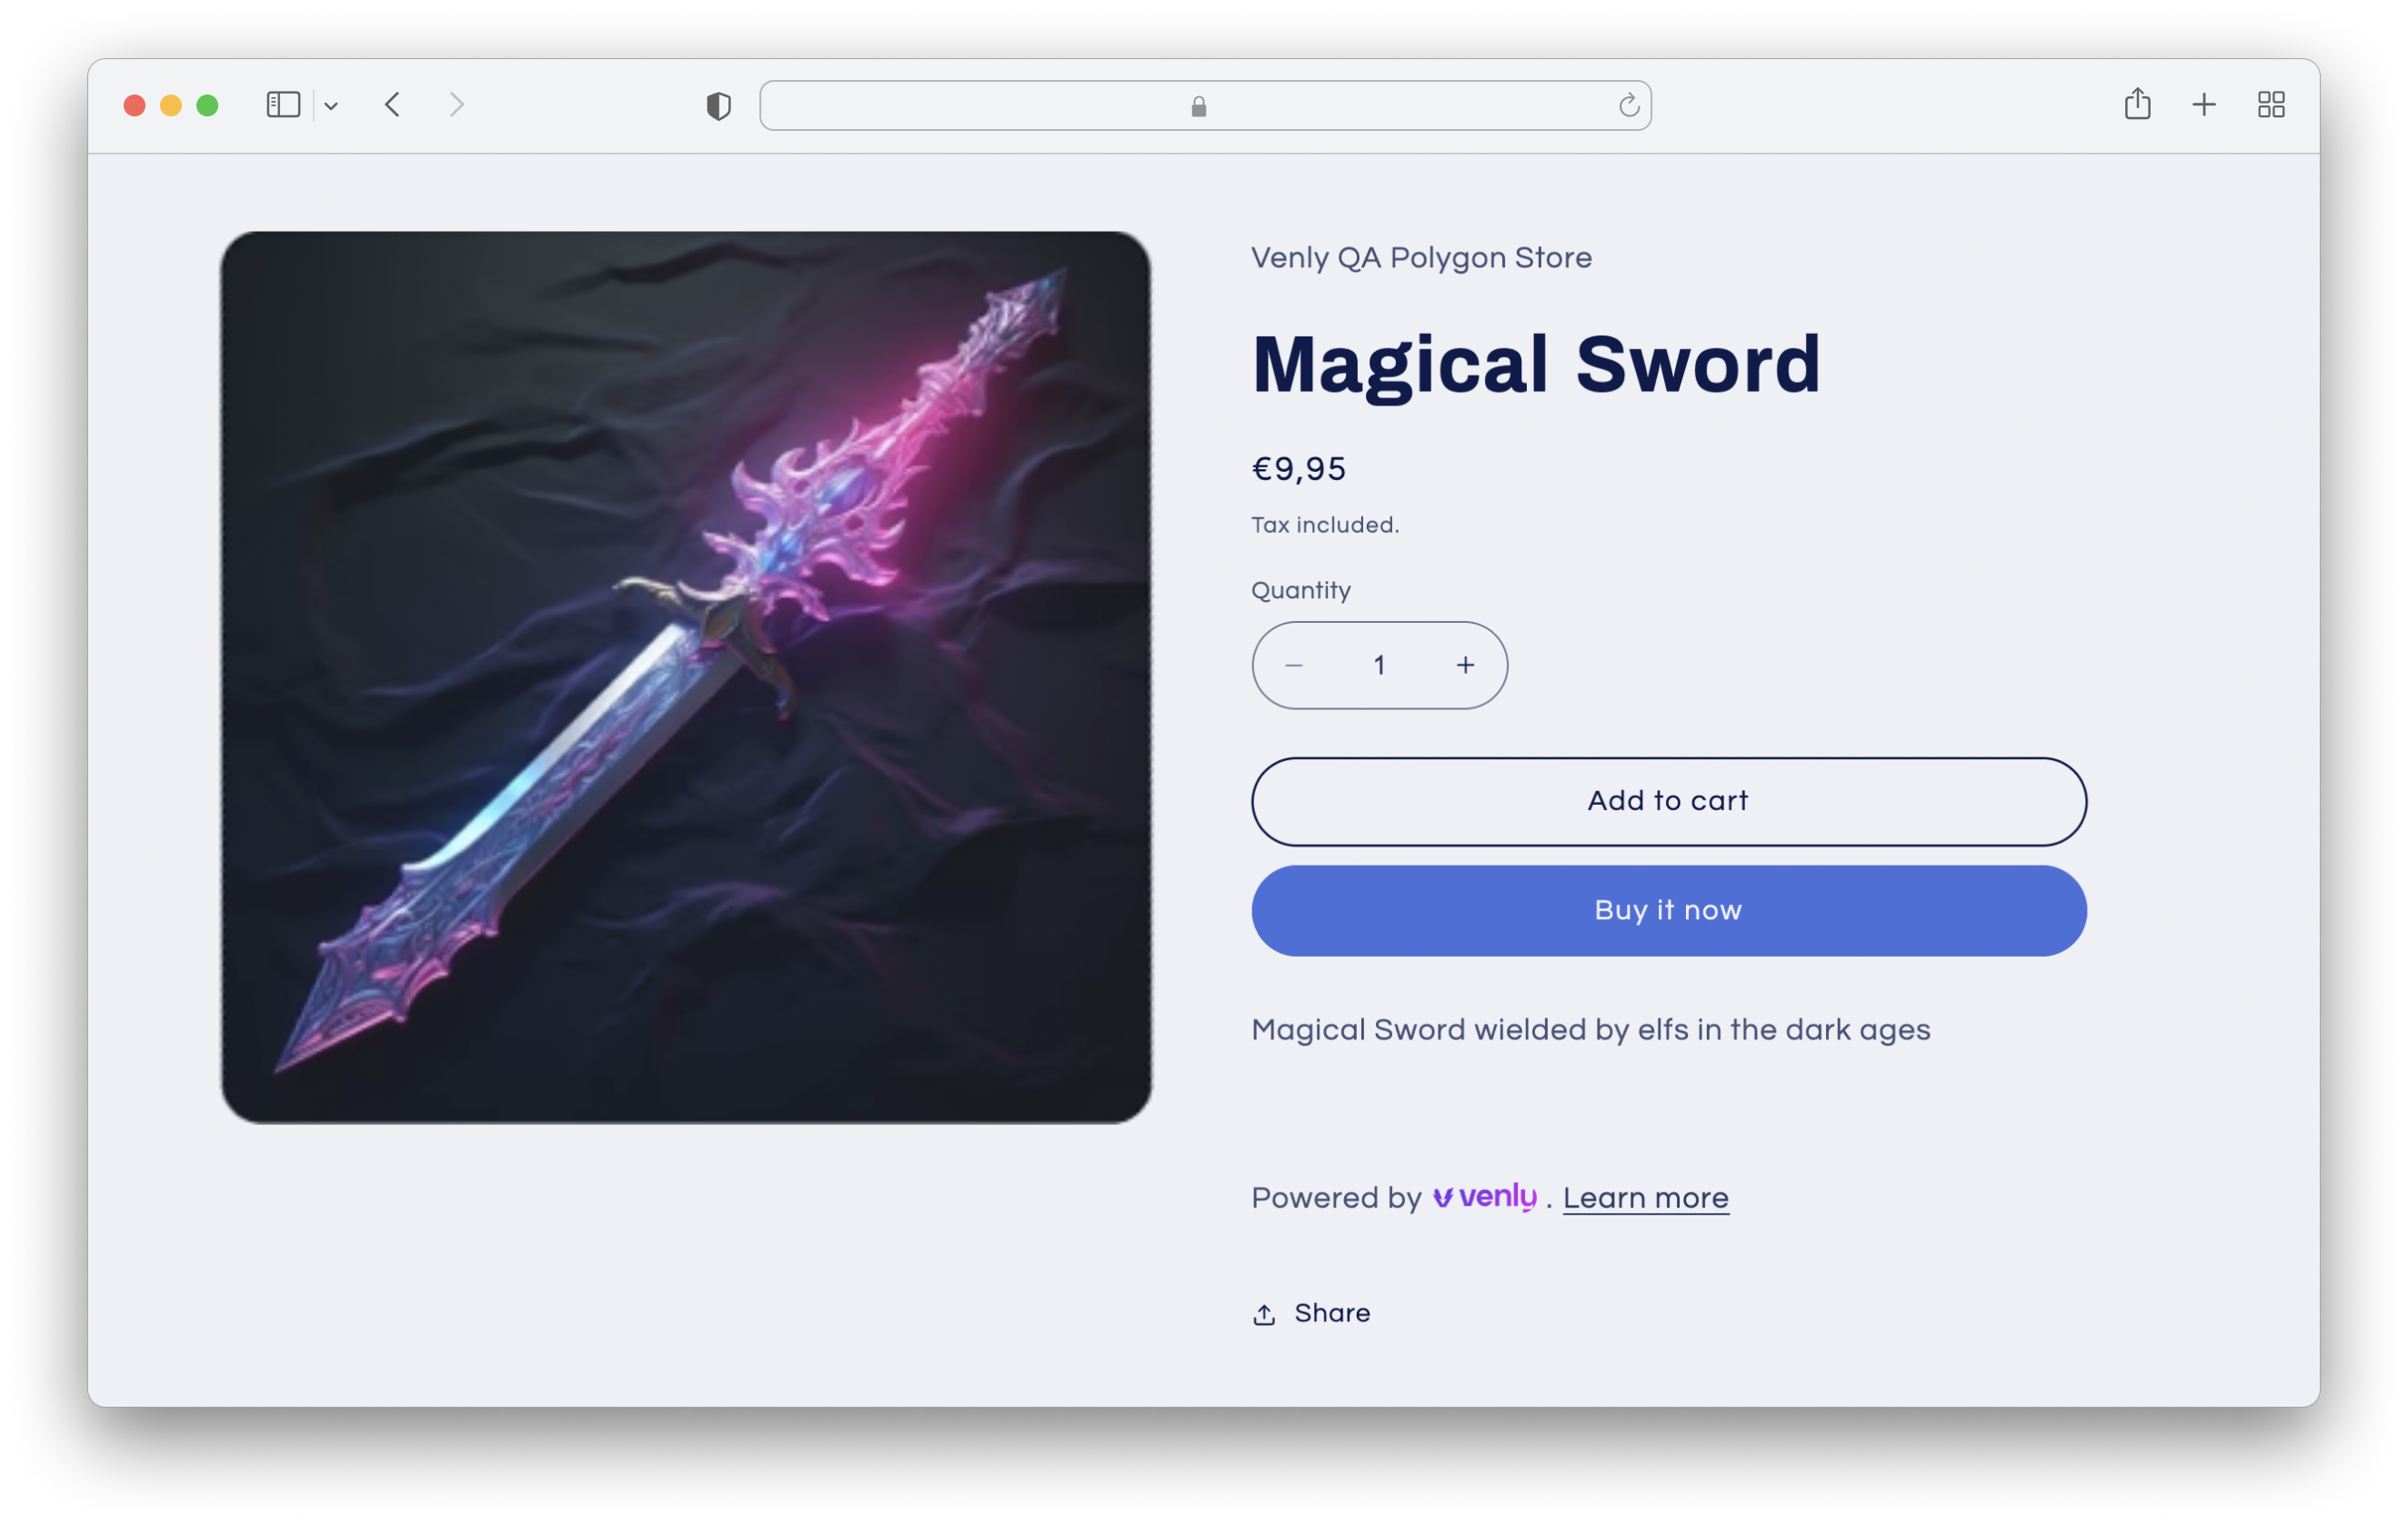
Live Product

Schedule a demo with our team to explore tailored solutions or dive in and start building right away on our portal.
Updated 9 months ago